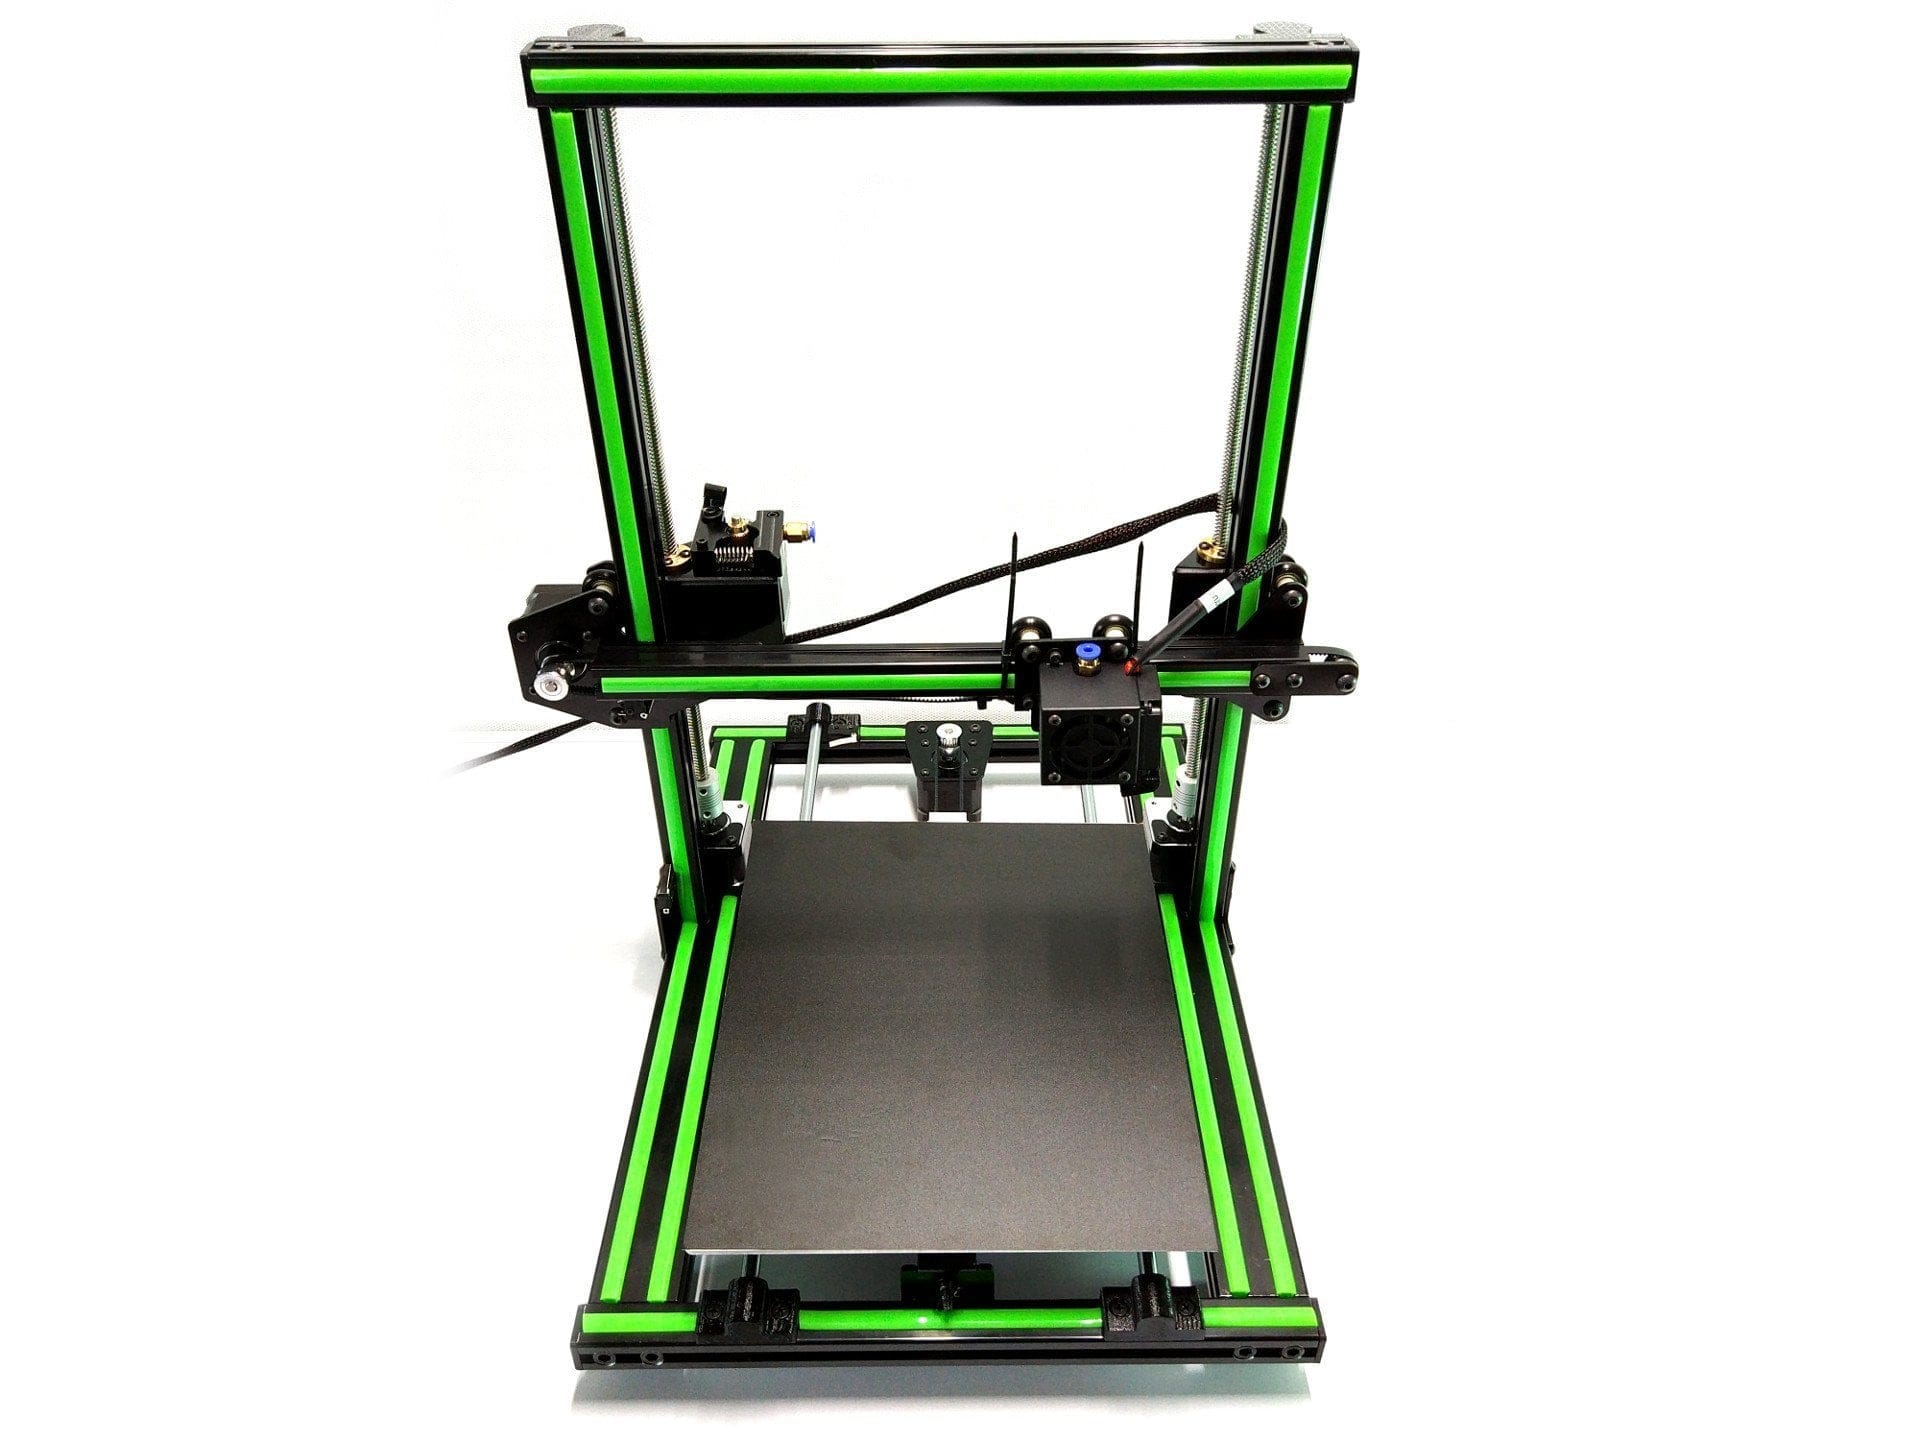
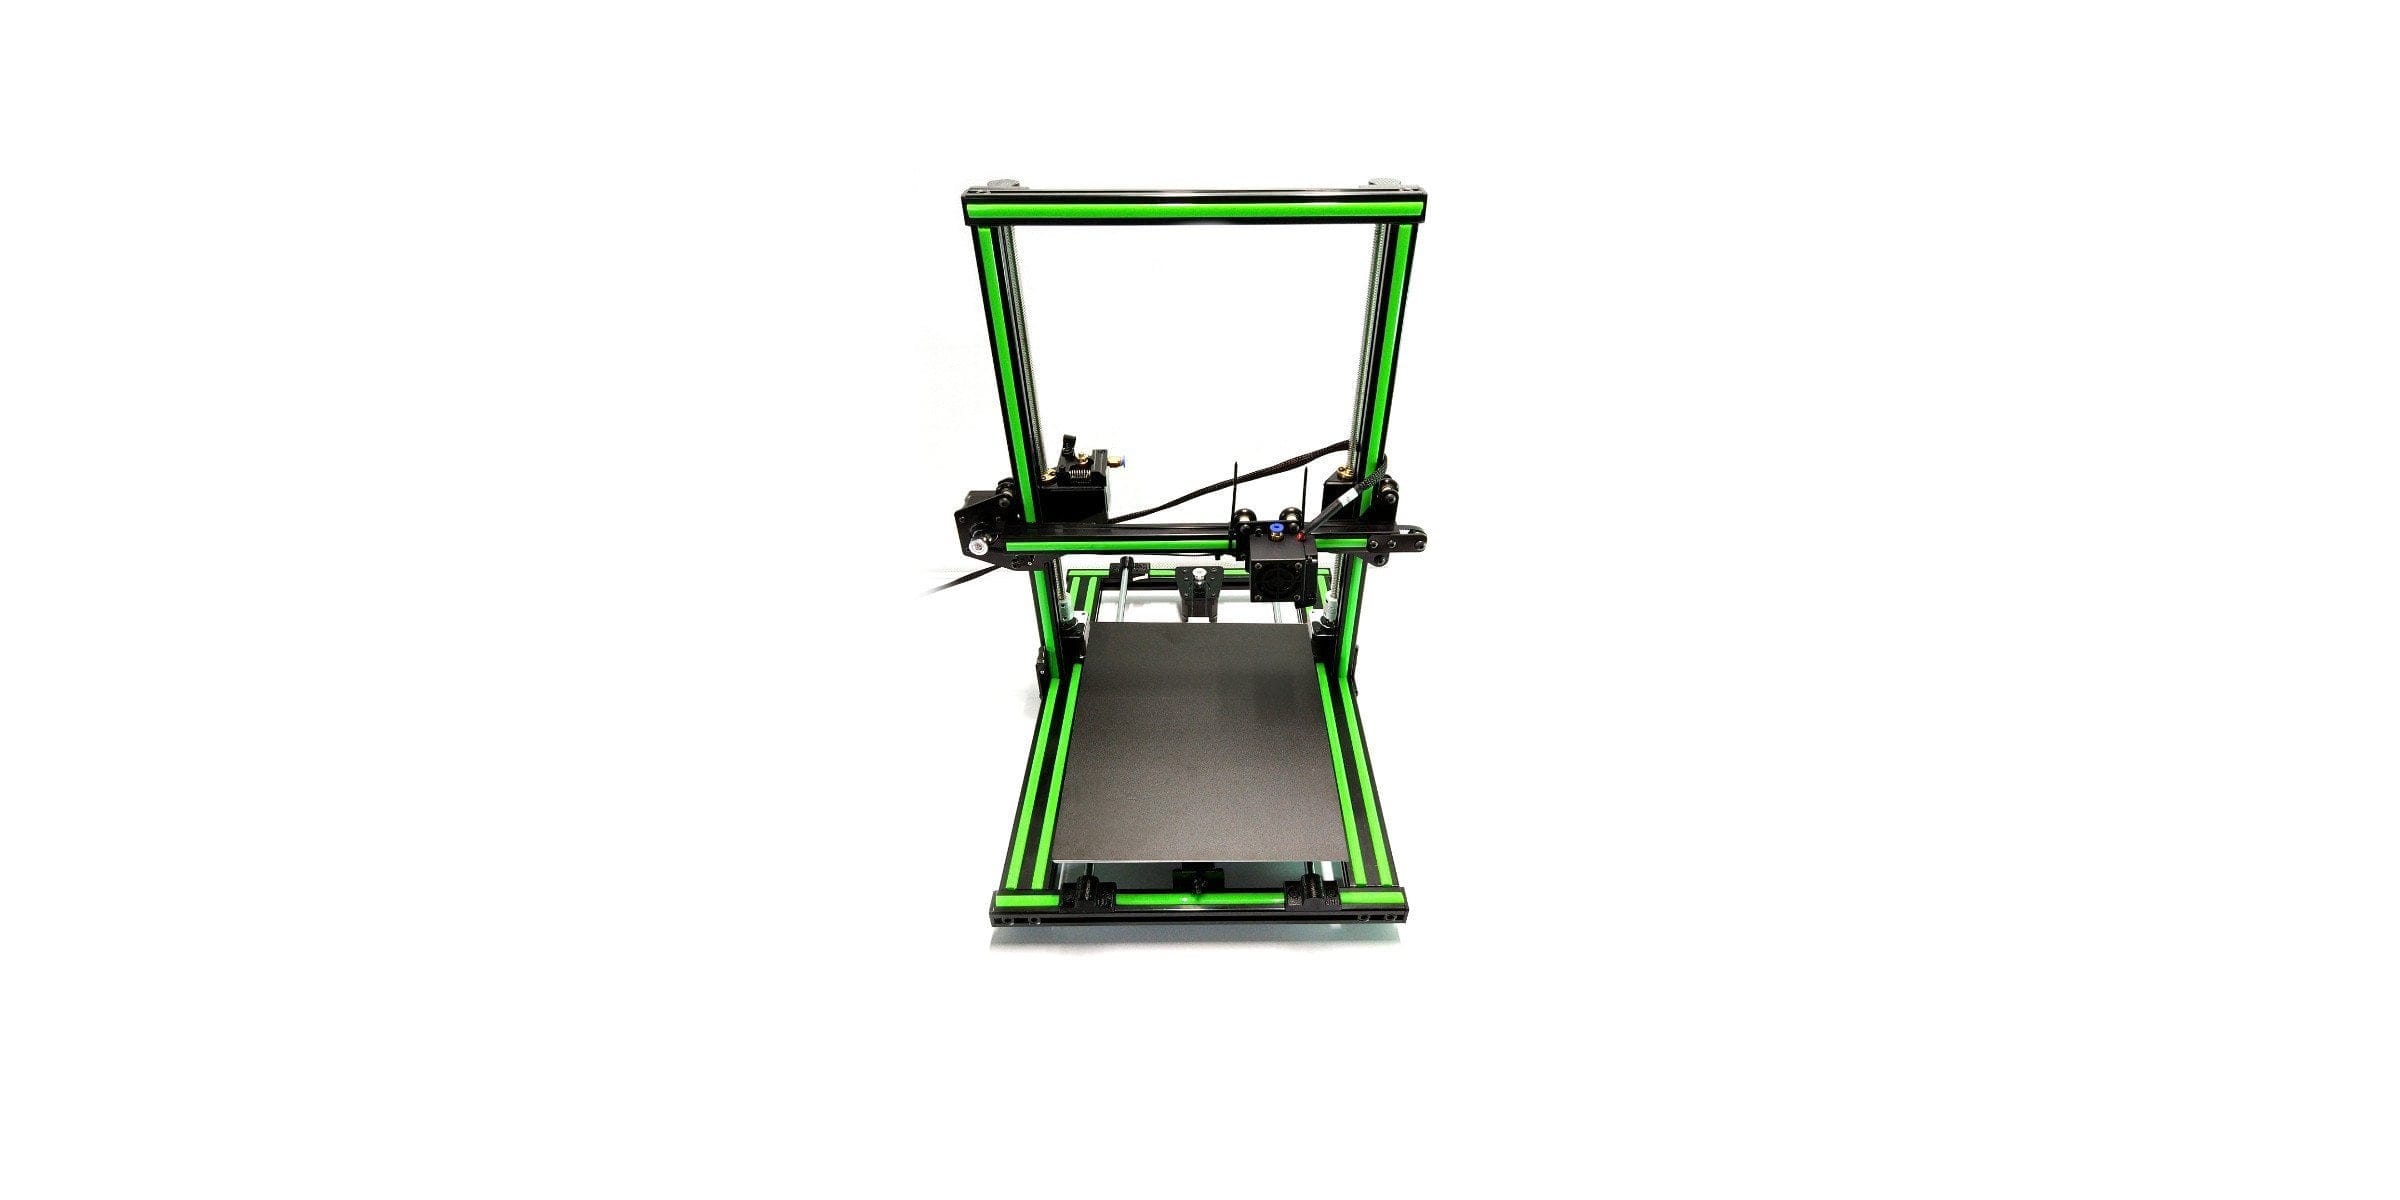
First impression of the Anet E10
When it comes to DIY 3D printer kits, “Anet” is one of the best-known manufacturers. With the Anet A8 and Anet A6 (Anet A6 review) the manufacturer has already brought two inexpensive printer kits onto the market, which were particularly well received by the community and still offer a good introduction to the world of 3D printing. The Anet E10 is another DIY 3D printer that only delivers the parts for assembly. What makes this model so interesting is, on the one hand, the Bowden setup and the aluminum frame.
What's in the box
The Anet E10 is supplied as a kit, which, unlike the other Anet DIY 3D printers, is largely pre-assembled. For safe transport, all parts are embedded in several styrofoam inserts. The 3 largest parts of the kit form the two pre-assembled frame parts, as well as the control center, which includes the power supply unit and the mainboard. The scope of delivery also includes a screw and tool set, 2x 10 meters of PLA filament in white, a permanent film and a small spatula. In addition to the assembly instructions in print form, a USB stick with configuration files, further instructions, 3D printer software and finished print files is also included. What is missing from the scope of delivery is a pair of pliers for loosening the cable ties.
Assembly of the Anet E10
Due to the pre-assembly of the 3D printer, the assembly is done after around 30 minutes. As a result, the Anet E10 undercuts the set-up time of a Anet A6 or A8 clearly, nevertheless there are some mistakes on the part of the manufacturer in the pre-assembly. Especially with our test copy it was the case that the toothed belt of the Y-axis was anything but affectionately attached and had to be completely re-tensioned and attached. In addition, Anet has pre-assembled the Z-axis stepper in such a way that when the motors are connected, the connected cable is guaranteed to get stuck on the heating bed. Ultimately, you should turn both motors so that the connectors point to the front or to the side. You should also be careful with the screws. Sometimes the screws are already so tight that they can hardly be loosened, sometimes the screws are only loosely in the drill hole.
The assembly of our test copy you can watch in this video.
The entire construction is carried out in just 8 steps. The assembly instructions included are illustrated and written in an understandable manner. The level of difficulty is kept very low, especially with this model, so that the construction can also be carried out by the 3D printer novice without any problems. The cabling of the Anet E10 in particular is extremely easy. The cables are already connected to the mainboard and the power supply so that you no longer have to worry about this part of the wiring. The individual cables of the stepper and switch, as well as the heating bed are clearly labeled and are simply plugged in.
Design and workmanship
Aluminum frame
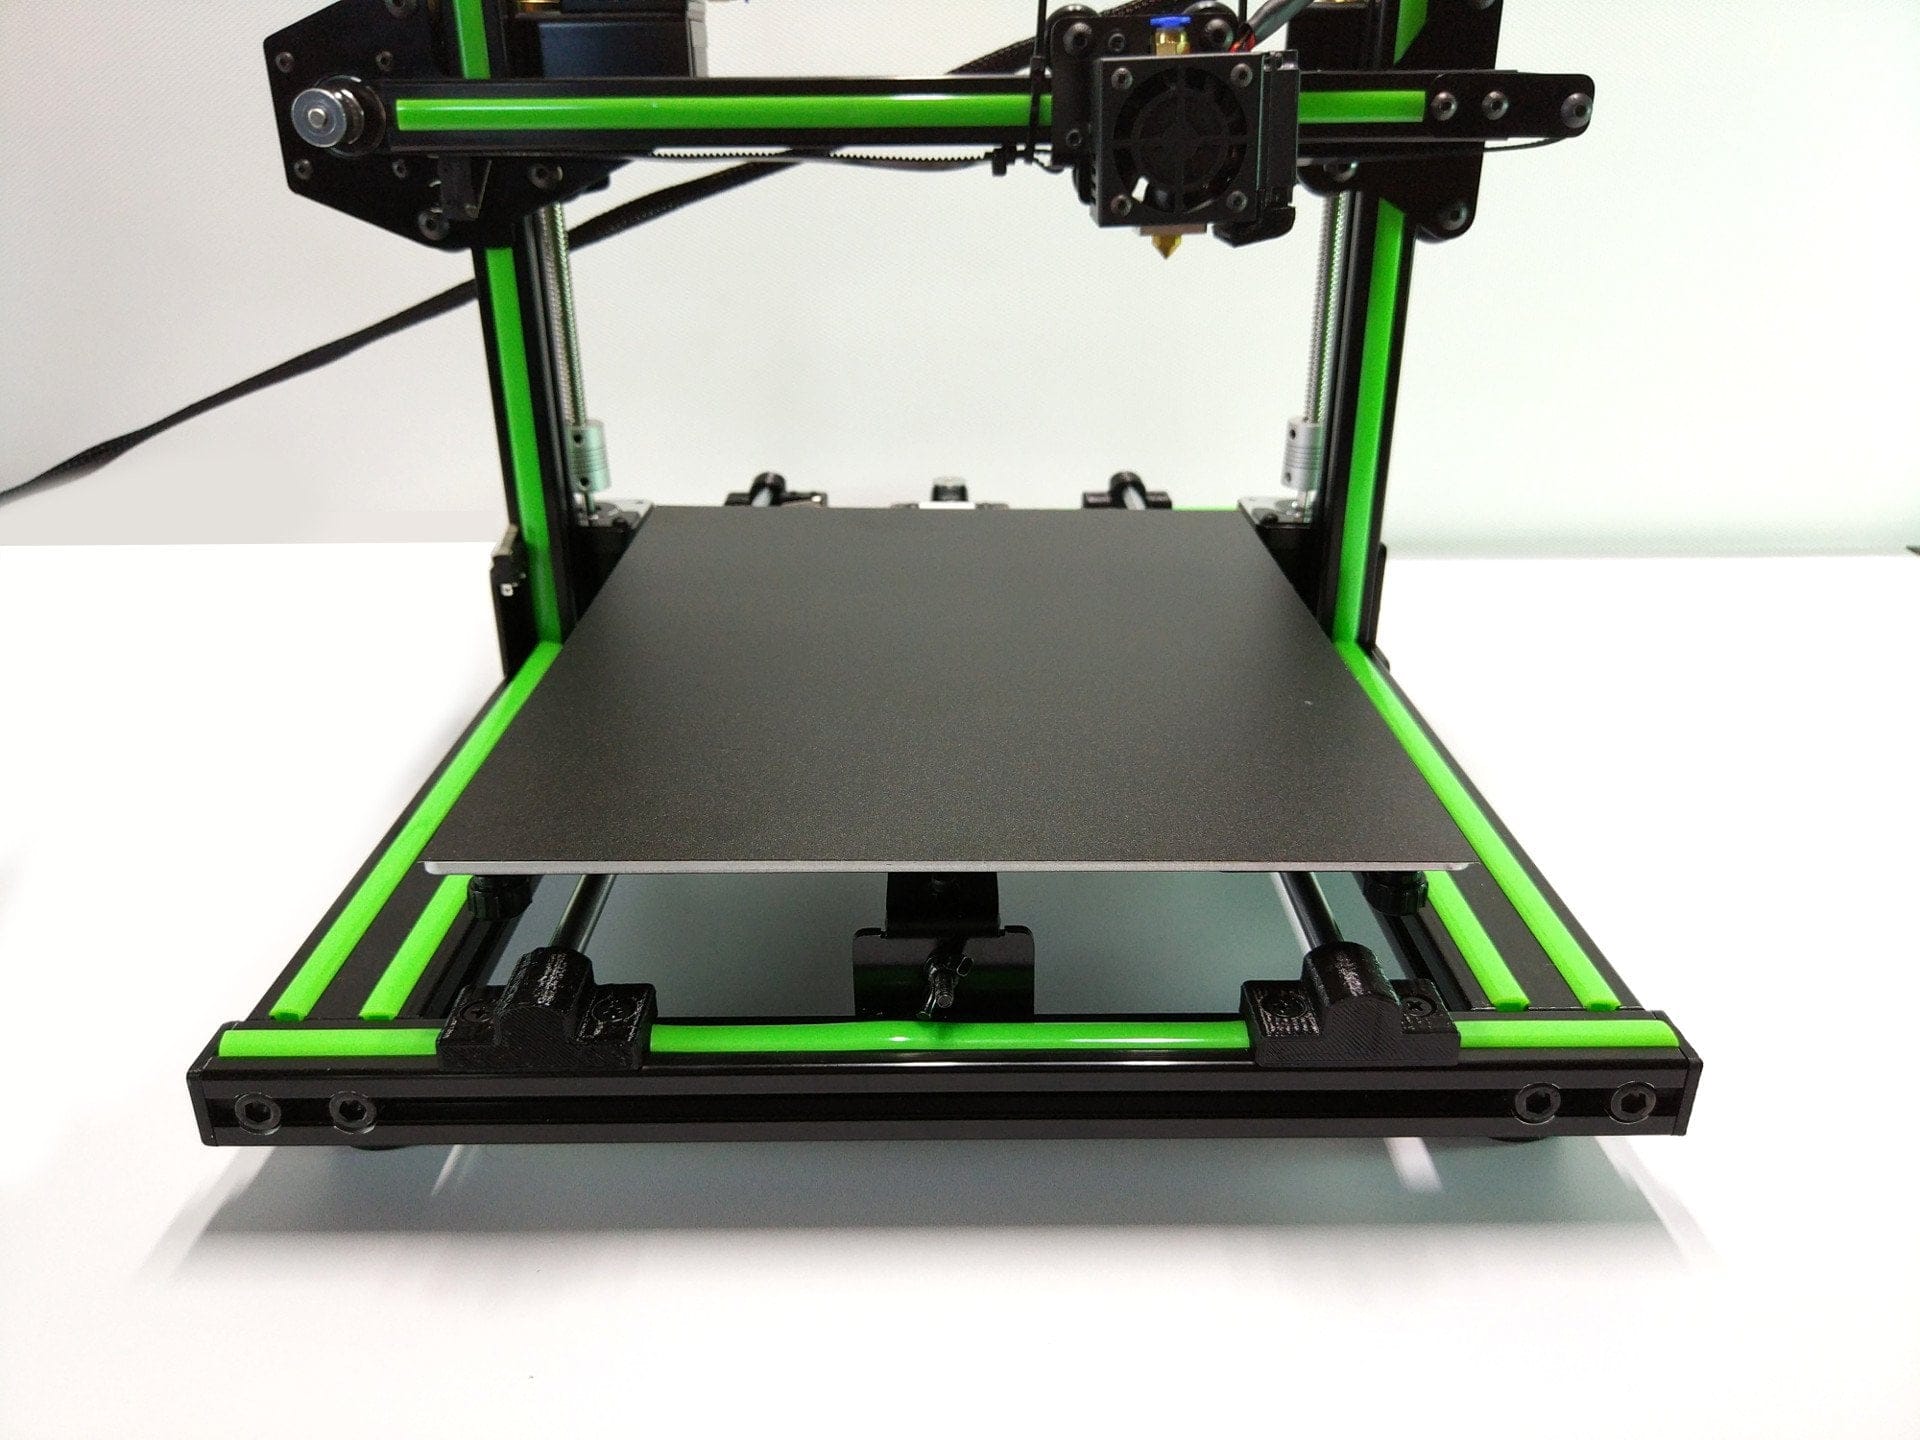
The design of the Anet E10 is based primarily on the previously published and quite successful Creality CR-10 . The frame structure is made up of T-aluminum profiles. A big advantage of the aluminum frame compared to the acrylic frame of the Anet A8 resp. Anet A6, is the better stability, which at the same time ensures a more accurate print image, as well as the lower wear of the frame. Acrylic in particular is known for breaking or deforming comparatively quickly under constant tension and constant vibrations. To avoid vibrations, the Anet E10 is equipped with a total of 4 rubber feet. Unfortunately, Anet decided to make the mounts for the shafts from a 3D printing material. Higher quality brackets would have been desirable here.
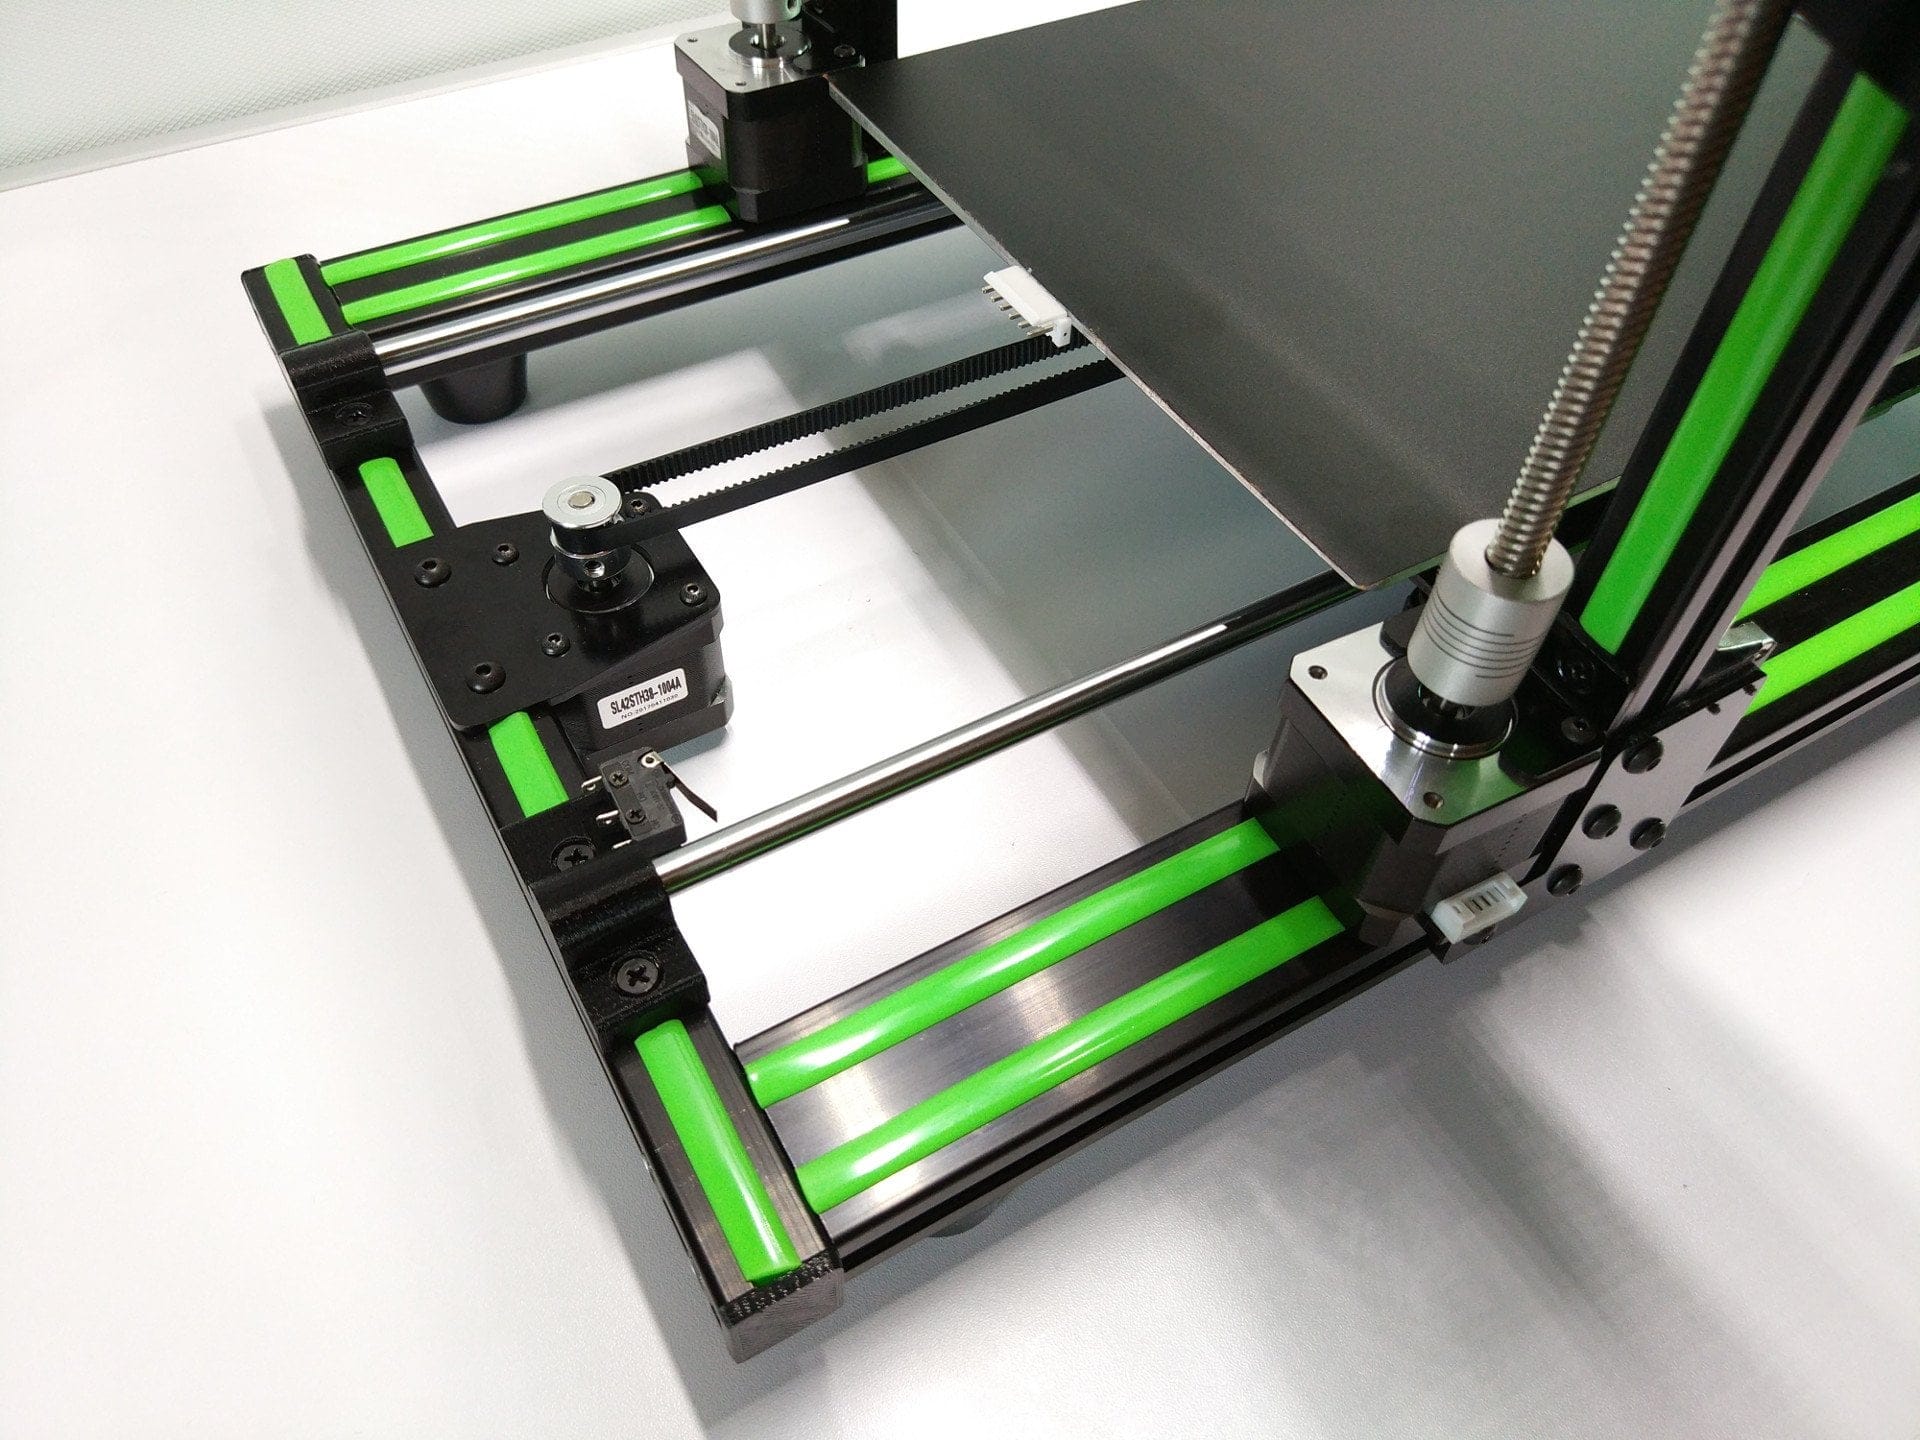
hotbed
The print bed or hot bed of the Anet E10 is moved on the Y-axis by sliding bearings. A belt tensioner is already available, which means that the 3D printer does not have to be converted first. The print volume of the Anet E10 is again more compact. At just 220 x 270 x 300 mm, the printing area is slightly more compact than the 300 x 300 x 400 mm printing area of the Crealty CR-10, To criticize is the attachment of the belt. This is held only by two screw heads.
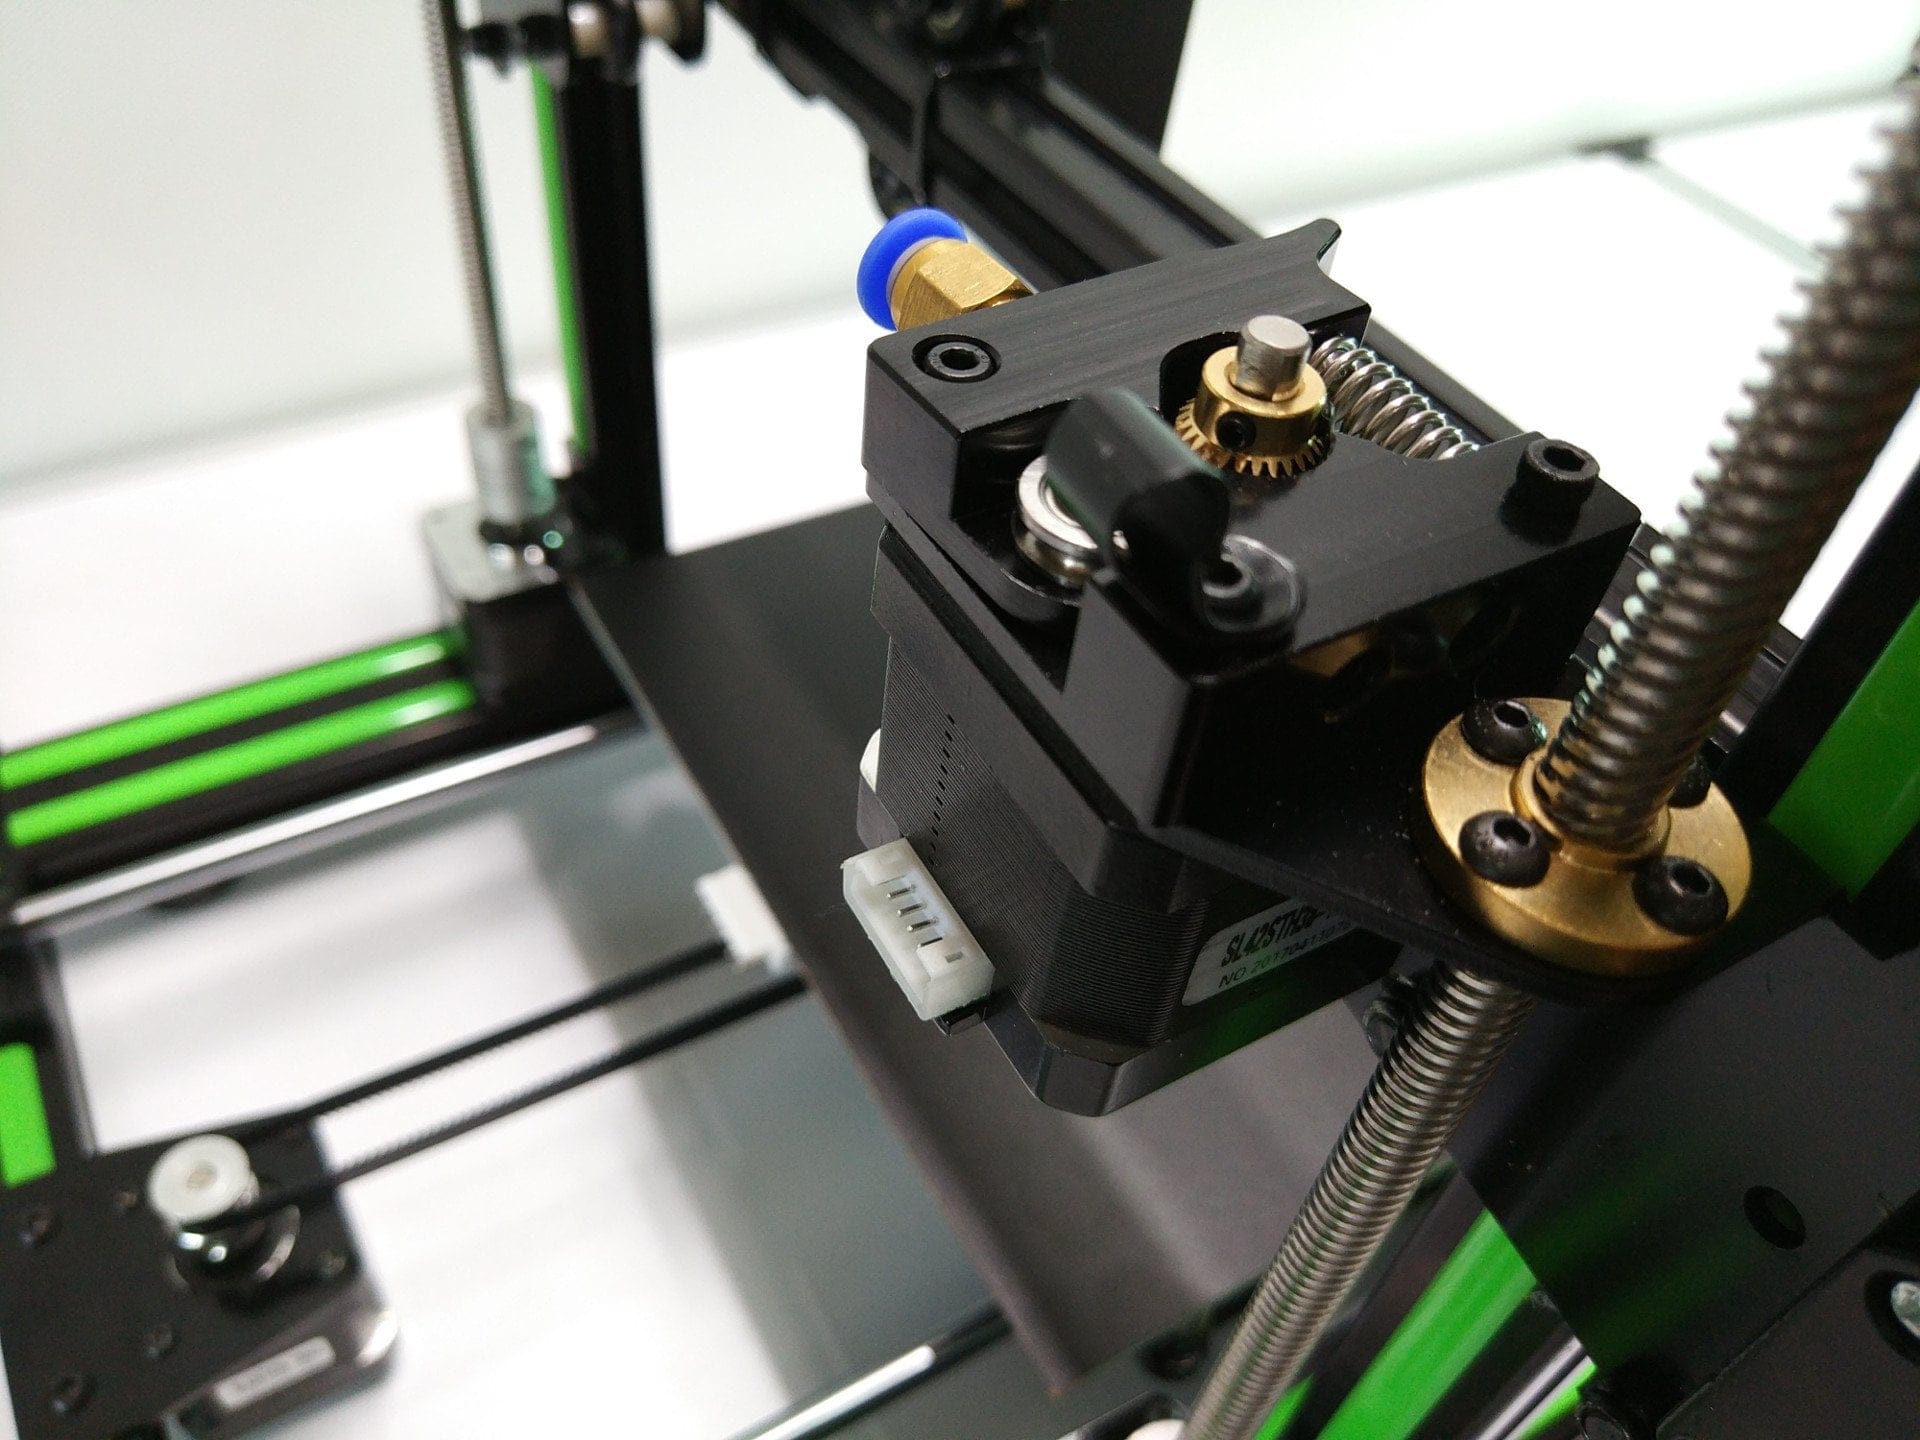
Bowden extruder
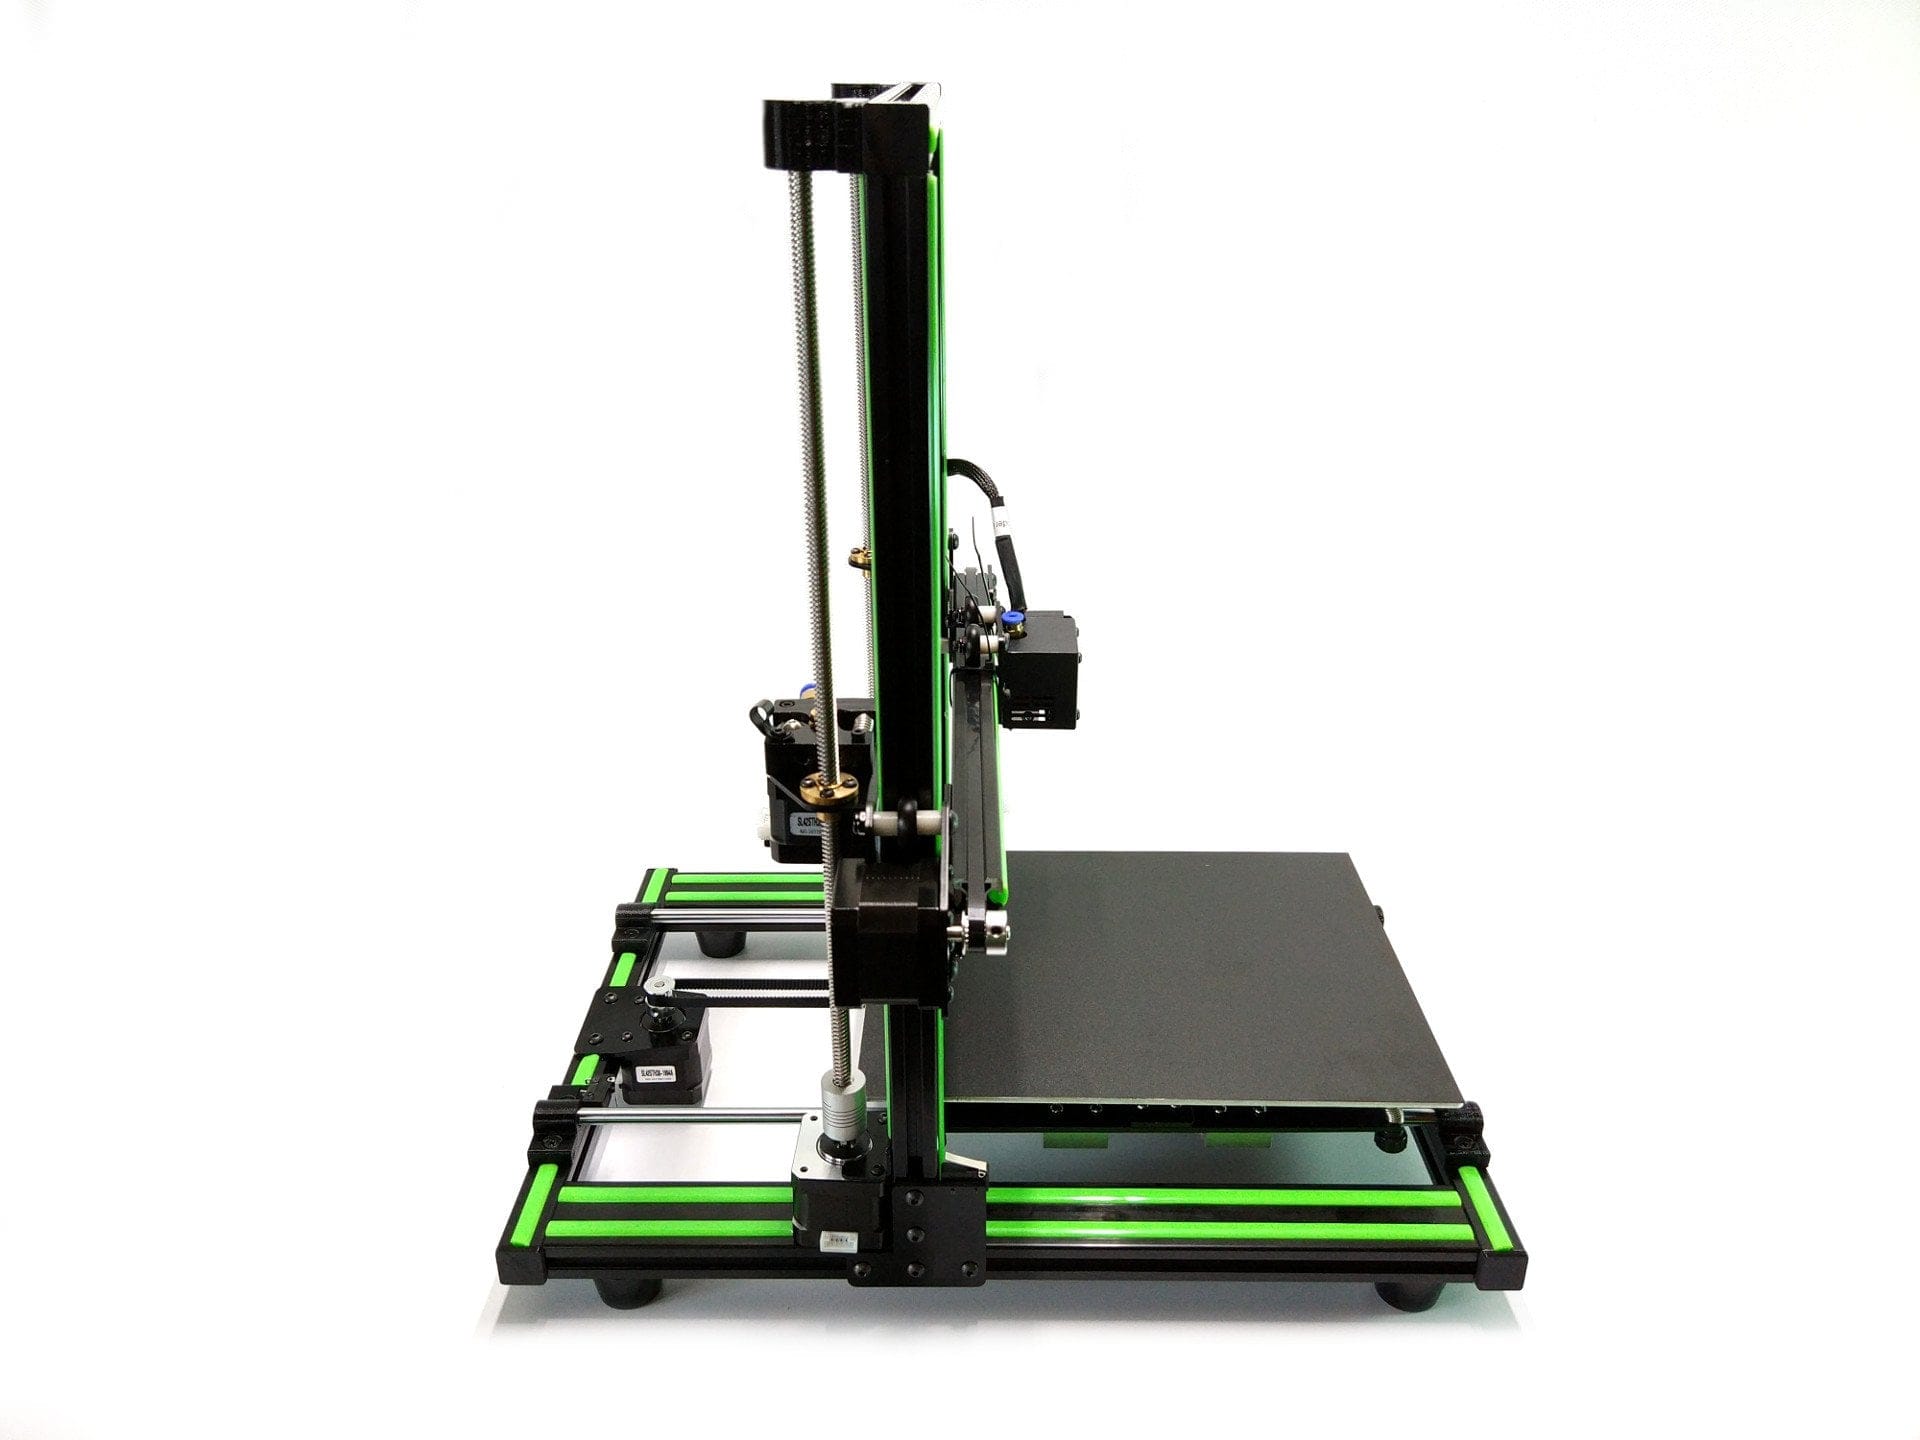
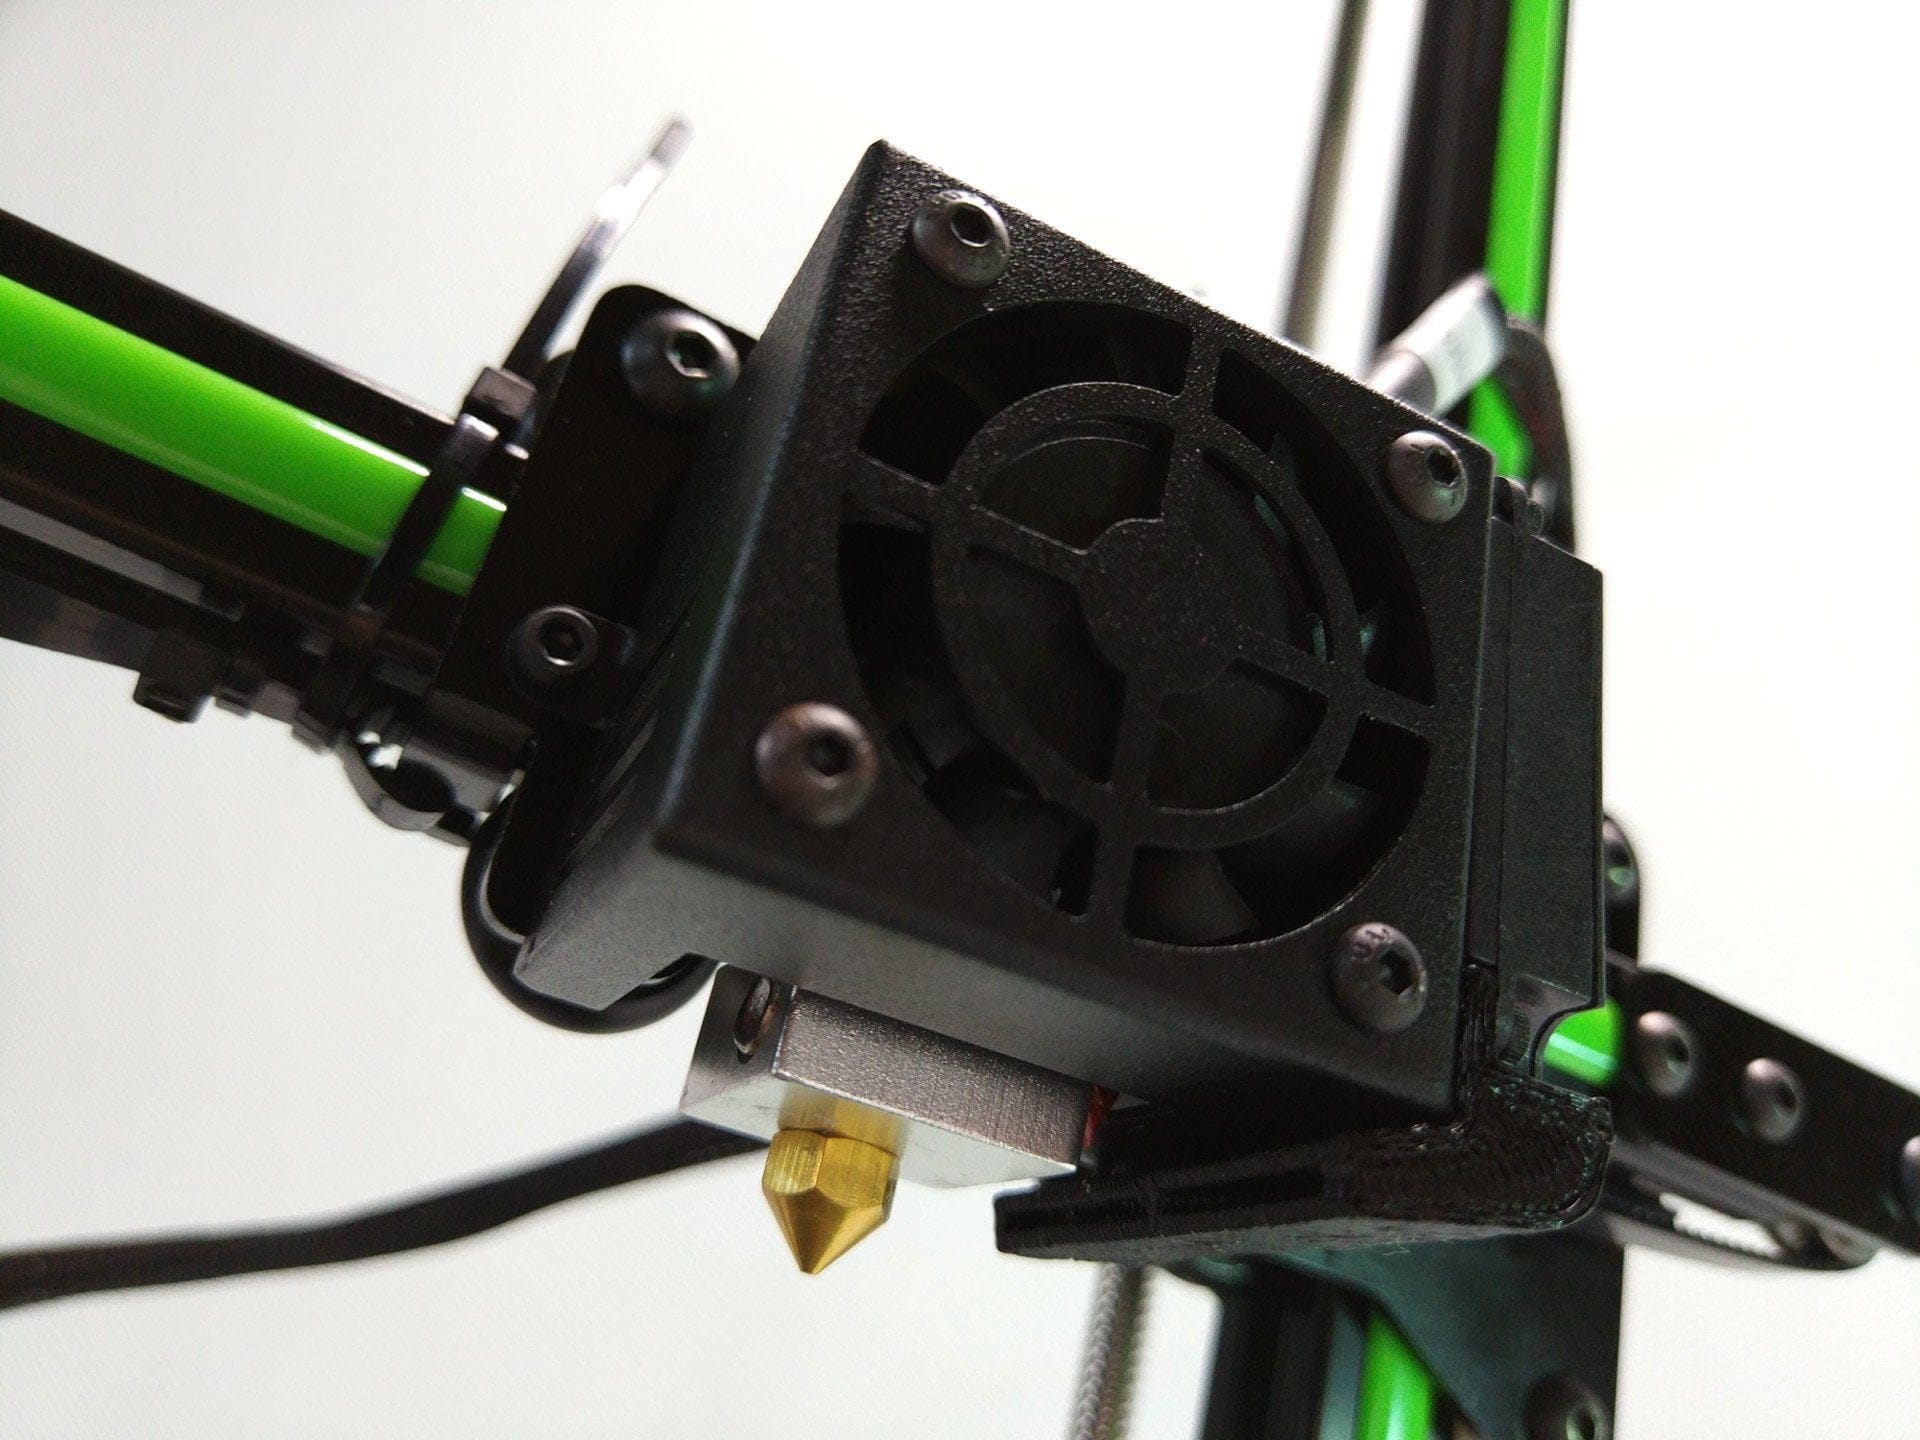
The extruder is of the "Bowden" type. In contrast to the “Direct Extruder”, the “Bowden Extruder” has the stepper, which drives the filament, not on the X-axis, but is attached separately to the printer. As a result, there is a significantly lower weight on the X-axis, which relieves the load and at the same time enables a significantly higher printing speed. Due to the greater range between the extruder and the nozzle, the Bowden extruder also has disadvantages, which makes printing soft filaments much more difficult, for example. A second Z-axis stepper with thread guidance, which is used, for example, in the Creality CR-10 just not there. The design of the extruder is to be criticized. The cooling block sits directly on the slide, which is why such a cooling block is completely wrong, as the air can hardly circulate at all. Then there is the huge fan that blows not only on the cooling block but also on the heating block. Last but not least, the fan duct is so puny that it is also of little use and a modified fan duct would hardly find space.
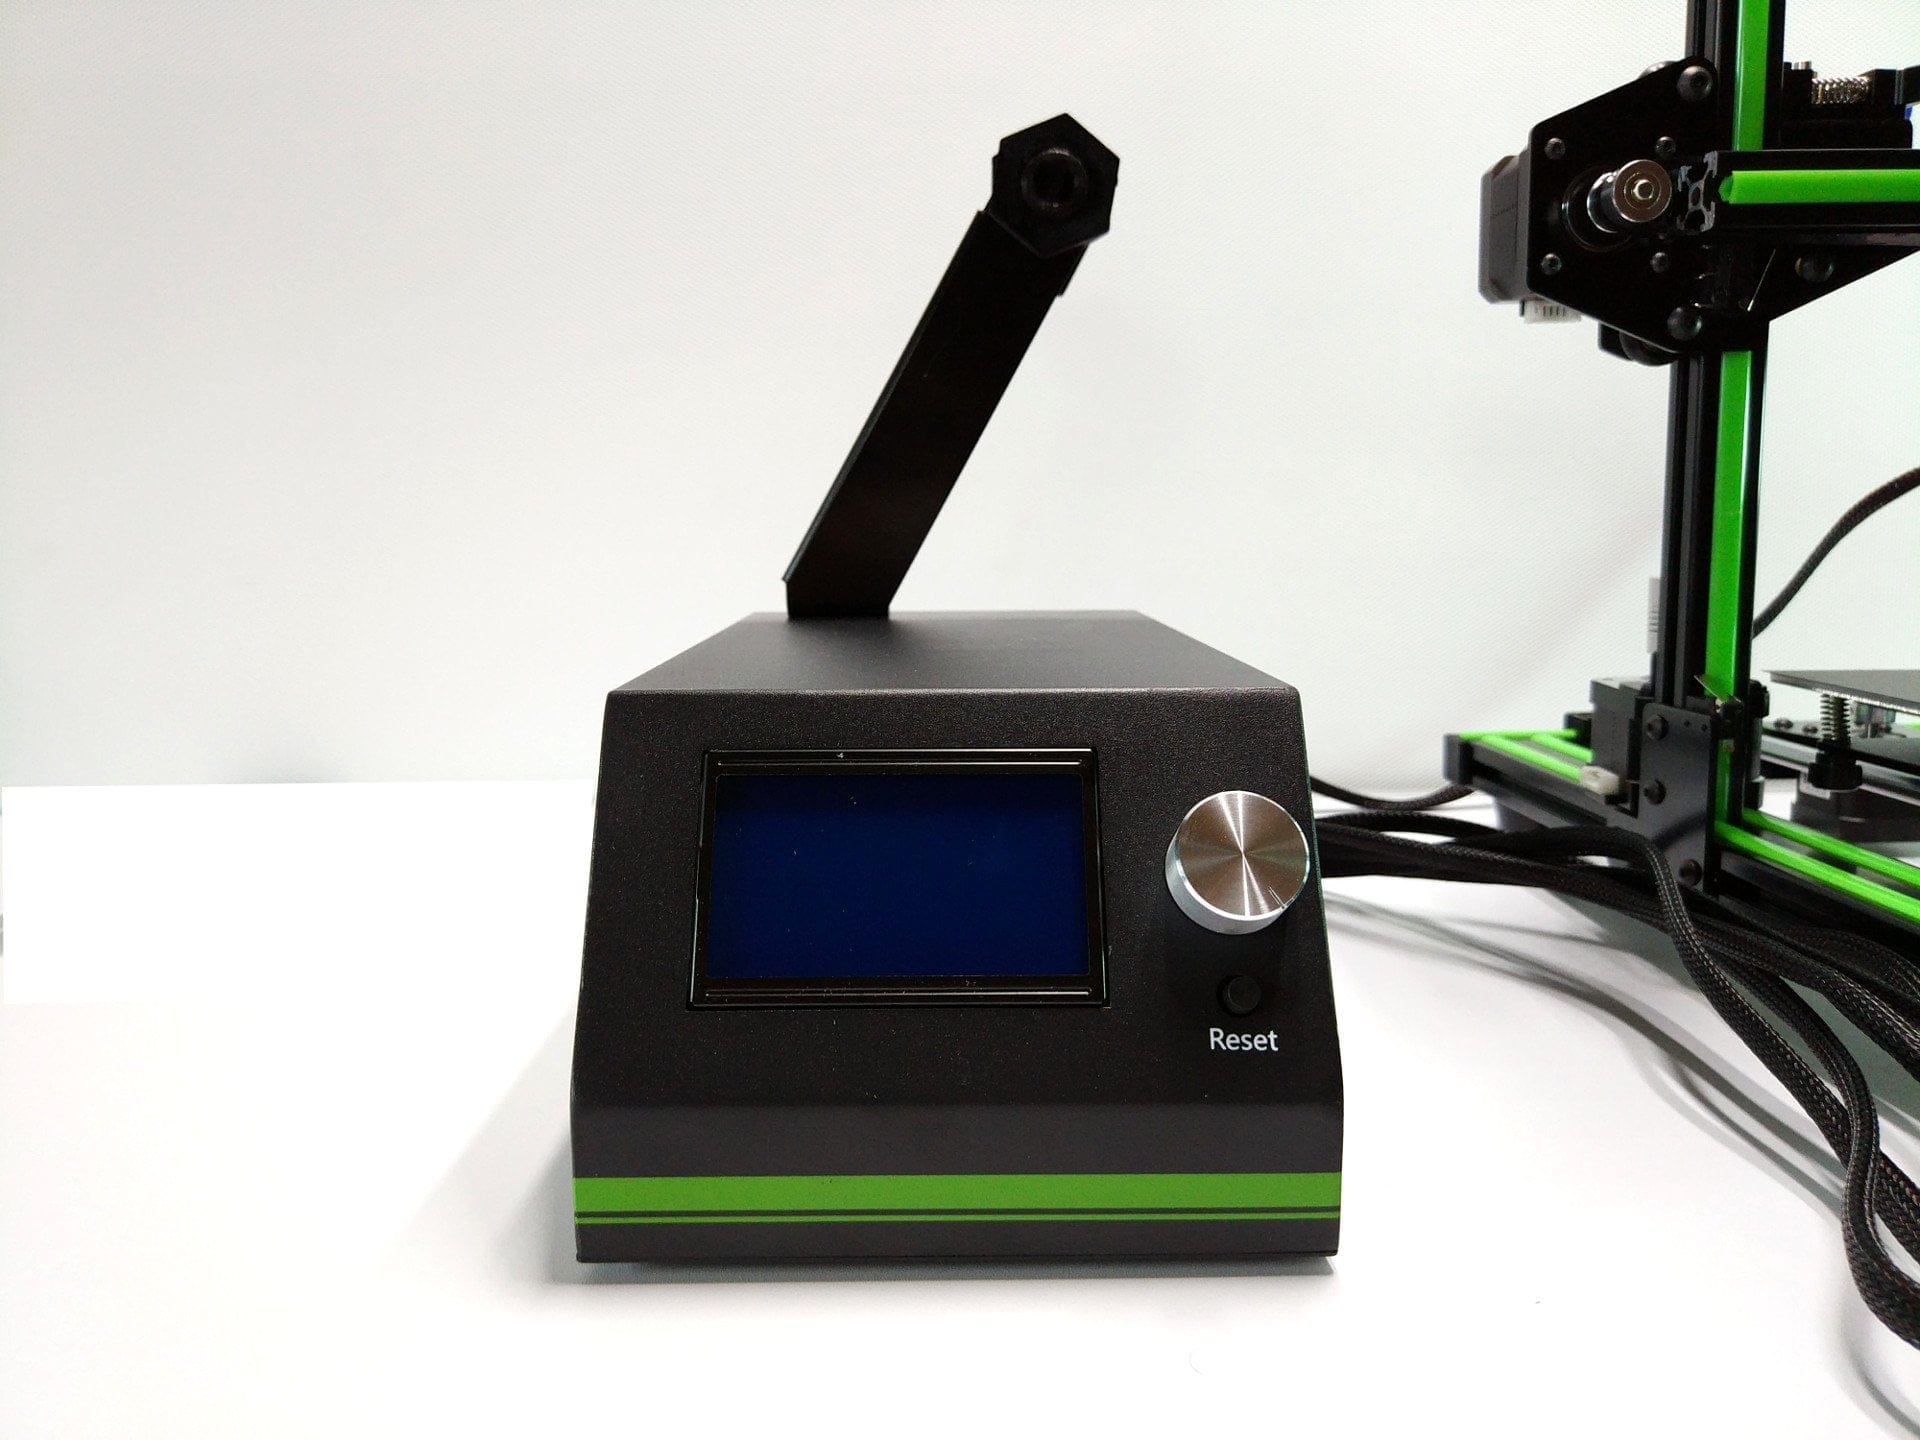
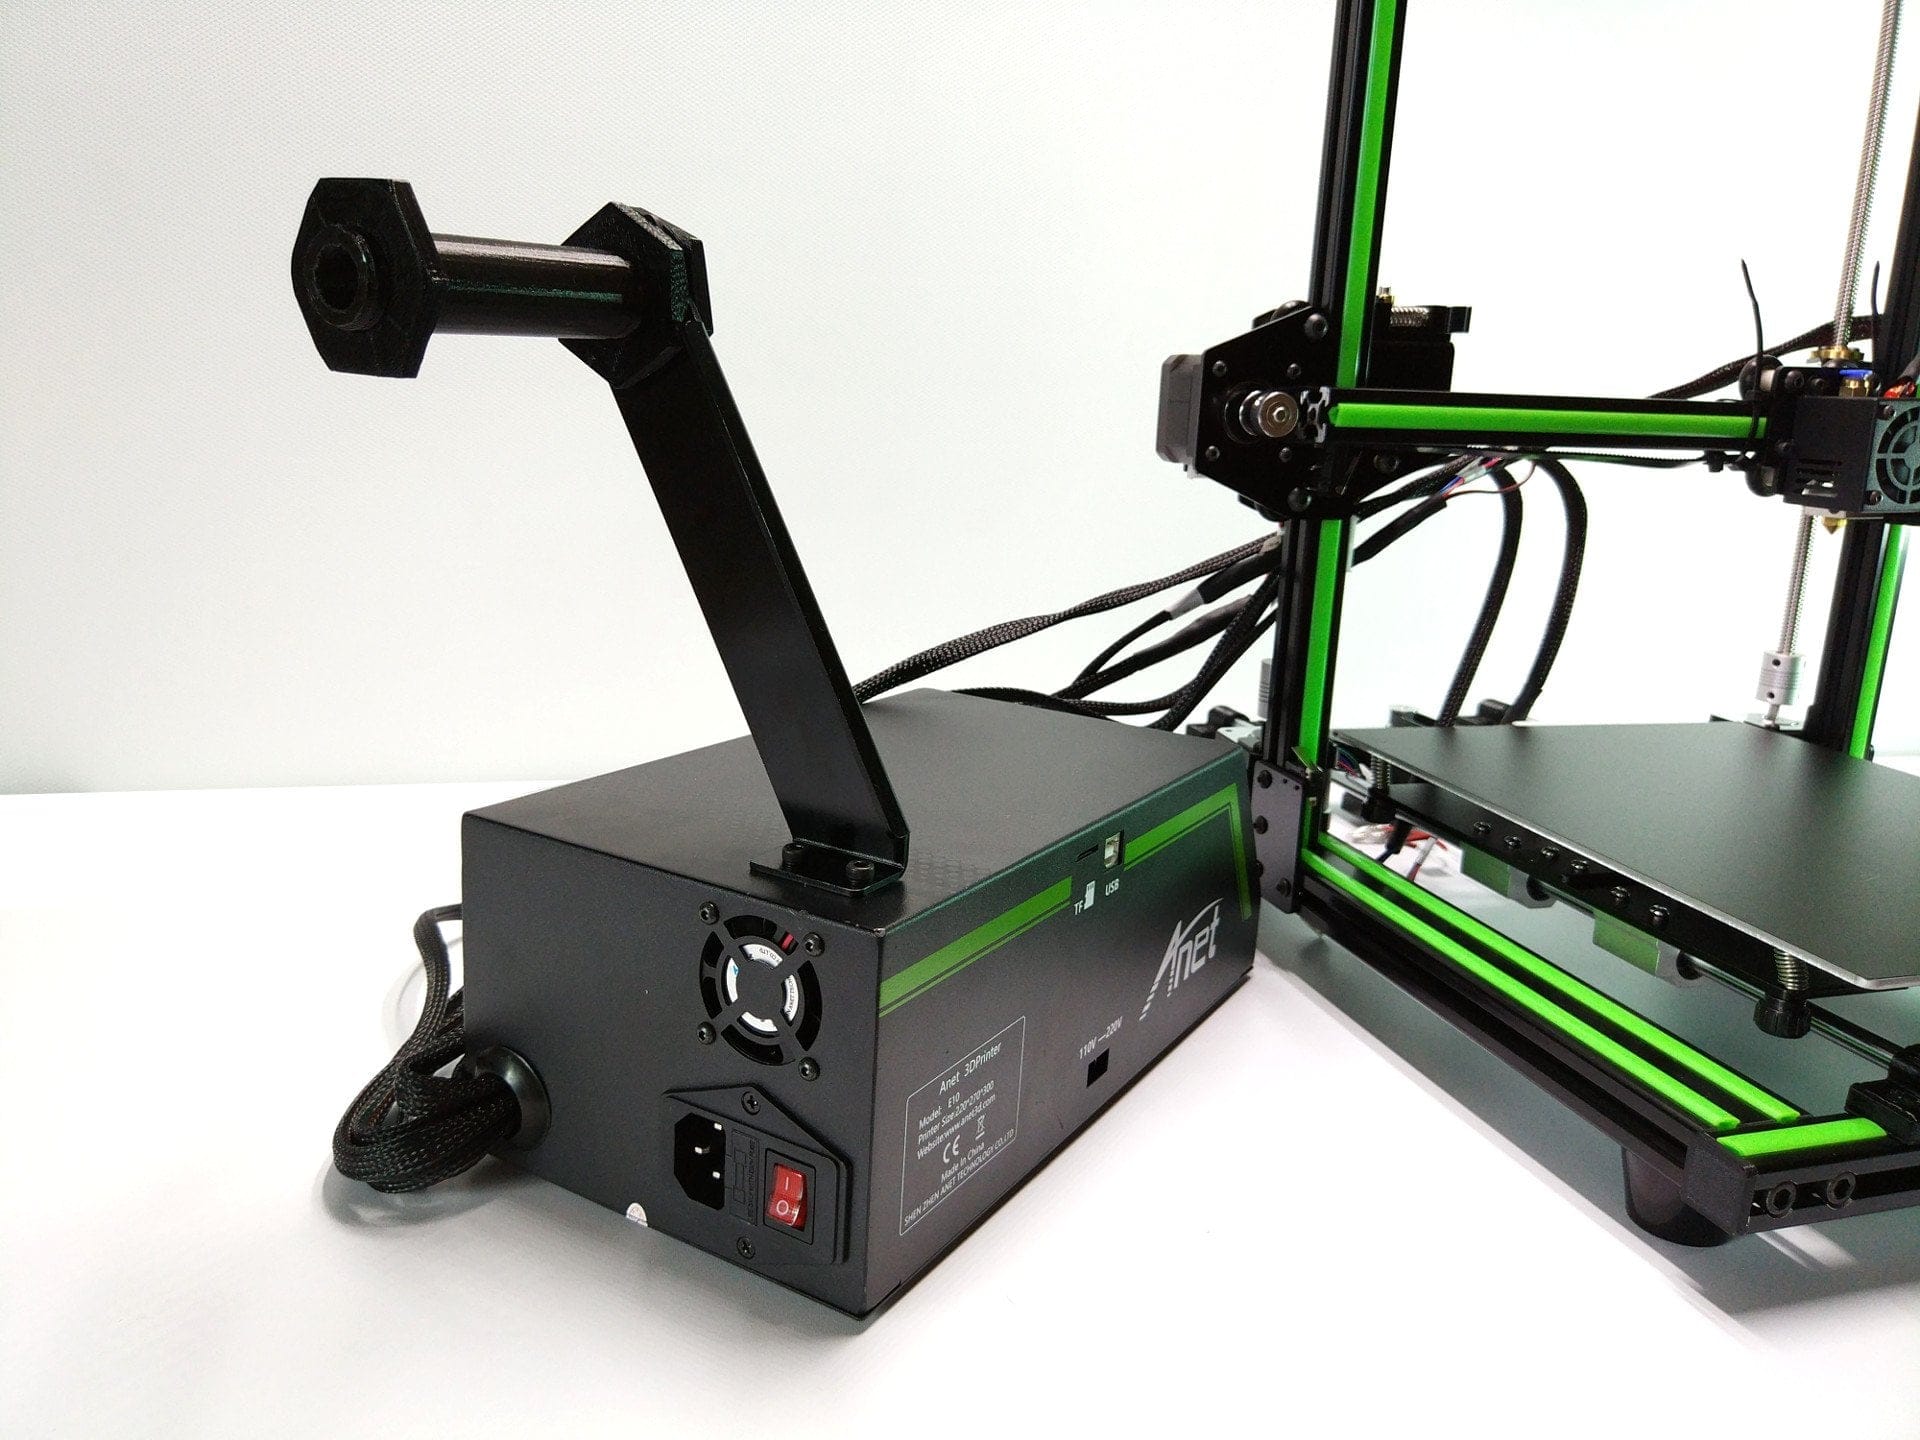
control unit
Mainboard, power supply and display are housed in a separate control unit that is separate from the Anet E10. Due to the improved cable management, the 3D printer looks tidier overall and it is easier to track which cable leads where. The graphic display (12864 LCD) is identical to the display of the Anet A6, The operation of the printer is done via a one-button control. A minor improvement over the previous Anet models is now on the power supply located toggle switch. A really small, but all the louder fan ensures that the hot air is blown out of the metal housing.
quality of workmanship
The 3D printer is processed according to the price. All of the components could be put together and screwed together to fit perfectly. There were no defective parts, especially with our kit. However, with regard to the processing quality of such DIY 3D printer kits, you should be aware that you will also get a "Monday piece". Most of the time, however, the errors are not serious and are limited to broken screws or unclean drill holes.
Hardware and printing properties
The printing area of the Anet E10 is 220 x 270 x 300 mm. The nozzle supplied has a diameter of 0.4 mm. The layer height is between 0.1 and 0.4 mm. Different filaments can be printed, from the typical PLA and ABS to HIPS or wood. According to Anet, the accuracy of the X and Y axes is 0.015 mm, that of the Z axis is 0.004 mm. The maximum printing speed is between 40 and 120 mm / s. The motors used are unspecified NEMA17 stepper motors. With the mainboard, Anet remains true to itself and continues to use the Anet V2.0.
Calibration of the Anet E10
Before you can even start printing with the Anet E10, the Bowden setup must be completed, the individual axes of the 3D printer must be calibrated and the hotbed must be leveled. The supplied assembly instructions in printed form do not go into this. Instead, you should follow the digital assembly instructions on the supplied SD memory card. It explains, among other things, how the Bowden tube is connected to the extruder and the stepper, how to insert the filament correctly and how to calibrate the individual axes or the hotbed. We have roughly summarized the individual steps in the following video.
Here is another checklist that you should consider before printing for the first time.
- Are the cables connected correctly?
- Are all screws tightened?
- Are all axes calibrated and the hotbed leveled?
- Are the straps stretched?
- Can the heating bed, slide and Z-axis move freely?
print quality
If you have carried out the above steps correctly, nothing stands in the way of the first print. Ready-made GCODE print files are already on the SD memory card. The manufacturer also provides a slightly older version of Cura including a configuration file, so that you can also create your own print files without any major detours. However, we recommend the current Cura version directly via the Ultimaker website (Link) to download.
The first correct print after several calibration cubes
To print, simply insert the SD memory card into the slot provided on the control center and select “Init” from the selection menu. SD-Card", which means something like "initialize SD memory card". You can then access the folder structure of the memory card and start the first printing attempt by selecting the desired file. Alternatively, it is also possible to use the USB interface of the Mainboards send a file to the printer to start printing. All drivers are on the included SD memory card.
After a print job has started, the print bed and the nozzle are brought to the temperature specified in the GCODE. The preset temperature is usually 50 ° C for the heating bed and 200 ° C for the nozzle. Try it here! Different filaments require different temperatures and even with the same type of filament there are definitely differences. Most filament manufacturers indicate a printing temperature on the filament packaging. The same applies to the filament supplied by Anet, which should be printed between 190 ° C and 210 ° C.
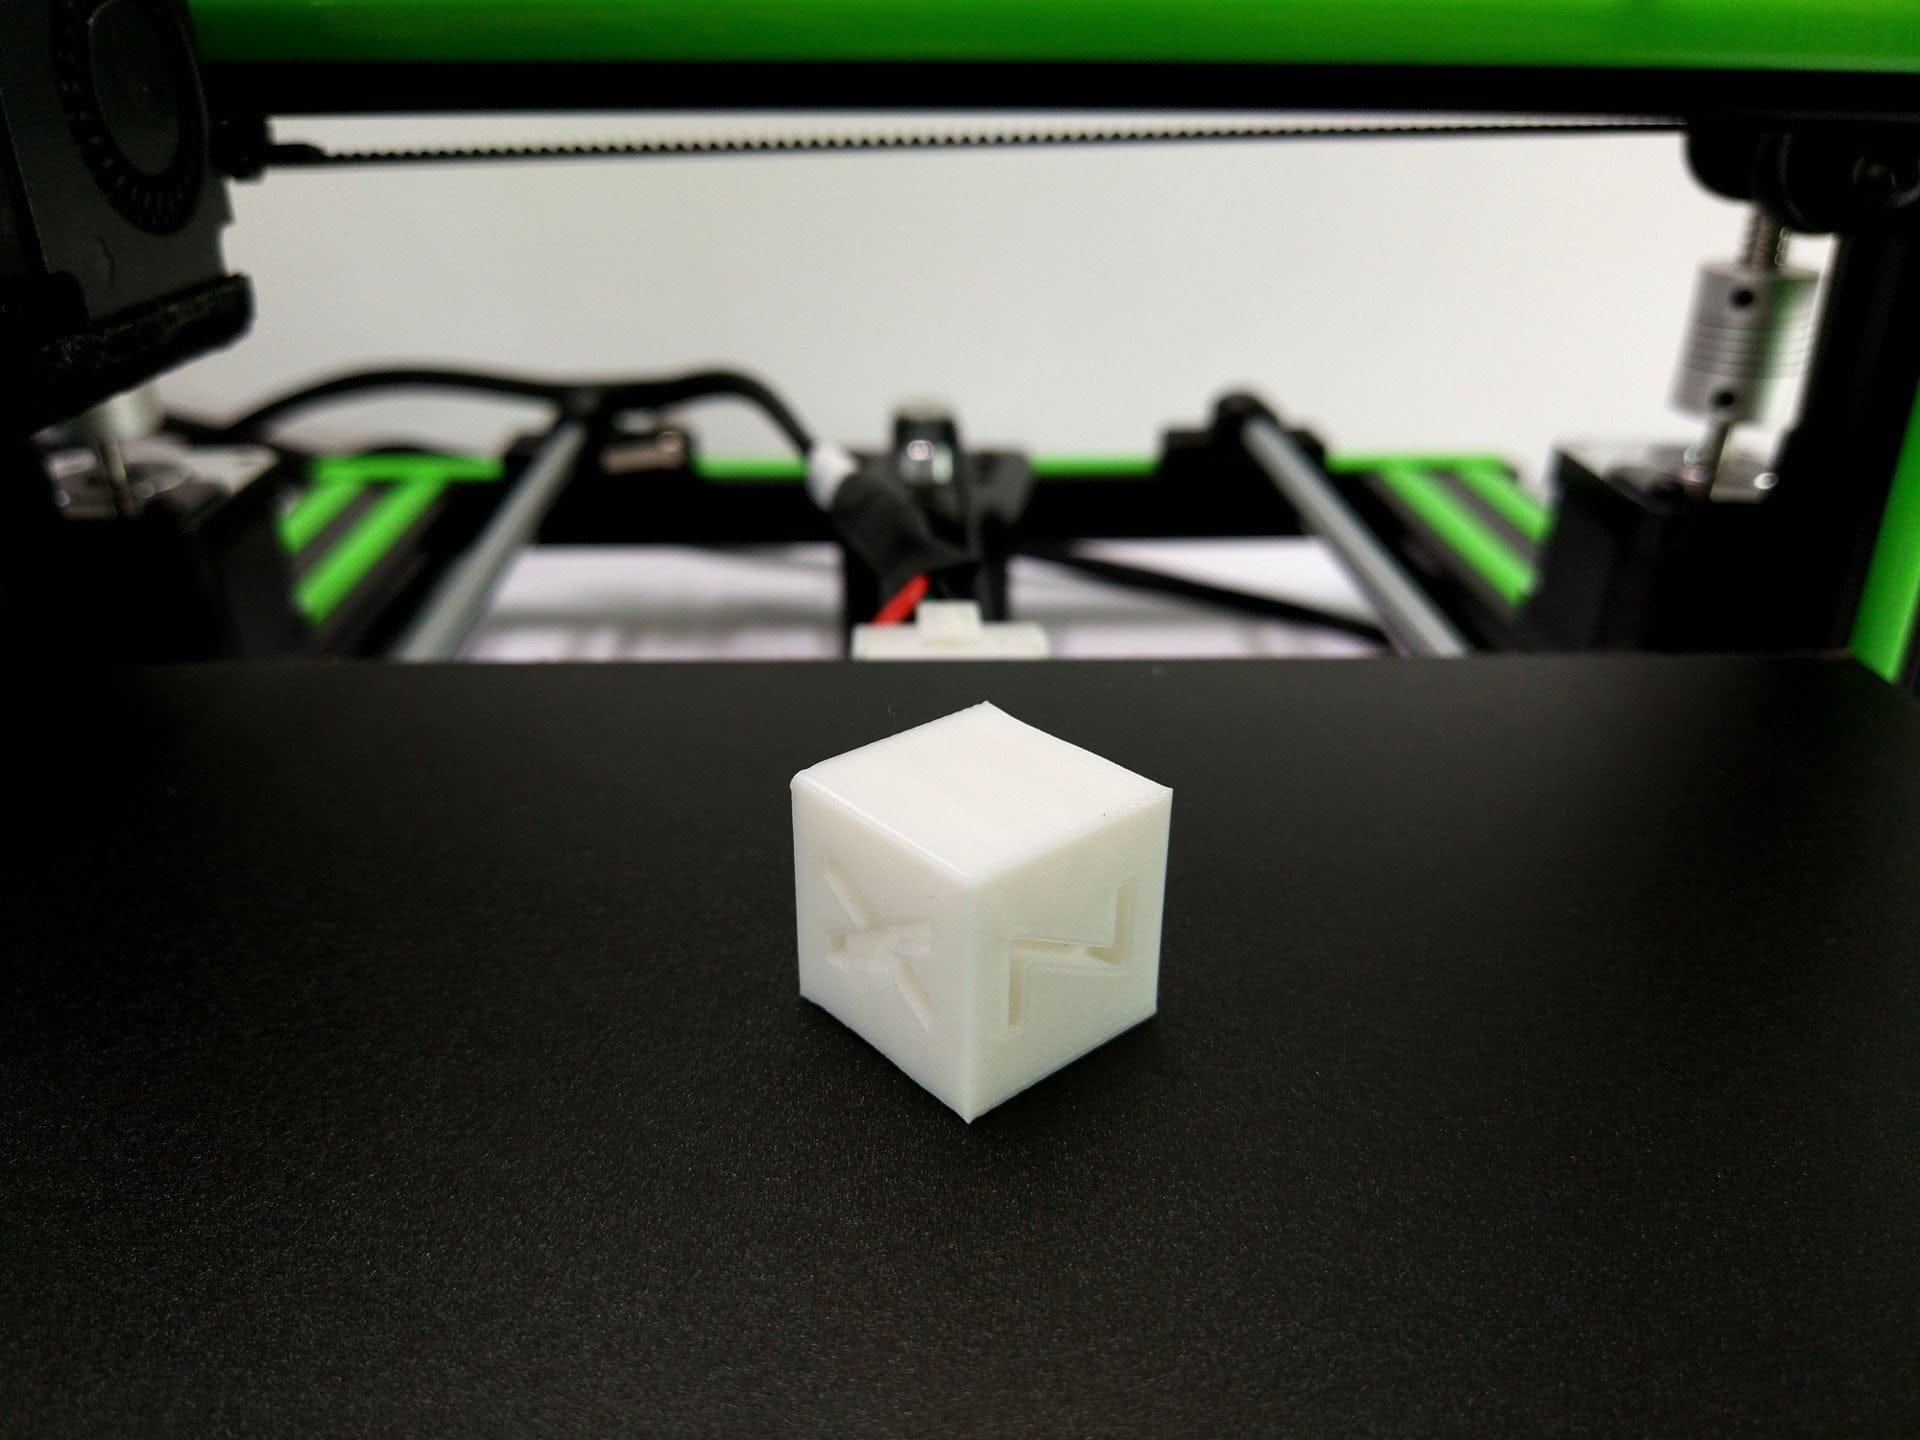
Our first attempt at printing was a small "XYZ Calibration Cube", which was created using the Cura configuration file provided. One advantage of the cube is that it can be printed in a very short time and the accuracy of the individual axes can be checked at the same time. The heating bed was set to 50 ° C and the heating block to 200 ° C by default. The Anet E10 had to struggle with the temperature of the heating block. The problem is the fan blowing not only on the cooling block but also on the heating block at the same time. In order to bring the 3D printer up to temperature, you should cover the lower part of the fan with tape.
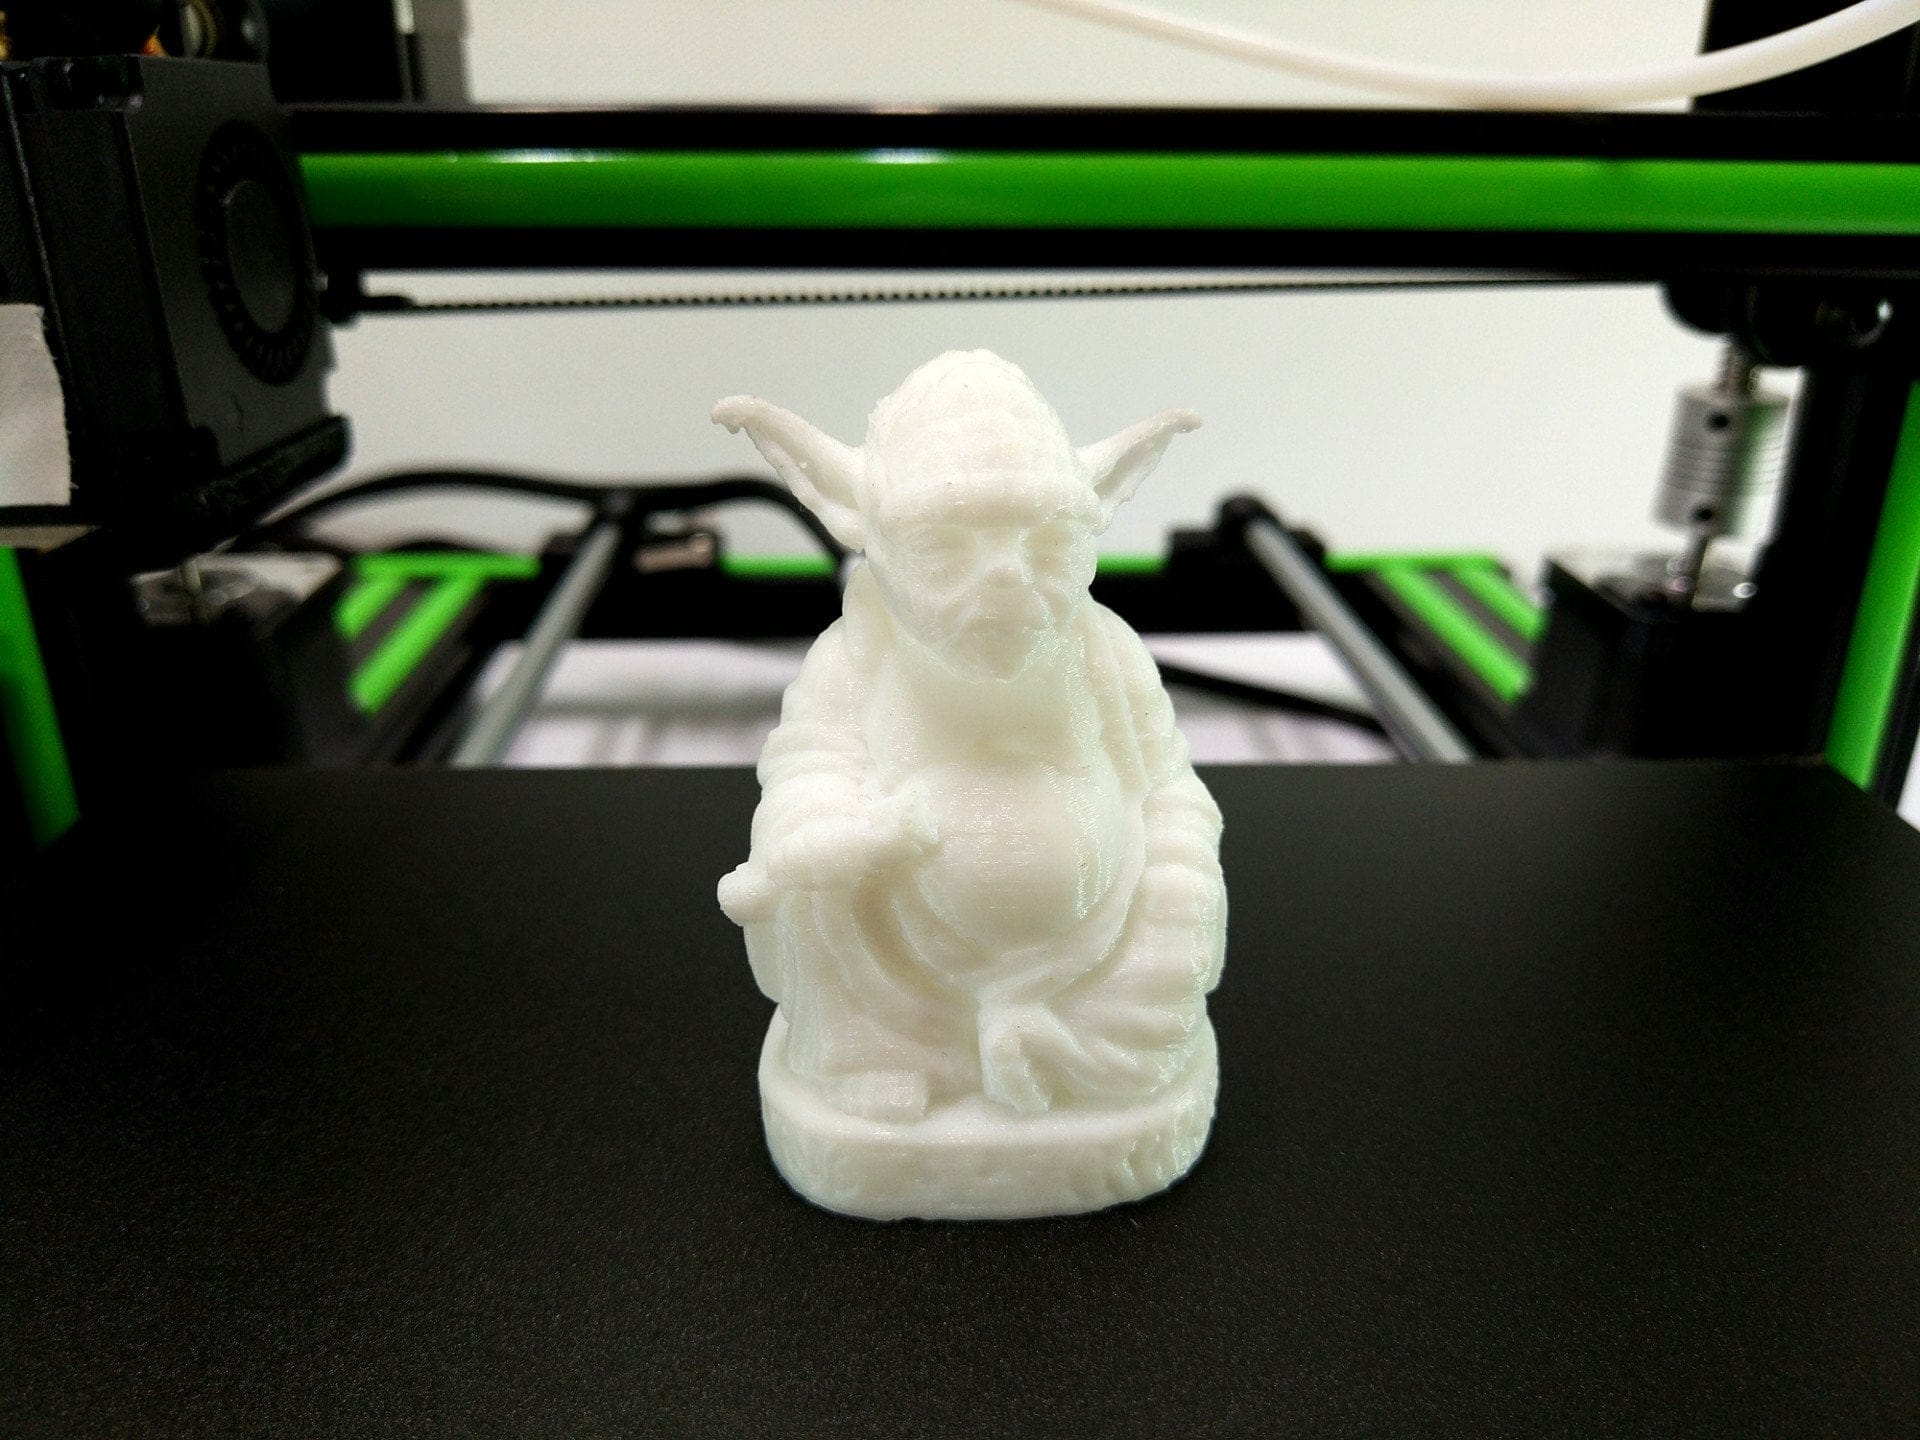
First print result with the Anet E10
The printing result was quite acceptable, especially for the first printing attempt, even if there was a visible "warp effect". After some fine-tuning, without making any major modifications to the printer, the Anet E10 achieved printing results that corresponded to a modified Anet A6 and scored with barely visible layers. The permanent film also proved to be practical, which means you don't have to use blue tape or masking tape. All previous prints adhered excellently to the permanent film and were extremely easy to remove.
Anet E10
Straightforward assembly
Adequate workmanship
Aluminum frame
beginner friendly
Good print quality
Large print area
durable film
Quality control
Careless pre-assembly
Rash design
The all-important question is: is it worth buying an Anet E10? Well, if you want a 3D printer, where you do not spend half the day with the assembly and the achieved without much modifications and good print results, then it is worth (despite some criticisms) quite the Anet E10 into consideration. On the other hand, those who like to tinker, can live with a lower printing speed and a sturdy aluminum frame does not care, is better served with a significantly cheaper Anet A6 or A8, at least after the current price range.

Heiko
17. July 2017 17 to: 24
I have an A8 myself and until it was finished I added another 150 €. I like that with the aluminum profiles and the rubber feet. I only got my A8 stable with a rubber mat for washing machines. It cost me another 20 €. For around 250 € you really can't complain. Maybe it will be my two gimmicks: P. But I'll wait for your test and then see what improvements will come out in the coming months. There has to be an autobedlevel for everyone!
Timo admin
18. July 2017 10 to: 19
Yes, I have to agree with you. I also invested a lot in my A6 (other shafts, IGUS plain bearings, level sensor, etc.). In the end, it is also fun to tinker with the printer and actually it prints really well even without improvements. I'm really looking forward to the E10 and looking forward to the test.
Ben
19. July 2017 23 to: 30
Great thing .. at the price I'll probably get this thing as a gimmick. Do you know good websites where you can get templates?
Timo admin
26. July 2017 17 to: 29
The best way to download free templates is to go to thingiverse.com.
EE
26. July 2017 17 to: 14
Is there a MOSFET between the power supply unit and the mainboard or do you have to buy it as with the other printers?
Timo admin
26. July 2017 17 to: 30
Unfortunately, this is not yet known as nobody has the printer yet. As soon as there is new information about it, I will update the post.
Helmfried A.
28. July 2017 13 to: 42
Hi, I have a few more questions before I buy. I hope you can help me.
1. Does the printer come with a pane of glass?
2. How long does it take to set up?
3. Does he have a heating bed?
Thank you!
Timo admin
28. July 2017 13 to: 54
Hi, I'll try to answer your questions, even if we haven't received our test copy yet.
1. A pane of glass is not included (see first unboxing videos). But you can have a slice cut quite cheaply or buy a finished borosilicate glass plate on Amazon.
2. Again, I am referring to videos from others. It takes about an hour to set up.
3. Yes, there is a heatbed.
Helmfried A.
30. July 2017 20 to: 19
Thank you very much for the quick reply. The most important thing to me is that the printer has a heating bed. I'll have the glass sent to me as soon as I have the E10!
Shr0ud
28. July 2017 16 to: 47
Yesterday I watched two hours of test video for the part here. The construction and the calibration are kP even for beginners. What you can argue about are the individual parts used. The aluminum profiles are not solid X-profiles but only T-profiles and the connecting parts are made of ABS. And take a look at the extruder. It sits tight in the guide. You definitely won't get a circular fan attachment on it.
Timo admin
29. July 2017 18 to: 50
Hi you are right What you could see in the first reviews sounds rather disappointing. Compared to the Creality CR-10, the Anet E10 looks sobering. What bothers me above all are the printed brackets and the extruder that doesn't get any airflow. I have no idea what Anet was thinking. If the price levels off at € 200 - okay - but € 250 is definitely too much for that. I'm looking forward to our test copy ...
Pops
21. November 2017 19 to: 39
Hello, is another test planned for the Anet E12? LG
Andrew Hoffman
27. December 2017 09 to: 20
Obviously not!
Unpack, superficial review, done!
I can also complain about a Ferrari because the trunk is too small!
Anyone looking for a "perfect" 3D printer has to take 15000 euros into their hands.
And the Anet uses self-printed axle holders, why not.
They have almost no forces to absorb!
And ALL tuning parts are available for free on the Inet.
Or is your filament too expensive for you?
It is a DIY printer and not a professional device.
Timo admin
27. December 2017 14 to: 58
Hi Andreas, it seems to me as if you have not understood the point of a review. A review is primarily about highlighting the points of criticism of the product. I am not a reviewer who withholds such criticisms from his readers. The Anet E10 is not perfect. You will find the same or similar points of criticism in other reviews. To what extent you improve the 3D printer afterwards is up to you. It's all about what the manufacturer presents to you. And here Anet could have presented a significantly better product without much effort.
If the review is too "superficial" for you, you are of course free to start your own blog and write extensive reviews. If you then dig deeper into the 3D printer for several weeks, you may also notice the points of criticism I mentioned;). At least I still use the E10 and have improved it, but my opinion on the design flaws hasn't changed.
Felix
30. May 2018 19 to: 01
Hi, is there a detailed review of the E12 coming?
Timo admin
1. June 2018 11 to: 46
Hi Felix, unfortunately no test copy of the E12 was made available to us. However, a friend of mine is using the E12 and is so far satisfied with it. There are no design differences to the E10.
Michael
24. June 2018 18 to: 10
Hello, I wanted to use the GearBest Deal with the super price of 24 EUR today on 06/2018/217,49.
Unfortunately, only Warehouse China can currently be selected, plus postage costs of approx. 25 EUR,
The price of the printer alone was 240 and the voucher is not accepted.
Do you have any advice or an updated link for me?