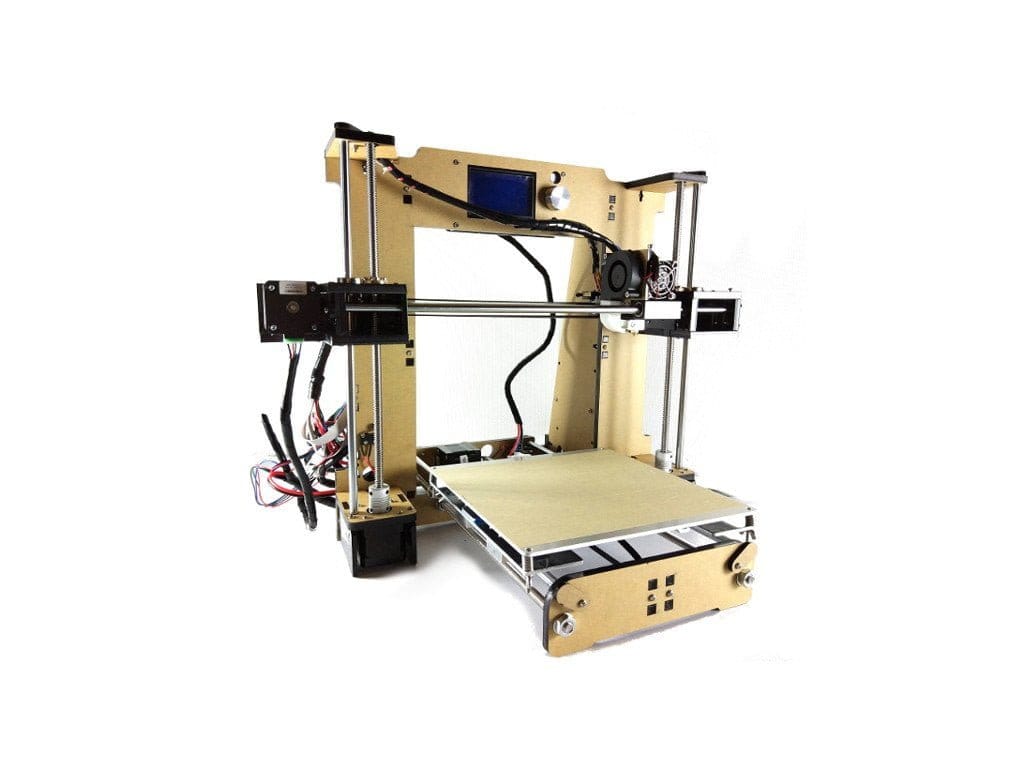
First impression of the Anet A6
Anet is now one of the best-known 3D printer manufacturers from China. In addition to the slightly less well-known "Anet A6", the manufacturer also sells the much more well-known model "Anet A8" as well as other ready-made printers, which, however, are in much higher price categories. This test deals with the Anet A6. First, let's take a closer look at the most important differences between the two inexpensive Anet models.
Anet A6 vs. Anet A8
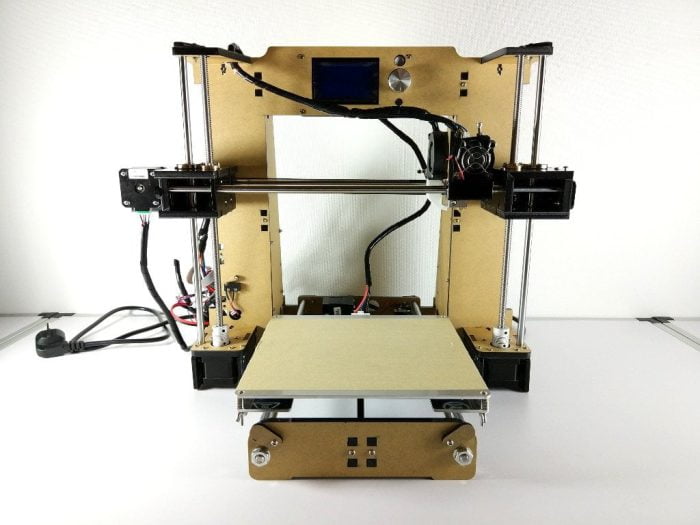
Both models are 3D printer kits that differ mainly in the details. Probably the most relevant difference between the Anet A6 and the Anet A8 is the larger display of the A6 and the one-button control. The display of the Anet A6 shows up to 12864 pixels, whereas the display of the A8 only has 2004 pixels. The Anet A8 is operated via 5 control buttons. The Anet A6, on the other hand, has a one-button operation with rotary control. The mainboard used is now identical in both models.
-
-
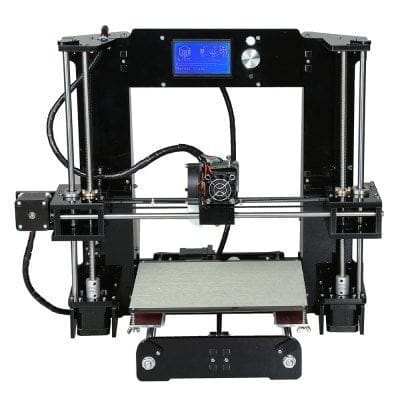
Anet A6
-
-
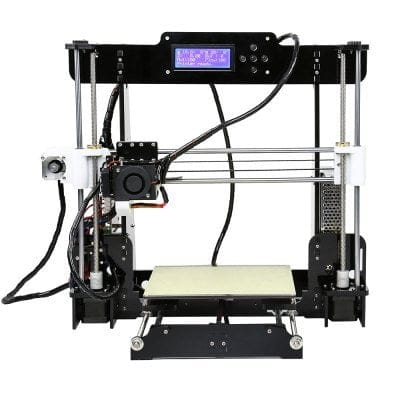
Anet A8
Another difference is the guidance of the X-axis. The A8 has a vertical guide, so both shafts run parallel on top of each other, whereas the shaft guide of the Anet A6 runs horizontally, i.e. next to each other. All brackets of the A6 are made of acrylic. Brackets of the A8 model were partially created using 3D printing. There is another difference in the scope of delivery. The A6 comes with a 500g roll of white PLA filament. This was not done with the Anet A8!
What's in the box
The Anet A6 kit is delivered with all necessary components. In addition to the housing parts, the required screws, belts, shafts, guide rods, etc. are also included. The tools required for assembly are also included in the scope of delivery, so that even those who do not have the appropriate tools at hand can assemble the printer kit without any problems. The manufacturer even includes a 500g roll of white PLA filament with every Anet A6 kit. After assembly, nothing stands in the way of a first attempt at pressure.
Design and workmanship
The Anet A6 was created based on the Prusa design by Josef Prusa and can largely be assigned to the RepRap scene ("Rapid Prototyping and Rapid Manufacturing"). The open source design would make it possible to reproduce the Anet A6 without the finished printer kit.
The processing of the printer is good according to the price. In the tested kit no parts had to be reworked, as well as the parts fit together and screwed. The included steel shafts were straight and could be easily installed. Nevertheless, these DIY Printer Kits from China are always to be treated with caution. The components of our test kit were knotless, but it is not uncommon to catch inaccurate waves, a distorted heatbed or other, badly processed parts!
Hardware
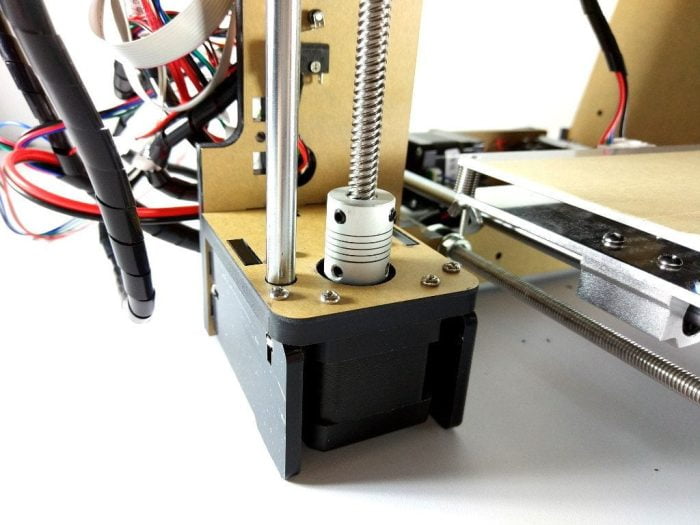
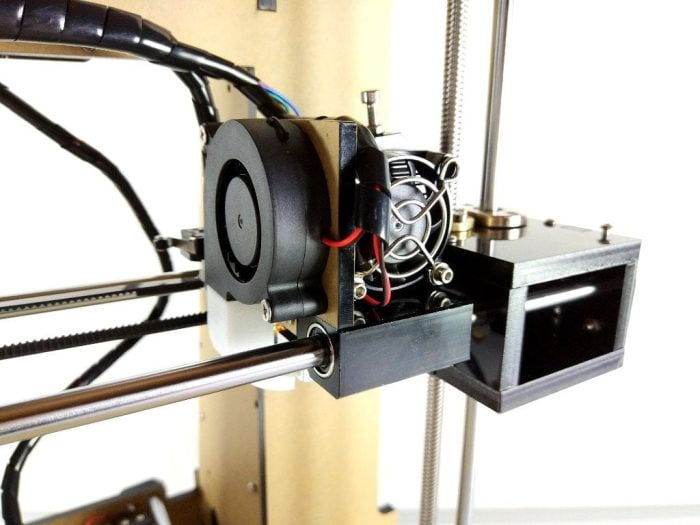
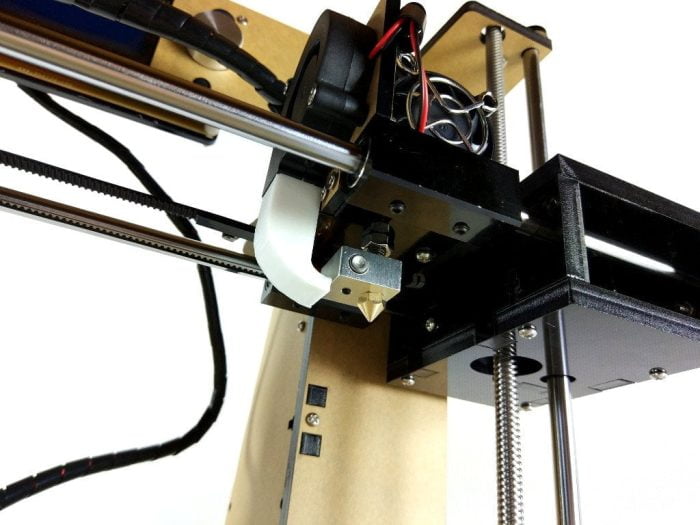
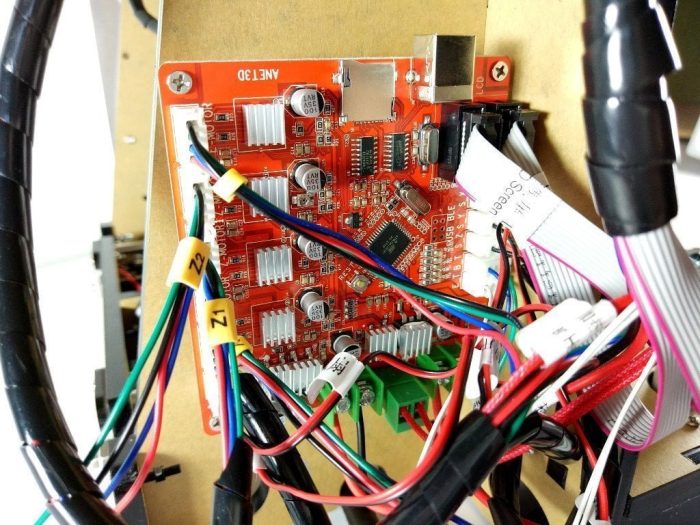
The print space of the Anet A6 measures 220 x 220 x 250 mm. The extruder is of the "Direct Drive" type, in which the extruder is located directly above the hotend and thus leads to an increased weight on the X-axis. The nozzle has a diameter of 0.4 mm. The printable layer height is between 0.1 and 0.2 mm. 1.75 mm filament made of different materials is supported (ABS / PLA / HIPS are mentioned). Anet specifies the accuracy of the X and Y axes as 0.012 mm. The Z-axis is 0.004 mm. The motors used are unspecified NEMA17 stepper motors. The mainboard is of the type Anet V2.0.
Assembly of the Anet A6
Well, where are the instructions? The Anet A6 kit does not come with printed construction instructions. Instead, Anet includes a USB card reader in the form of a stick with a suitable 16GB Micro SD memory card. In addition to the illustrated assembly instructions, the memory card also contains the “Cura” slicer program, the appropriate printer drivers and test files that are tailored to the A6 and can be printed out immediately after assembly.
The instructions provided are mostly illustrated, but it is advisable, especially for beginners, to follow the video instructions on YouTube. The step to the Z end stop was even completely omitted in the illustrated instructions, which would certainly have led to a lot of frustration at the end of the assembly. But you shouldn't rely 1: 1 on the manufacturer's video instructions either. The carrier of the heatbed is mounted the wrong way around in both instructions, which means that the belt does not run parallel.
The assembly of our test copy you can watch in this video.
Calibration of the Anet A6
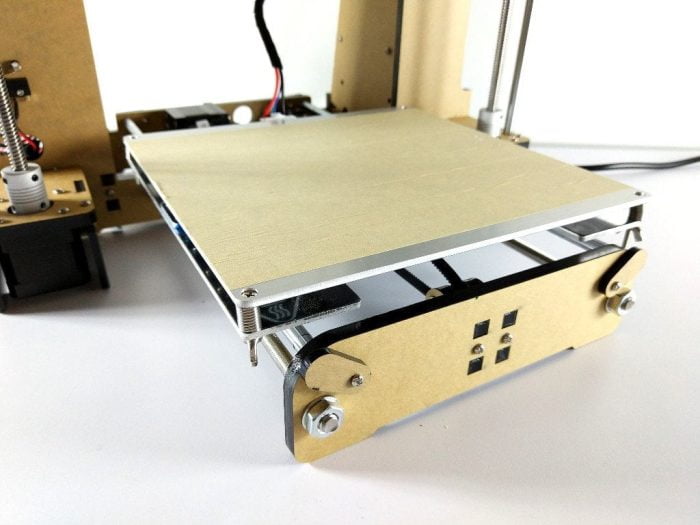
Before you can even start printing, the printer has to be calibrated. The Z and X axes must run parallel, the heat bed of the Y axis must be in the lead and the distance between the nozzle and the heating bed must also be adjusted. The height of the heating bed can be corrected using four threaded screws with wing nuts. The maximum distance to the nozzle should not be more than 0.1 mm. To achieve this distance, take a sheet of paper and place it on the heating bed. If you run the nozzle over it, you should be able to feel a slight pressure on the sheet. All printer belts should be sufficiently tensioned, otherwise the printing results will be inaccurate.
-
-
Another step is to insert the filament. In order to gain initial experience, you can safely use the supplied filament. The filament is fed directly into the extruder. To do this, the metal spring rocker is pressed down and the filament is pushed through the small opening. Then you have to insert the filament past the transport wheel through another opening directly into the nozzle with a little feeling. You can tell whether the filament has been inserted correctly by whether liquid filament is coming out of the nozzle. Of course, you should preheat the nozzle to around 200 ° C beforehand! The filament can be removed by pushing a few centimeters through the preheated nozzle, pressing down the rocker and pulling the filament upwards with a swing.
For a better illustration, here is another video about the calibration of the Anet A6
First pressure tests
If you have carried out the above steps correctly, nothing stands in the way of the first print. For beginners it is advisable to first print the print files provided on the SD card. For printing, the SD memory card is inserted into the corresponding slot on the mainboard. Then you switch on the Anet A6 and select the SD memory card as the print medium. Alternatively, you can also print from a connected computer. A connection between the computer and the printer is established via the USB interface on the mainboard. The required drivers are also located on the SD memory card.
-
-

Once you have started a print job, the heating bed and the nozzle will heat up to the temperature specified in the GCODE file. The current temperature can be read and monitored via the display. The temperature of the heating bed is usually between 50°C and 60°C. The temperature of the nozzle depends on the respective filament. The vast majority of filament manufacturers provide the appropriate printing temperatures. The printing temperatures are also indicated on the included Anet filament. But here too, you have to try it out! During our first printing tests, the heating bed was set to 50°C and the nozzle to 200°C by default. However, we achieved better printing results with the Anet filament at 60°C and 210°C. A recommended first attempt at printing would be the “XYZ Calibration Cube”. This small cube is printed quickly and the accuracy of the print can be measured with a caliper.
Our first printing experiences with the Anet A6 are more than positive. If you observe all the steps for commissioning, the first print attempt can also be successful and provide an accurate result. Compared to much more expensive ready-to-use printers, the print result of the Anet A6 is in no way inferior to this.
You can download a GCODE for the XYZ Calibration Cube tuned to the Anet A6 here: https://www.dropbox.com/s/u5dtx1a989sivrw/AA_xyzCalibration_cube.gcode
CAD and slicer
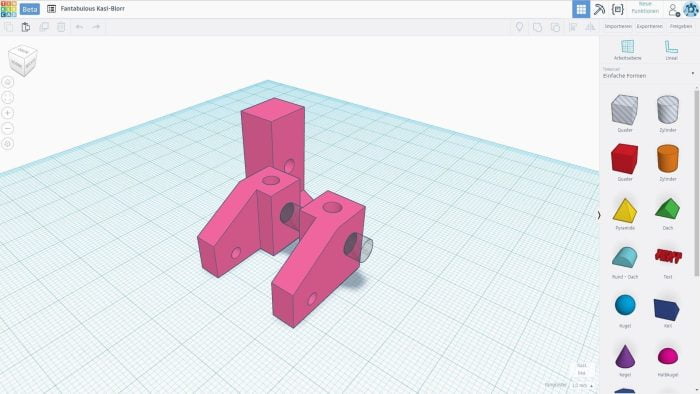
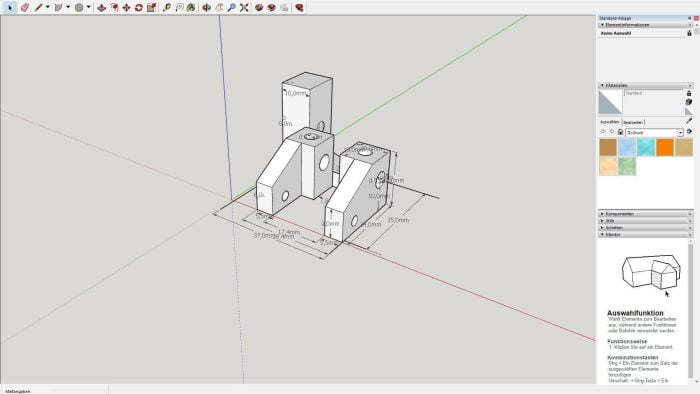
You create your own 3D models using so-called “CAD programs”. One of the most beginner-friendly is "TinkerCAD" , a "browser-based 3D design and modeling tool". Here you can start modeling straight away without even having to download any software and export your finished 3D model as an STL file. Advanced users should take a look "SketchUp" throw. This free 3D program is more complex, but also offers a lot more modeling options.
-
-
TinkerCAD
-
-
SketchUp
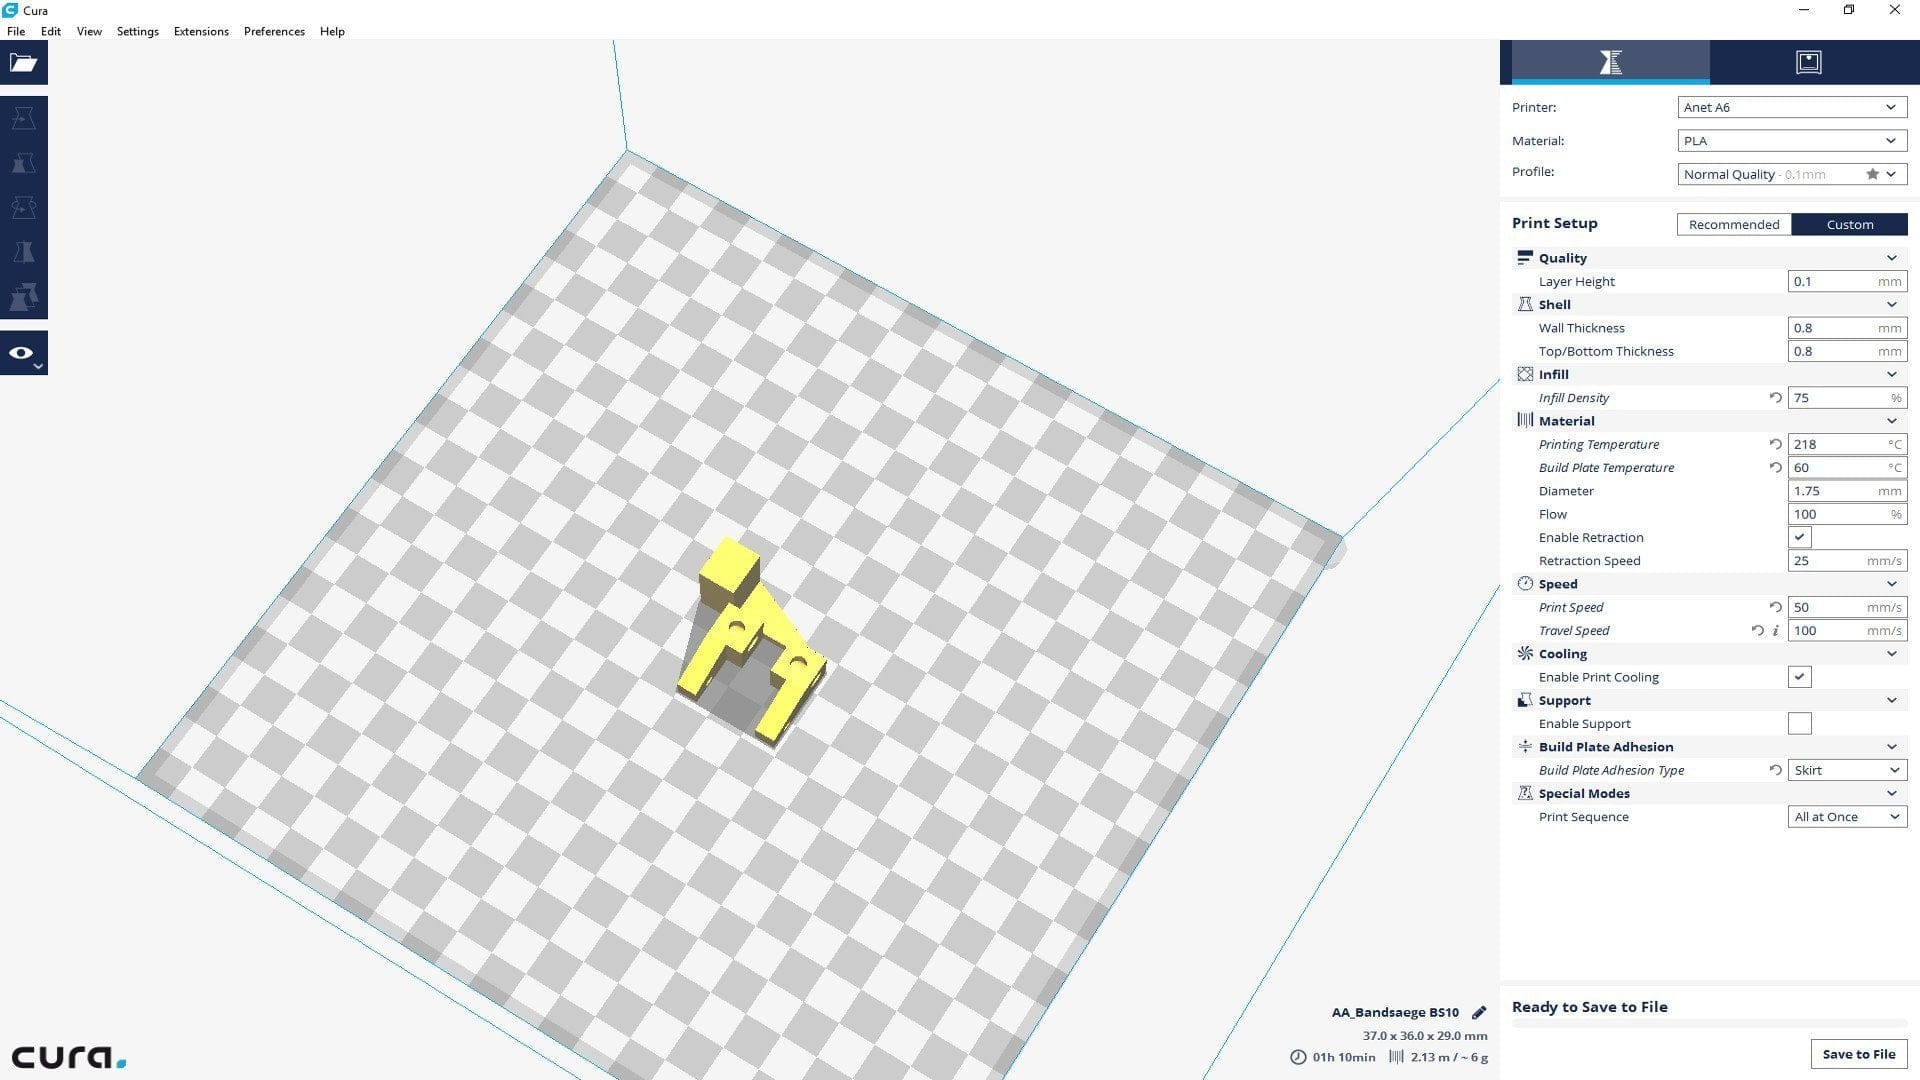
Once you have created a 3D model and saved it in STL format, you need a so-called “slicer program” to create a printable GCODE from it. The most famous freeware 3D slicer is "Cura" , If you have downloaded and installed Cura, you have to create a new 3D printer profile with the appropriate Anet A6 parameters. Beginners can also work on the finished Profile of "maciekish" To fall back on. The 3D model in STL format is now imported into Cura. Numerous print parameters can then be set. In addition to the speeds, the layer height, the infill and other parameters can also be given as GCODE. In addition, you get a preview of how the print will run, what time it will take and how much filament will be used. The GCODE can be exported to the SD memory card or you can print directly via Cura, provided that Cura is connected to the Anet A6 via the USB interface.
Cura3D
Anet A6 improvements
A DIY 3D printer is often an extensive handicraft project in which you like to exchange parts in order to achieve even better printing results. On the one hand, there are printable improvements that are comparatively easy to implement, but there are also extensive modifications that change the former Anet A6 extensively. You can find an overview of possible modifications attached. We have already tested many of the improvements listed here in detail.
Printable improvements
Fan duct (fan): This improvement ensures a uniform cooling of the filament and is one of the most important, printable improvements.
Fan Duct by Paclanc
Y-Belt Tensioner: So that the belt of the Y-axis is always tight, it is advisable to print this belt tensioner.
Y-Belt Tensioner by Photograaf16
X-Belt Tensioner (belt tensioner): Also, the belt of the X-axis should not be loose. A good solution provides this belt tensioner.
X-Belt Tensioner by vernierroger
Table Nut Cover: With this improvement, the heating bed is even easier to calibrate.
Tablet Nut Cover by AndrewUsov
Filament Guide: So that the filament does not get tangled there is this practical filament guide, which leads the filament evenly to the extruder.
Tablet Filament Guide by CanalVap
Replaceable improvements
Igus plain bearings (RJ4JP-01-08): One of our first, non-printable improvements was the replacement of the original ball bearings with the Igus slide bearings RJ4JP-01-08. The all-plastic plain bearings consist of a special iglidur® plastic that is particularly wear-resistant and also self-lubricating. The advantage of the Igus plain bearings compared to the factory-installed LM8UU linear bearings is the reduced volume and freedom from maintenance. To convert to the Igus RJ4JP-01-08 you need a total of 8 such plain bearings, which are available from € 2 per piece.
Igus RJ4JP-01-08 bearings
Igus Precision Aluminum Shaft (AWMP-08): The steel shafts contained in the Anet A6 printer kit are not of particular quality. If you are looking for an inexpensive alternative, it is advisable to take a look at the Igus precision aluminum shafts. These anodized full aluminum shafts are available directly from Igus from € 8.65 per meter. Of course, you can also have the waves cut to the right size. In our test, the X-axis shafts were exchanged for two AWMP-08 and four Igus RJ4JP-01-08. Although the slide slides more difficultly on the X-axis, the reduced volume is clearly noticeable. The print result also feels more accurate.
Igus AWMP-08 waves
GT2 Timing Belt and Washers: A worthwhile improvement is the replacement of the original timing belts and pulleys. Unfortunately, Anet used a very stiff toothed belt, which wears off comparatively quickly with increasing tension. It is also interesting to switch to pulleys with 20 teeth. Pulleys with more teeth allow a higher printing speed. A pulley with fewer teeth, on the other hand, enables a more precise print result. If you change the pulleys and the toothed belt, make sure that the steps are still set correctly.
- 16 teeth: 100 steps / mm
- 20 teeth: 80 steps / mm
- 25 teeth: 64 steps / mm
GT2 timing belt with pulleys
E3D-V6 Bowden: It is also interesting to convert the direct extruder to the E3D-V6 Bowden extruder. The advantage of a Bowden conversion is the lower weight on the X-axis, which means that more accurate prints can be achieved at higher printing speeds. At the same time, however, the distance between the extruder and the nozzle is increased, which means that very soft filaments in particular are very difficult to print with a Bowden set-up. If you would like to change, we recommend an E3D-V6 Bowden extruder replica, which is available from € 7. Of course, the X-axis slide must also be converted to Bowden accordingly. A very good design with a nice name "Frankenstein" is available on thingiverse.
E3D-V6 Bowden extruder
Inductive / capacitive proximity sensor: Constantly reorienting the heatbed can quickly become frustrating in the long run. A capacitive or inductive proximity sensor, which replaces the Z end stop, can help. The proximity sensor is attached directly to the extruder carriage. It is then no longer necessary to manually correct the distance between the nozzle and the heatbed. However, in order for such an "autolevel" conversion to be successful, a different firmware must be flashed onto the mainboard of the Anet A6. The most well-known alternative firmware for the Anet A6 and Anet A8 printer series is the so-called "SkyNet 3D" Firmware. There are also a few things to consider when it comes to the sensors themselves. The best way to choose a capacitive sensor is to print on a glass surface, as an inductive sensor does not recognize glass. An inductive sensor, on the other hand, usually works more precisely, but mainly detects metallic objects. You should also pay attention to the voltage with which the proximity switch is operated. Most of the time, the sensors are operated with 6 to 36 volts. Individual sensors can also be operated with just 5 volts, but measurement errors are not uncommon. So that the sensor is correctly recognized by the Anet mainboard, it is advisable to put an optocoupler in between so that no residual voltage remains when switching.
LJC18A3-HZ / BX (Capacitive)
LJ18A3-8-Z / BX (Inductive)
Glass plate as printing surface: If the filament doesn't want to hold properly, or if you don't have to constantly change the blue tape, we recommend switching to glass as the printing surface. A suitable pane of glass (215 x 215 mm) can be cut to size at most specialist dealers. Alternatively, you can buy a borosilicate glass plate that has already been cut to size. The advantage of glass is the very good hold, that it is easy to clean and that you get a very smooth print result. If the print does not adhere directly to the glass, you can help with a little hairspray, which creates a better floor structure. If the filament does not adhere even then, it helps to cover the glass surface with a thin layer of UHU-Stic. Every filament that is difficult to adhere is guaranteed to hold!
Borosilicate glass plate