First steps with the GOAT G1
Prime Day offer
On the occasion of Prime Day on Amazon, ECOVACS has reduced the price of its GOAT G1 robotic lawnmower. Instead of the non-binding retail price of 1.599 euros, the device is now available for 1.399 euros.
To the Amazon offer
Unpacking the GOAT G1
“The mail is here!” - I would have liked this sentence. Instead, the GOAT G1 was only delivered to my driveway. The postman simply had no strength or desire to lift the 30 kg package to the front door.
Only Michael Ballack, brand ambassador of the GOAT G1, who is clearly visible on the packaging, could grin.
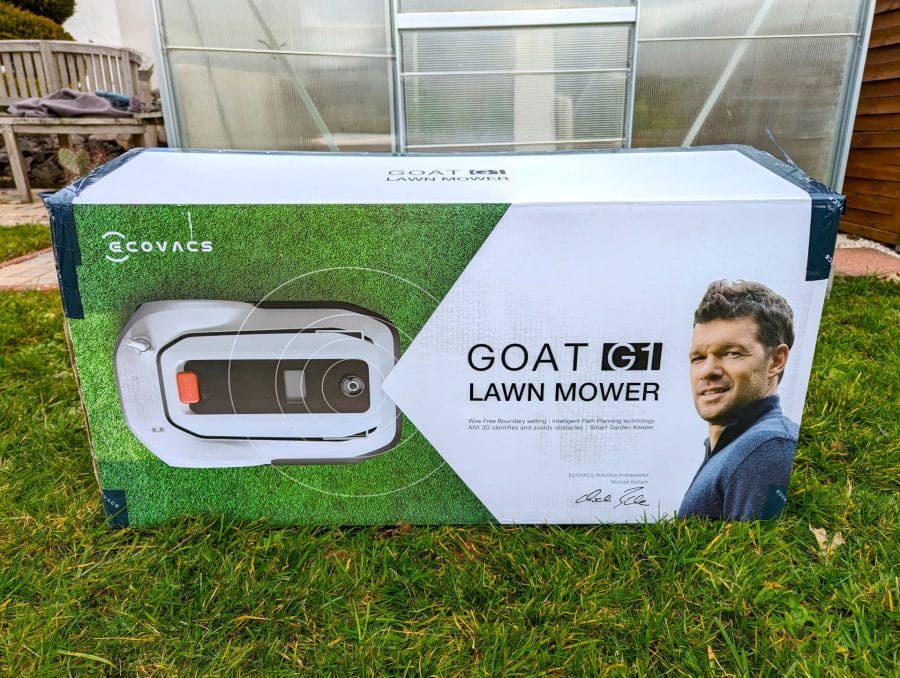
Big, heavy and with Michael Ballack as brand ambassador.
Arriving in the garden, we immediately started unpacking the huge package. First you are greeted by a huge short guide that explains the first preparation steps in German, English and French.
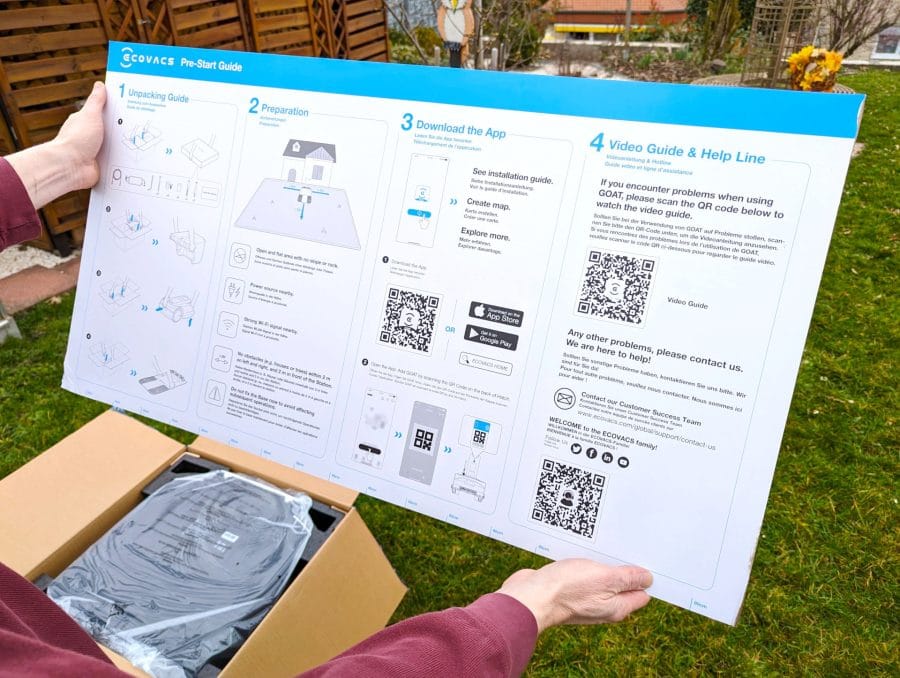
With the quick start guide, you can find your way around straight away.
Little by little I unpack the box and take out a box with accessories, the upper part of the charging station, the robotic lawnmower and finally the base plate of the charging station. All parts are packed in an orderly manner and safe for transport. However, a lot of packaging material remains.
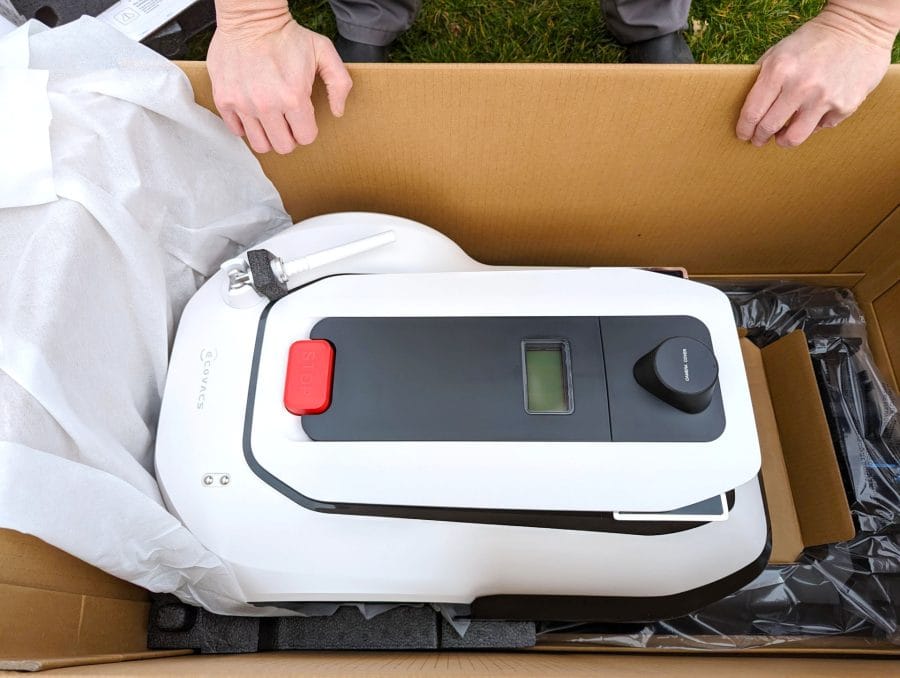
We are getting closer and closer to the robot lawn mower!
The box with accessories contains, among other things, two navigation beacons with which the GOAT G1 can find its way on the lawn. Depending on the shape and size of the lawn, you need a different number of beacons. With the two included beacons you can cover a single lawn with a side length of up to 45 meters.
Gardens with longer sides or gardens in a U, L or O shape require additional beacons, which are available for 99 euros each (RRP). Up to 10 beacons can be linked to a single GOAT G1. ECOVACS has published the following graphic so that you know before you buy how many beacons you will need.
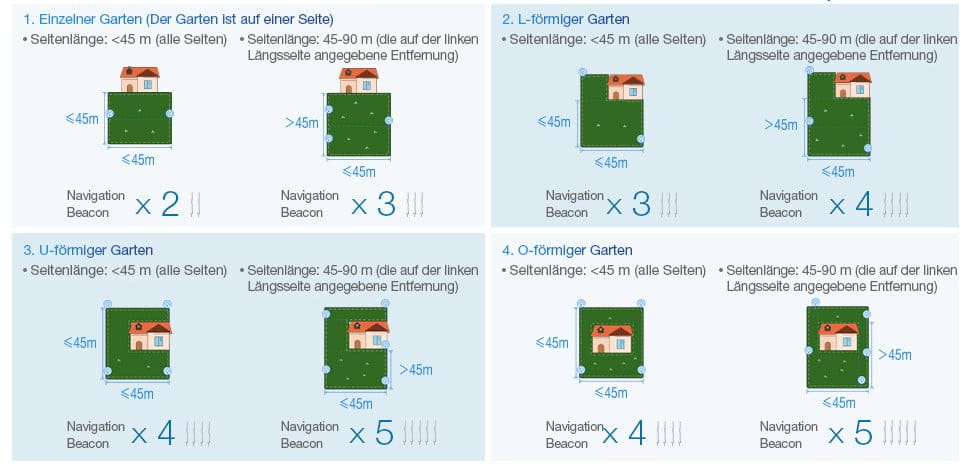
This graph will help figure out how many beacons are needed.
In addition, the accessory pack contains 6 Mono D (LR20) 1,5V batteries for the beacons, a set of stickers to decorate the beacons, the power supply unit for the charging station and a corresponding extension cable with a cable length of 10 meters, 9 spare blades, 8 ground anchors for the base plate of the charging station, an Allen key and a multilingual user manual.
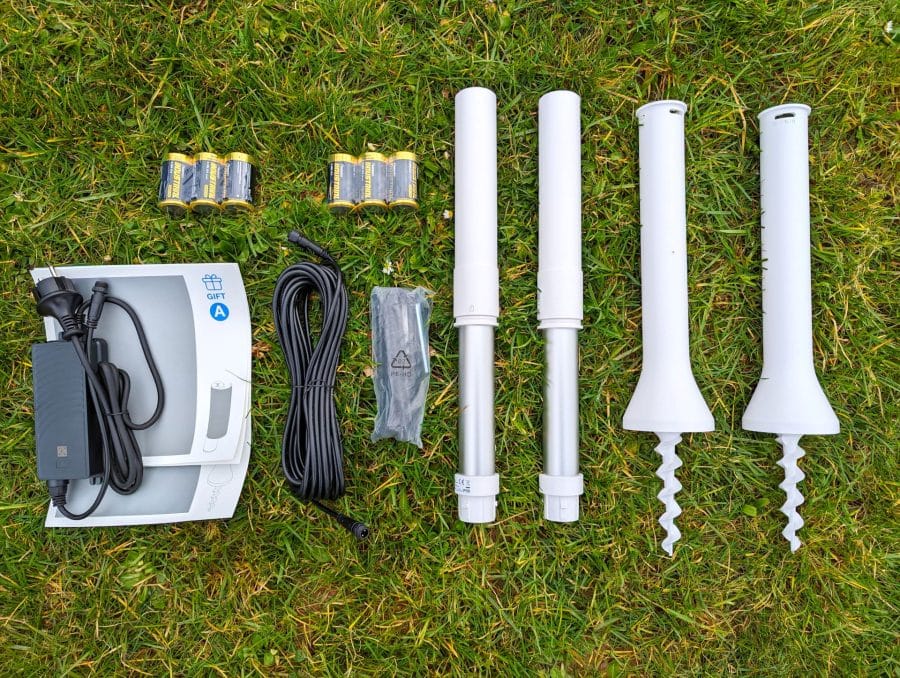
The complete contents of the accessory pack.
The aforementioned beacons (99 euros RRP), a cellular module (99 euros RRP) and an auto-connection module (249 euros RRP) are available separately.
The difference between the cellular module and the more expensive auto-connection module is that the latter already has an activated eSIM integrated and you don't have to insert your own cellular card. A set of 12 replacement knives costs 15 euros (RRP). Changing the blades is necessary after about 80 hours of mowing.
Setting up the GOAT G1
Installation of the charging station
The multilingual user manual explains the setup of the GOAT G1 in great detail. The assembly of the station made the beginning.
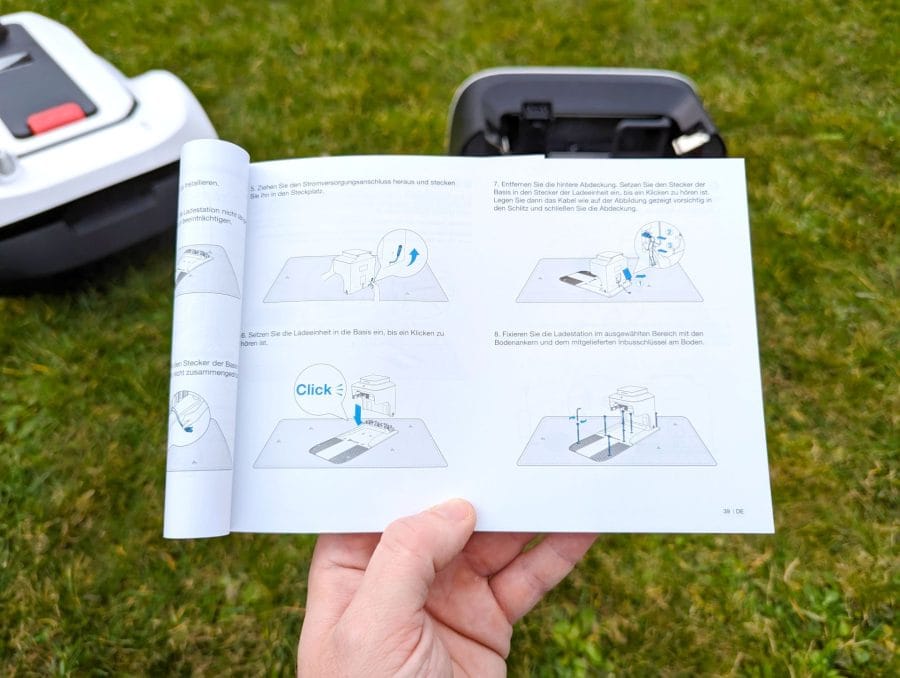
Text and images guide you through the individual steps.
The upper part of the charging station is placed on the base plate so that it snaps into place. Now connect the cable to both parts and the station is ready to be placed on the lawn. When placing, it must be ensured that there is a distance of at least 2 meters to obstacles to the left and right of the station.
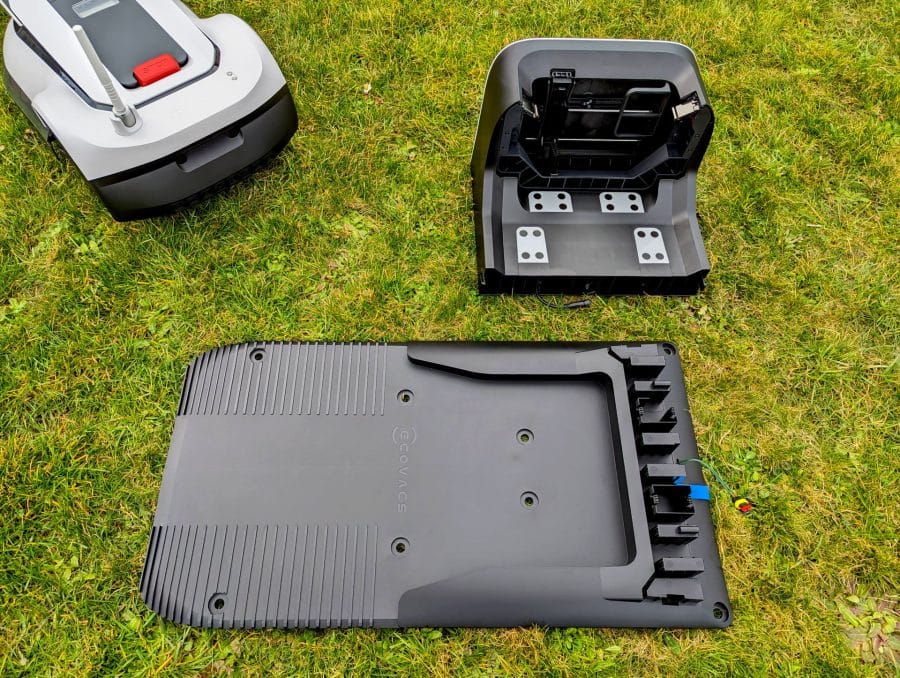
Both parts of the station are simply plugged together.
You should also place the station within WLAN range, because the robotic lawnmower can only be set up with an active Internet connection. As an alternative to the home WLAN, there is the previously mentioned cellular module that brings the GOAT G1 to the Internet. The module is installed on the underside of the robotic lawnmower.
ECOVACS has probably not integrated the module into the robotic lawnmower as standard for reasons of cost, but this would have been appropriate given the price of 1.500 euros (RRP). Anyone who has neither WLAN in the garden nor a mobile phone module installed can also set up a hotspot with their smartphone and use it to connect the robotic lawnmower to the Internet. More on that later.
Once you have found the ideal position for the station, attach the base plate to the lawn with the 8 ground hooks. To do this, you either use the supplied Allen key or you can make the work easier by using a cordless screwdriver.
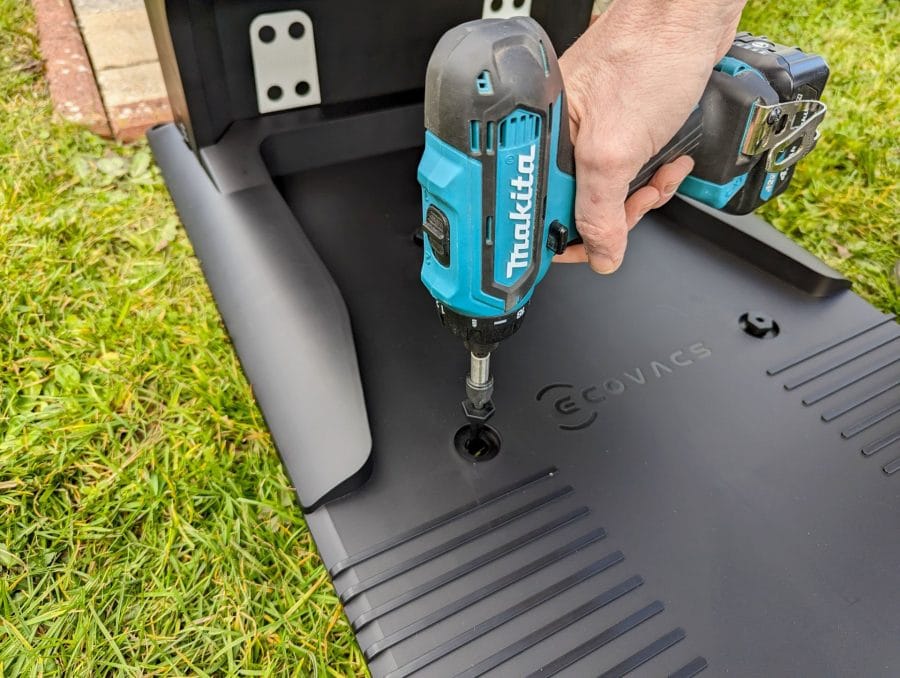
The floor hooks are much easier to tighten with a cordless screwdriver.
The station is then connected to the power supply, which did not cause any problems due to the length of the extension cable supplied. The connections between the power supply, extension cable and charging station are secured with a screw thread so that nothing comes loose and no water can penetrate.
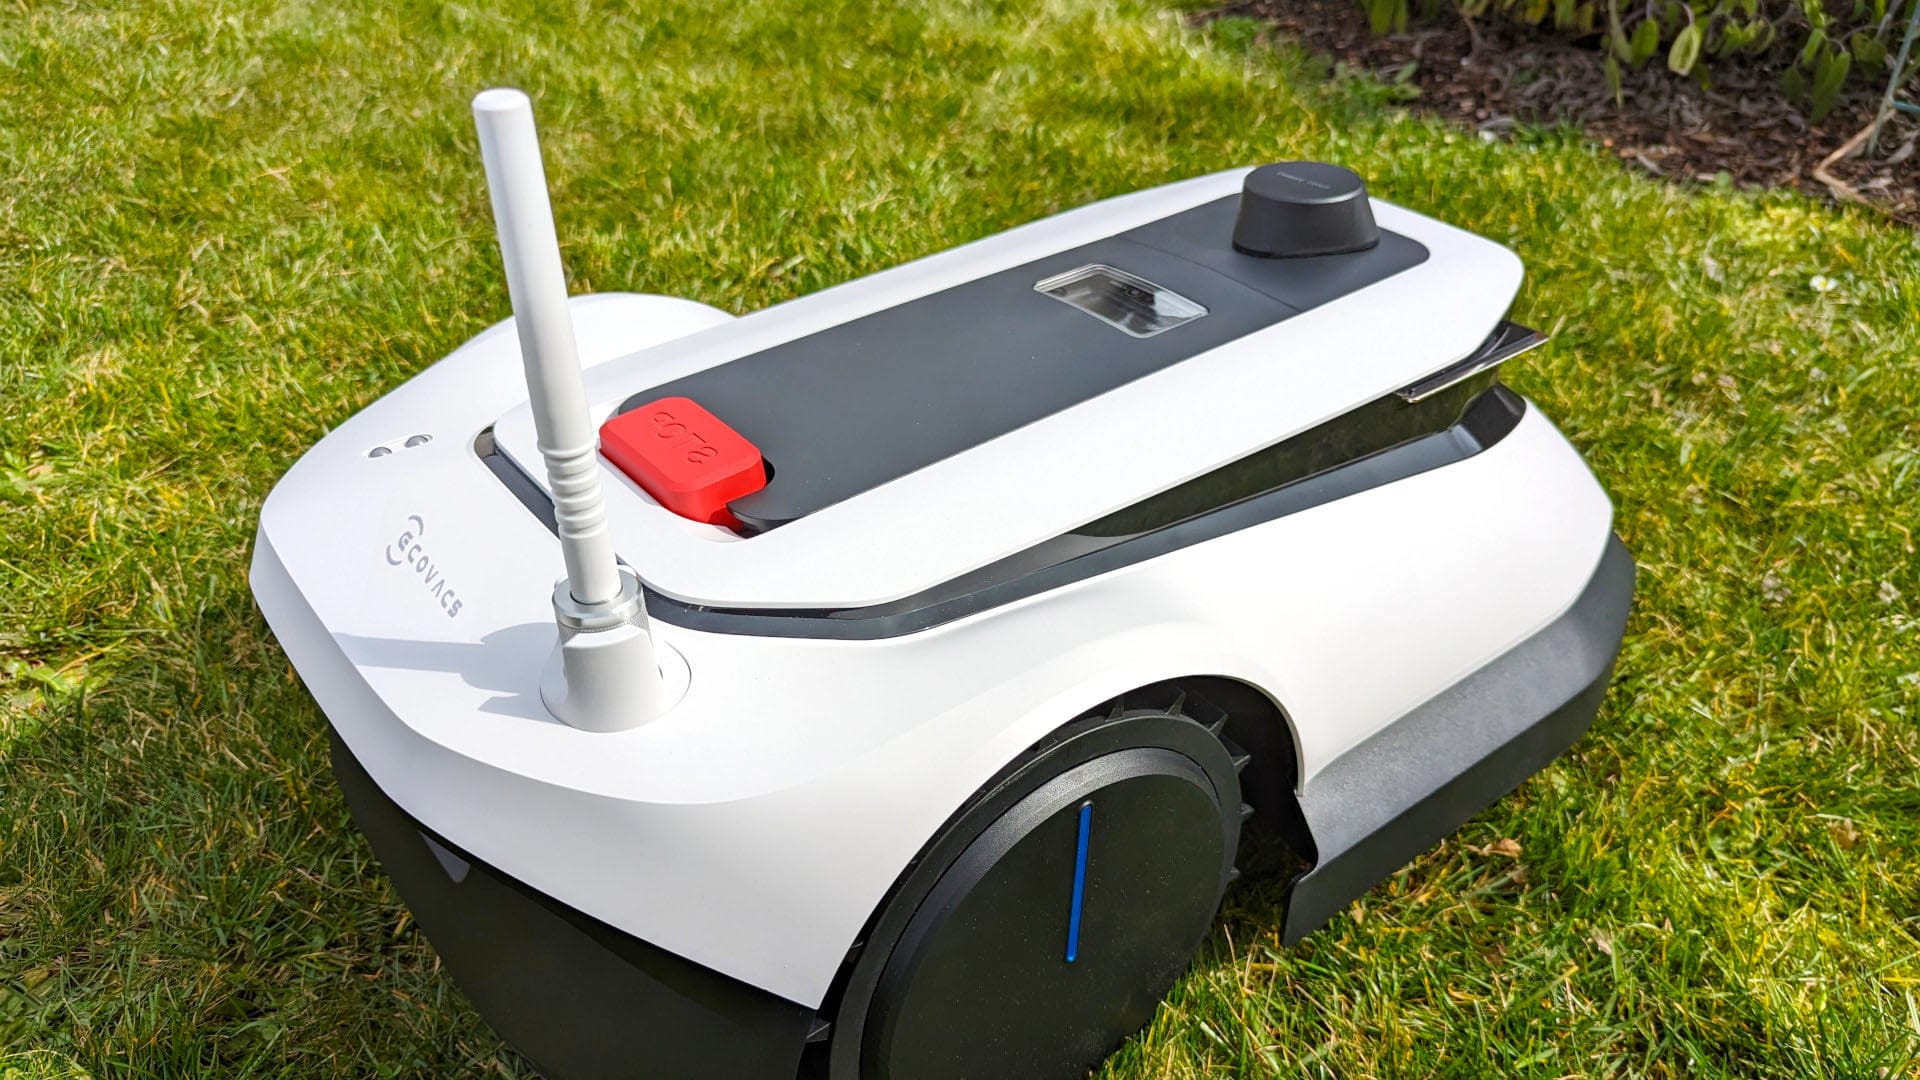
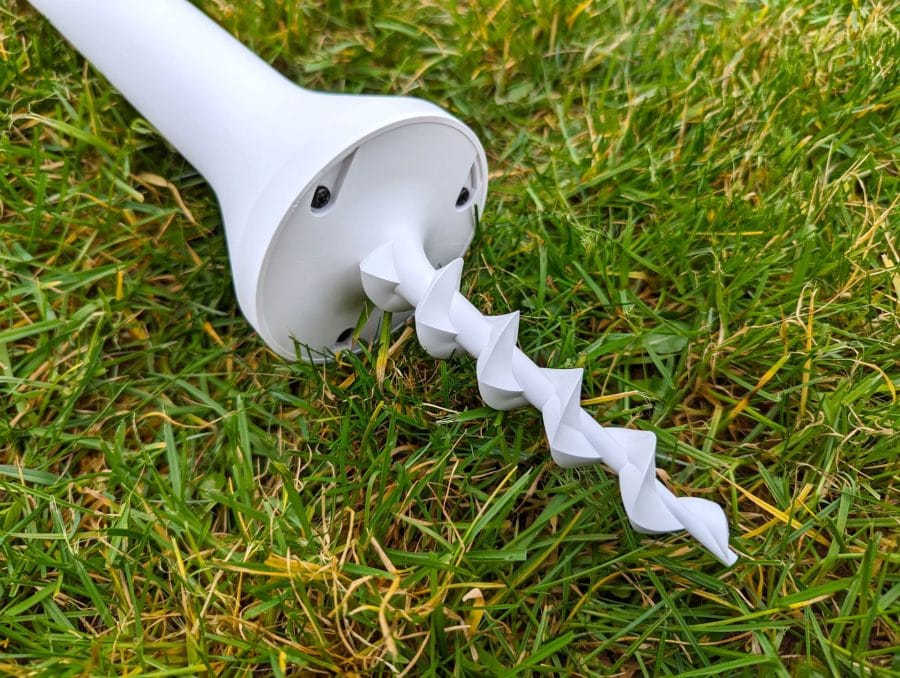
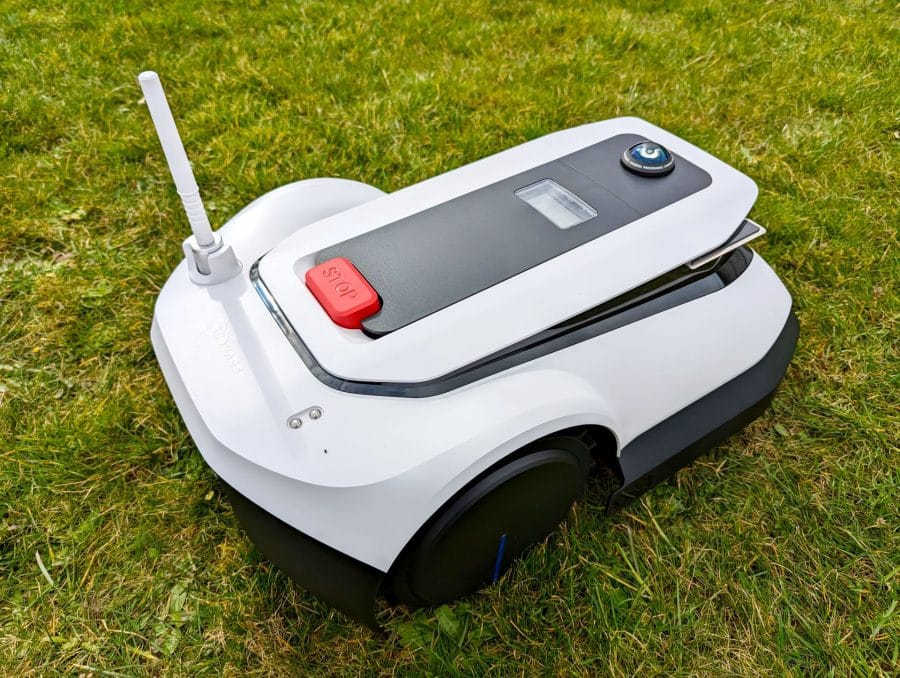
The station is now installed and the GOAT G1 can be placed on it for charging. Before doing so, fold up the antenna of the robotic lawnmower and pull off the protective cover of the panorama camera. A blue indicator light on the station shows whether the robotic lawnmower has been placed correctly on the charging contacts.
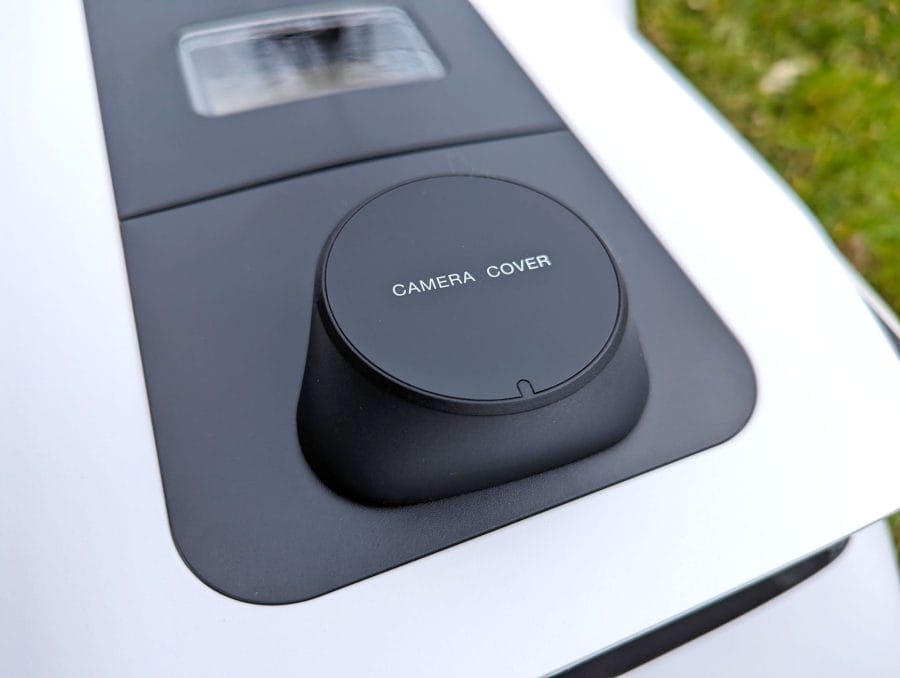
The protective cover must be removed so that the robotic lawnmower can see something.
When setting up for the first time, you will then be asked to select the language and set a four-digit PIN for theft protection. To do this, simply open the cover on the top of the GOAT G1. Below this is a display (LCD) and several control buttons.
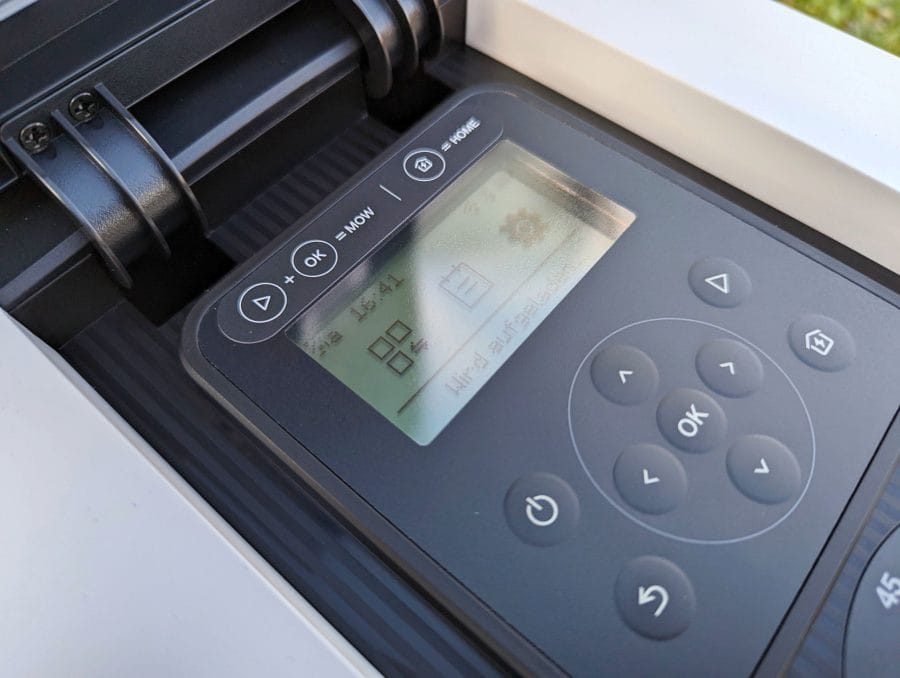
The display and control buttons are located under the flap.
Installation of the beacons
The next step is to install the ECOVACS app on your smartphone/tablet or you have already installed it if you already have another ECOVACS product. The app is mandatory for further setup. It is available for download in the Google Play Store and the Apple App Store.
The instructions of the app are very easy to follow. You first scan the QR code of the robotic lawnmower with the smartphone camera, then connect via Bluetooth and finally transfer the WiFi data so that the GOAT G1 is connected to the network. This worked right away in the test.
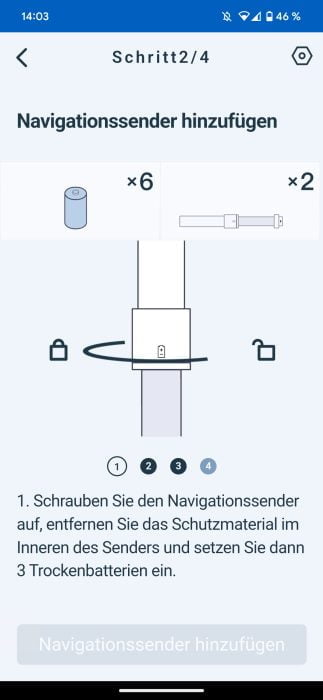
The app then guides you through the assembly and placement of the navigation beacons. According to ECOVACS, 3 Mono D (LR20) 1,5V batteries each supply the beacons with electricity for up to one year. Whether that's true will be seen in the summer.
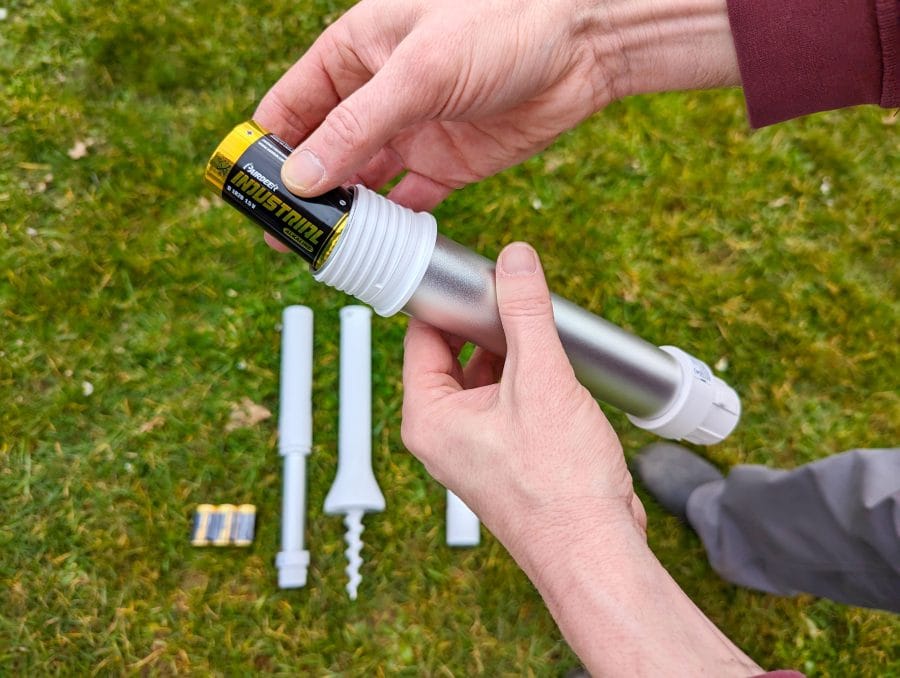
We insert the batteries into the battery compartment of the beacon.
When the beacon is screwed together, a short beep sounds to confirm that everything has been done correctly. Then you turn the assembled beacons on the lawn edges in the lawn. This is much easier than laying a cable and can be done in just a few minutes.
-
-
screw the beacons together.
-

-
Scan the QR code on the beacons.
-

-
Place beacons according to garden shape.
The beacons communicate wirelessly on UWB CH9 (7987.2 GHz) . The beacons may have a maximum distance of 45 meters from each other and should not be covered by obstacles to ensure visual contact. Otherwise there may be interference in the radio coverage and further setup will fail.
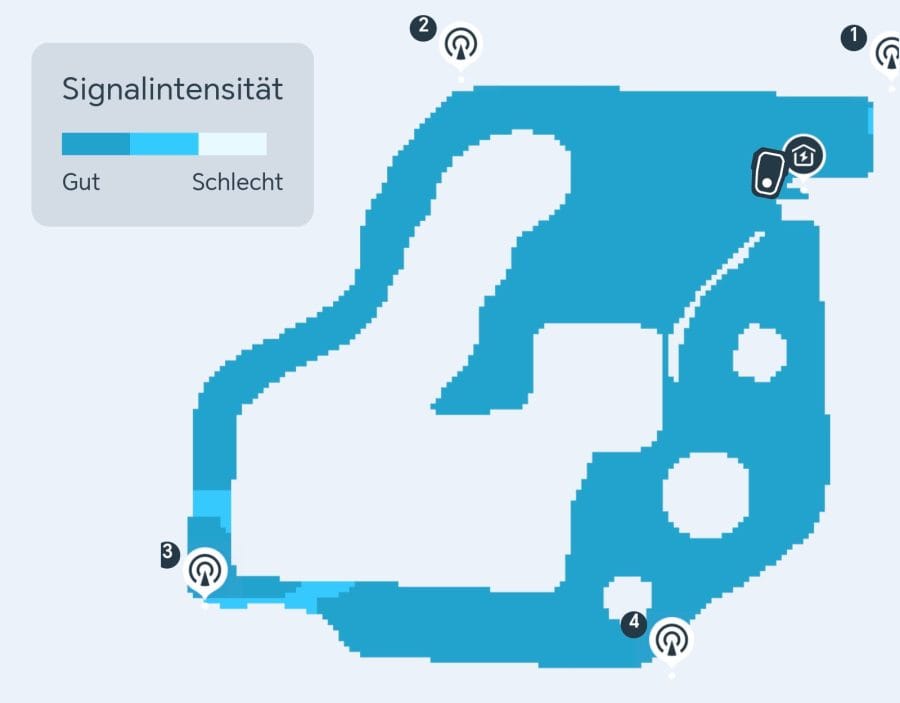
Map with transmission power of the beacons.
Sounds complicated, but it is not. The app helps with placement and shows precisely which beacon is not in signal range. In the test I placed 4 beacons, which were recognized immediately on the first try.

When assembled, the beacons are one meter long.
The design of the beacons is debatable. Anchored in the ground, the beacons protrude a good 76 centimeters from the ground and are therefore clearly visible. Including the screw thread, it is even 88,5 centimeters. My curious neighbors quickly became aware of the beacons and promptly asked which new garden gadget they were currently testing.
This screw thread holds the beacon securely in the ground.
ECOVACS has also given some thought to the beacons and has supplied several adhesive foils with which the bright white plastic can be somewhat hidden. Other adhesive foils, including those with a stone pattern, will soon be available.
Speaking of white plastic. The robotic lawnmower and the charging station do not miss out either. The plastic is of the high-quality and durable variety, but the matte plastic surface gets dirty pretty quickly.
After a short time, one of the beacons got an unsightly patch of clay and the robotic lawnmower was not spared from grass stains either. It will also have to be shown how weather-resistant the plastic is in the long term.
map creation
Next, the GOAT G1 needs to familiarize itself with the lawn. The ECOVACS app also explains this step in detail. With a virtual joystick you move the GOAT G1 along the lawn borders. This also works really well, because the GOAT G1 reacts to the controls without delay and is agile.
After 10 minutes, an exact map of the 98 square meter lawn was created in the test. Then you have to create the forbidden zones. This means, for example, pools, garden furniture or beds that the robotic lawnmower should not drive over or touch. The obstacle detection of the GOAT G1 automatically detects trees or posts.
-
-
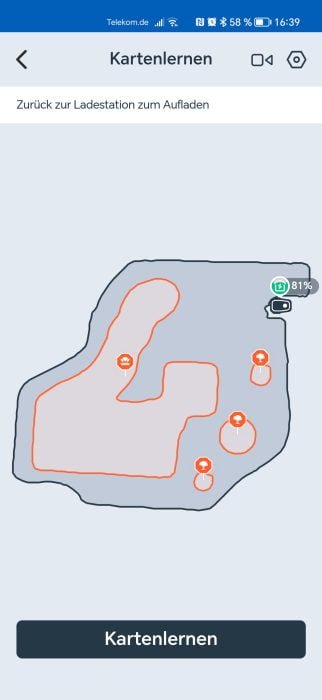
Automatic map learning teaches the robotic lawnmower the map.
-

-
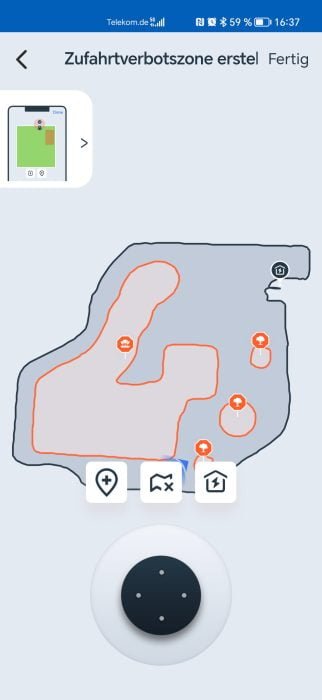
This is what the finished map looks like in the app.
-
-
The borders of the forbidden zones are driven along with the joystick.
You can use the virtual joystick to move the robotic lawnmower along the boundaries of the restricted area. Now drive the robotic lawnmower back to the station and press the “Home” button to create the map.
You can delete cards or refine them later using the “card learning” function. During map optimization, the robotic lawnmower moves on the lawn without mowing. Prohibited zones can also be deleted or recreated later. Saving multiple cards is currently not possible, but will be added as an update soon.
Mowing with the GOAT G1
In March the weather was not yet ideal for mowing the lawn. The first weeks of spring on the damp lawn were a real endurance test for the GOAT G1.
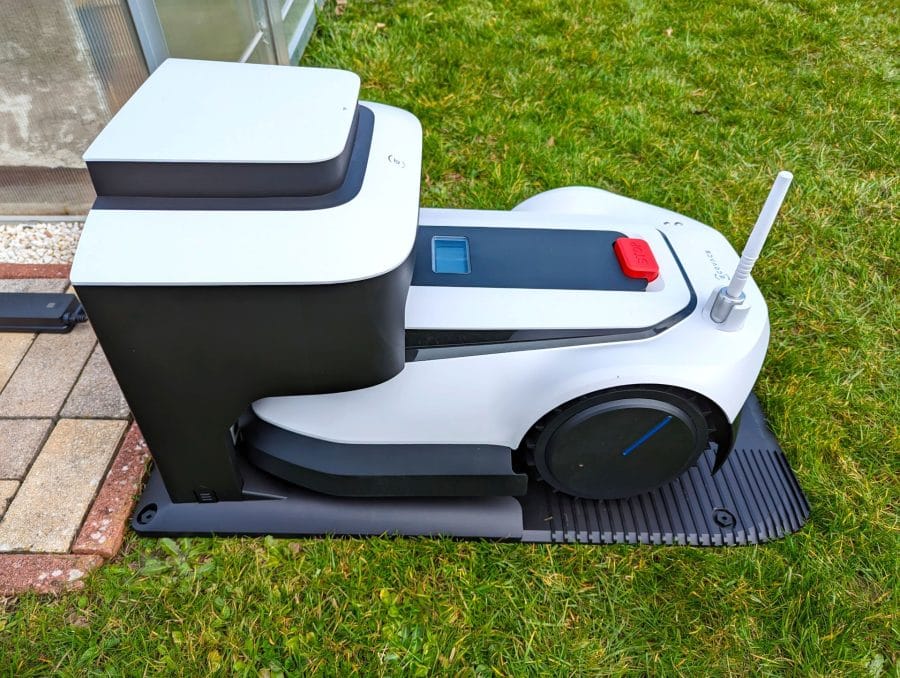
The GOAT G1 is docked to the charging station.
cutting height
Before you send off the robotic lawnmower, you have to trim the lawn to at least 10 centimeters. The GOAT G1 then keeps the lawn constantly low. The cutting height can be adjusted in 2,5 millimeter increments using a rotary control on the robotic lawnmower.
Adjusting the cutting height via the app would certainly have been “smarter”, but most of the time you just leave it at one setting. A minimum of 3 centimeters can be adjusted, the maximum length is 6 centimeters.
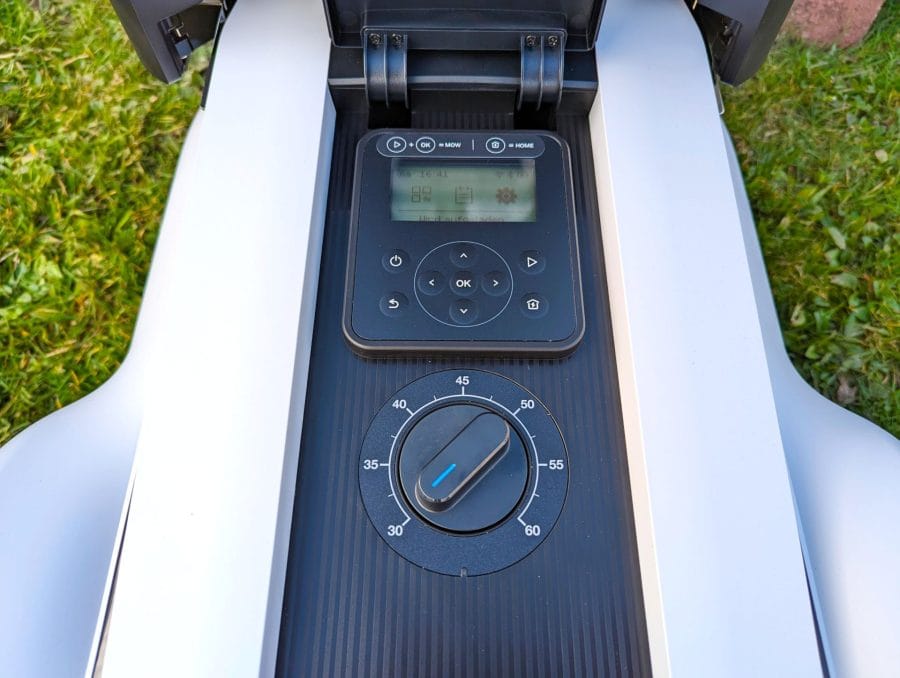
The cutting height is set using a rotary control.
mowing behaviour
The GOAT G1 mastered the subsequent mowing pass well. The robotic lawnmower does not drive around aimlessly, but mows in even tracks. He does it so quietly that you hardly notice him. The small amounts of lawn clippings simply remain as fertilizer.
The GOAT G1 moves across the meadow at a good pace.
However, there was a problem at one point on the test turf. As soon as the lawn section is less than 1,5 meters wide, the robotic lawnmower cannot cross it.
This is particularly problematic in narrow corridors between several lawn sections if the passage is limited on the left and right by a wall or something similar. In general, the GOAT G1 struggles with lawn edges just as much as other robotic lawnmowers. The 3 blades are in the middle, so that the robotic lawnmower does not reach the edge of the lawn due to its design.
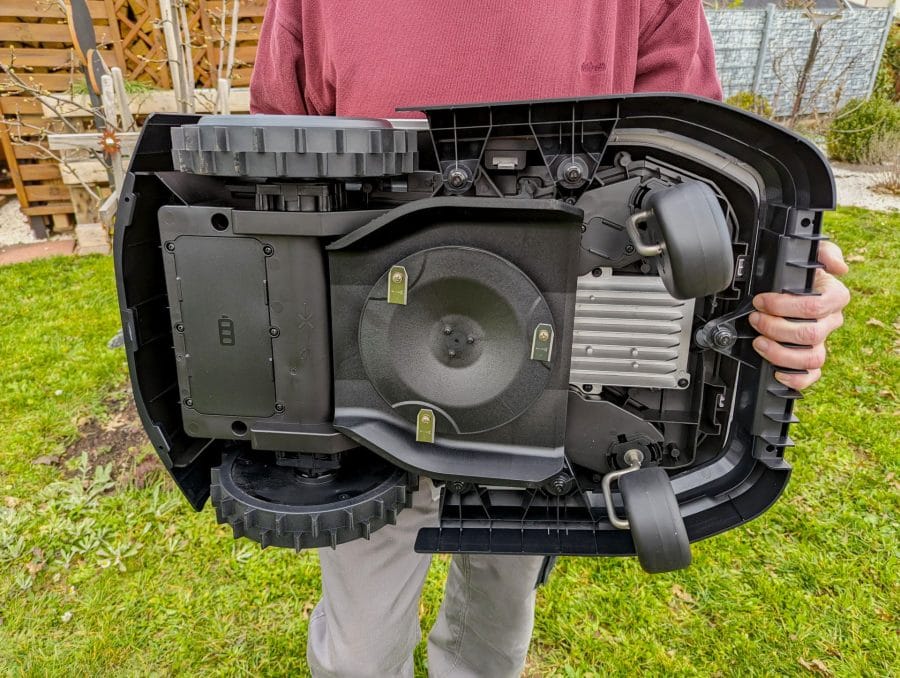
The 3 knives are in the middle. At the back is the cover for the cellular module.
In contrast to the robotic lawnmower with a boundary wire, you can simply steer the GOAT G1 a little beyond the edge of the lawn when creating a map. Then the 22 centimeter wide cutting surface also takes the lawn edges along nicely, but this “trick” only works on flat, obstacle-free lawn edges. The robotic lawnmower maintains a distance of approx. 10 centimeters from obstacles or prohibited zones, which inevitably makes it necessary to reach for the edge cutter.
The GOAT G1 copes well with inclines, declines or an uneven lawn. In the test, the drive had enough power to tackle a slope with a gradient of 25 percent. According to ECOVACS, inclines of up to 45 percent are not a problem.
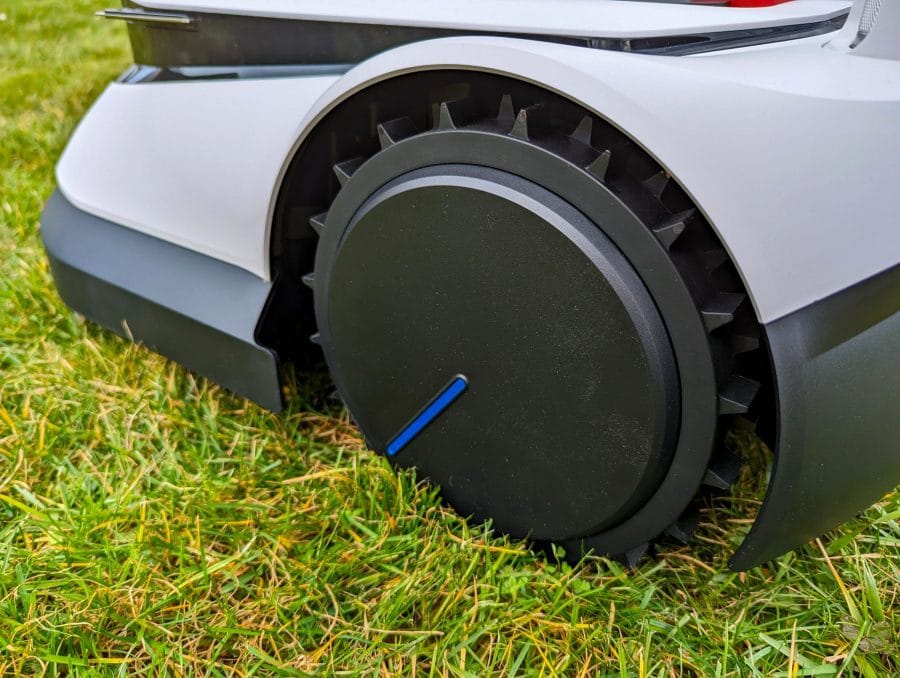
With its drive wheels, the GOAT G1 masters inclines of up to 45 percent.
area and duration
According to ECOVACS, the robotic lawnmower is able to mow around 600 square meters of lawn in one day. The GOAT G98 mowed my 1 square meter lawn in just under 30 minutes, which in turn cost 30 percent of the battery.
At the end of the mowing process, GOAT G1 automatically returns to the charging station. It does the same if the battery drops to 15 percent while mowing. Then it drives back, charges up to 80 percent and continues where it was paused.
The GOAT G1 found the station reliably, even if it didn't always choose the shortest route. Charging the battery takes up to 2,5 hours, depending on the battery level.
Safety features of the GOAT G1
The GOAT G1 is equipped with a whole range of different safety features.
Camera system
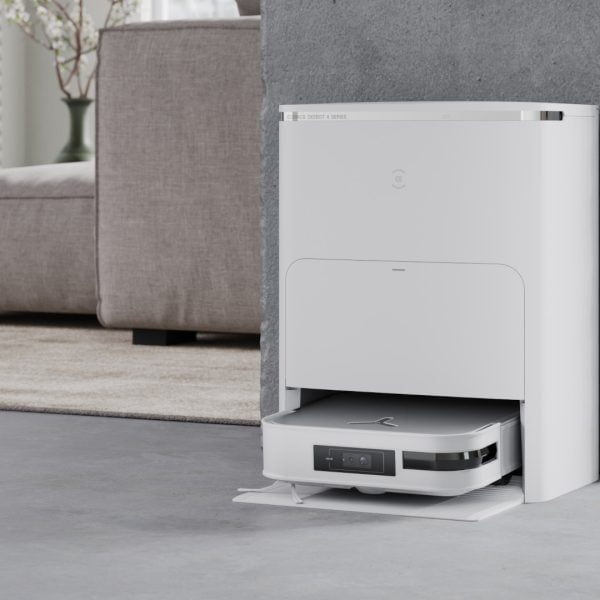
With the help of the AIVI camera system (panorama camera, AI camera and ToF sensor), the robotic lawnmower keeps an eye on its surroundings. ECOVACS already uses a very similar system for its vacuum robot models, e.g. B. dem ECOVAC'S DEEBOT X1 OMNI. The robotic lawnmower generously avoided people, animals and objects lying around in the test.
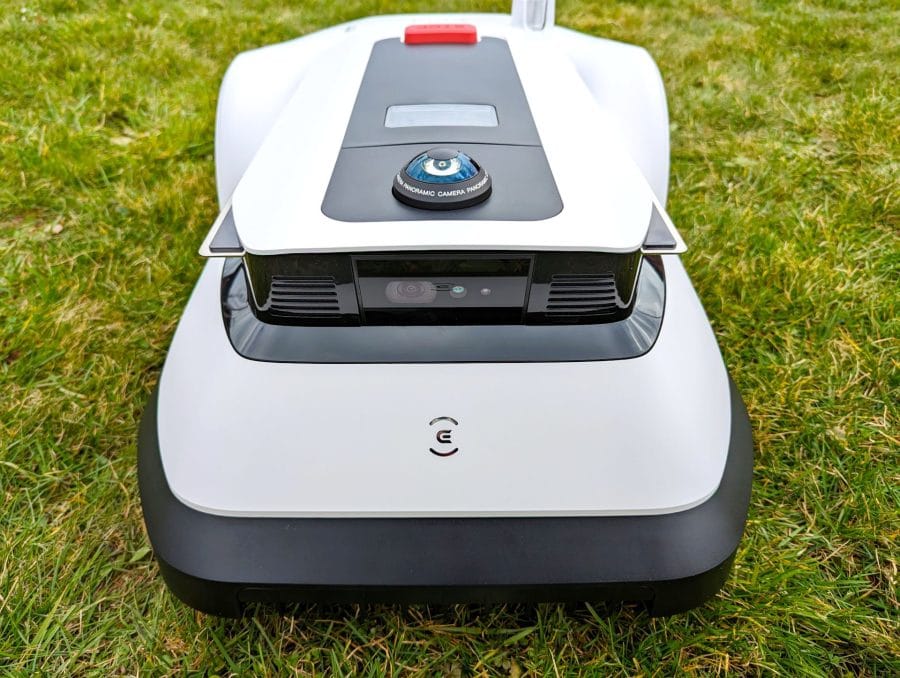
The cameras of the GOAT G1 capture people, animals and obstacles.
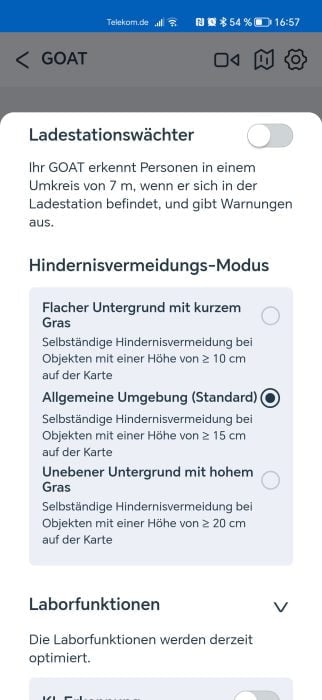
From which object height the obstacle avoidance becomes effective can be set in 3 levels (> 10 cm, > 15 cm and > 20 cm) in the app.
The 360° fisheye or panorama camera is located at the top. But the camera system can do more than just detect obstacles. The live image of the 360° panorama camera can be accessed via the app. To do this, the robotic lawnmower must be connected to the Internet.
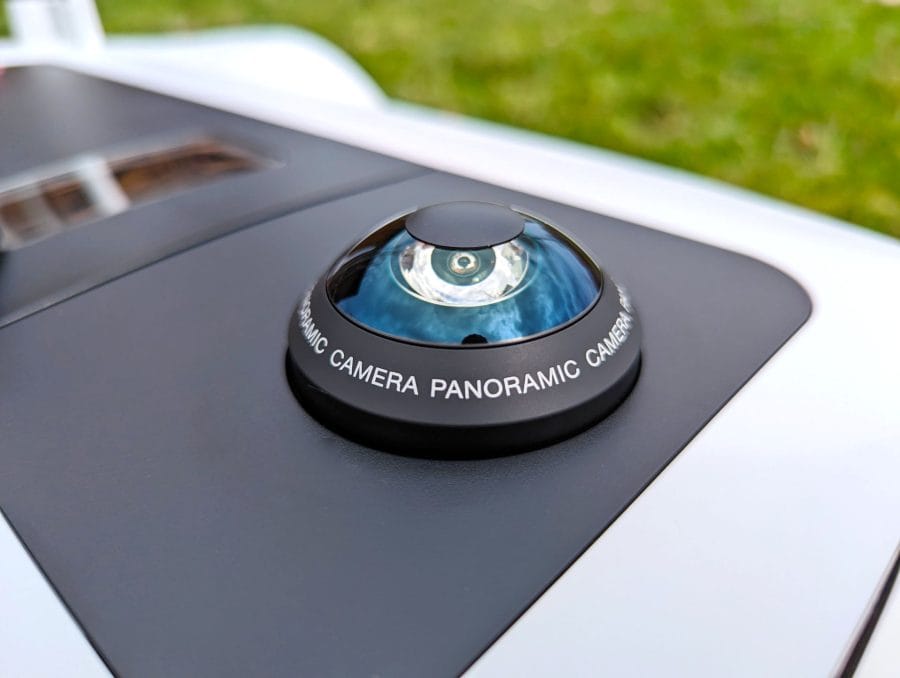
The 360° fisheye or panorama camera is located at the top.
The image quality isn't the best, but it's enough to just check things out in the garden. With the “Spot monitoring” function, the robotic lawnmower automatically travels to observation points. Camera recordings can be saved locally on the smartphone.
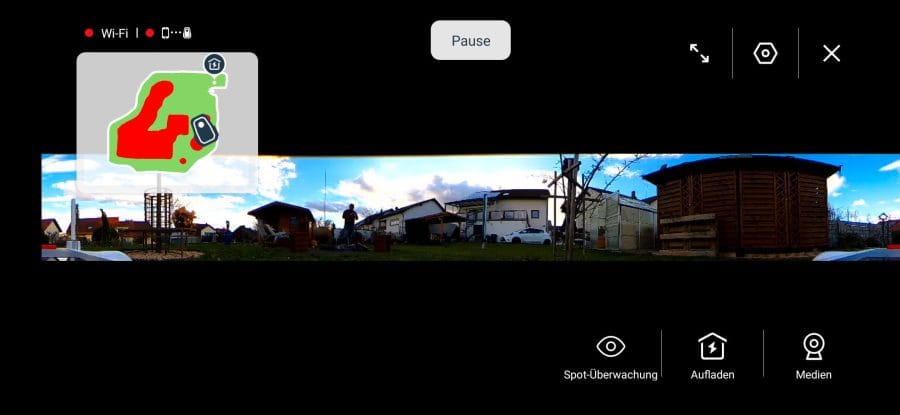
Live monitoring provides a 360° panoramic image.
Using the 360° camera becomes difficult if you keep an eye on more than just your own property. When the function is called, a short note warns of exactly these concerns. Two brushes in the charging station keep the fisheye camera clean all the time.
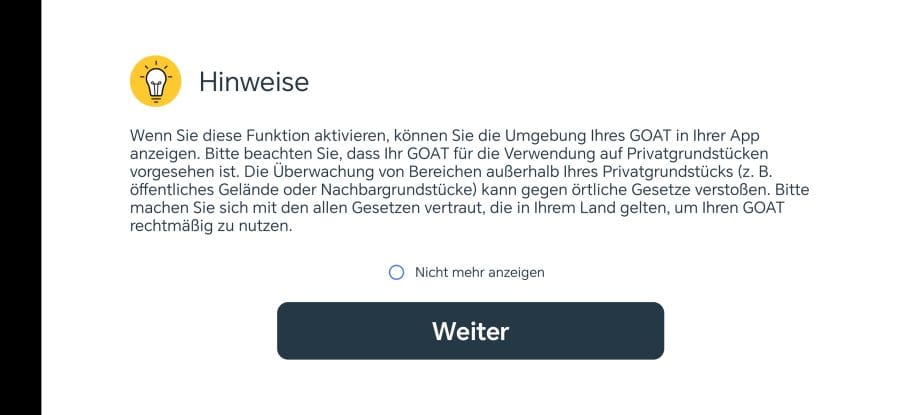
A warning not to use the camera in public areas.
Emergency shutdown
For tricky situations, there is an emergency stop button on the robotic lawnmower, which immediately interrupts the mowing process and stops the blades. The GOAT G1 also stops its knives when lifting. But only when the robotic lawnmower is approx. 15 centimeters above the ground. To restart the robotic lawnmower, the PIN must be entered on the control panel.
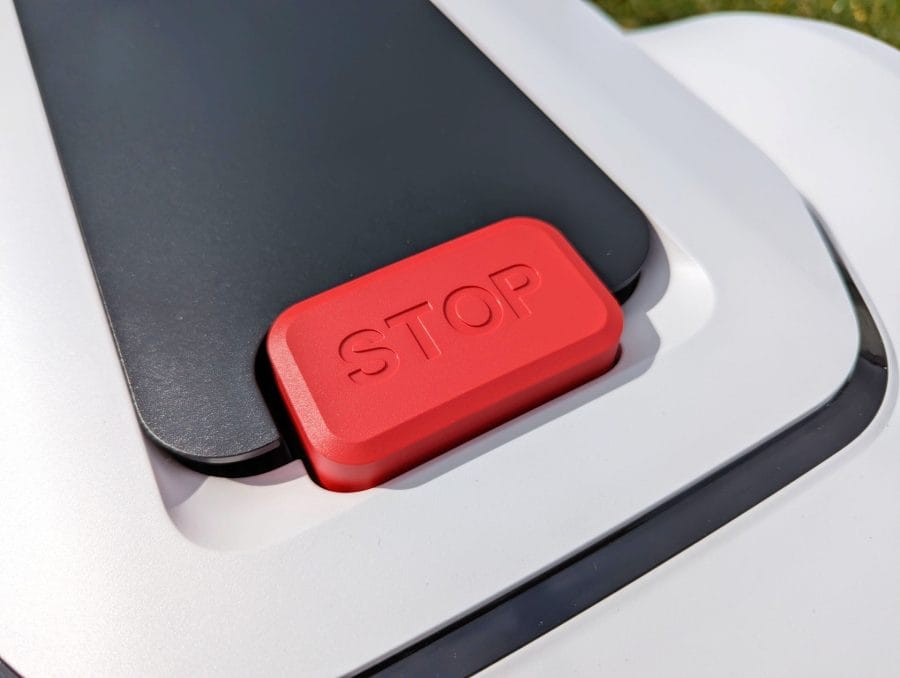
Placed in a clearly visible position, the emergency stop button switches the robotic lawnmower off immediately.
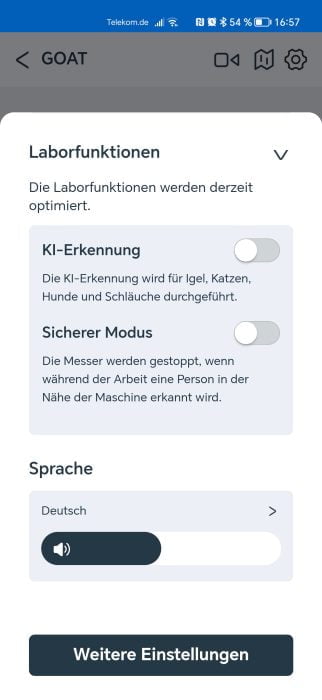
Beep and voice prompt inform about actions, such as e.g. B. starting the knives. This is not uncommon and gets annoying for you and the neighbors pretty quickly. Fortunately, the volume can be adjusted in the app.
Burglar
Thieves have little chance with the GOAT G1. As soon as you transport the robotic lawnmower outside the borders of its map, a loud alarm sounds. Only entering the four-digit PIN deactivates the alarm again. The device can be located via GPS.
App features of the GOAT G1
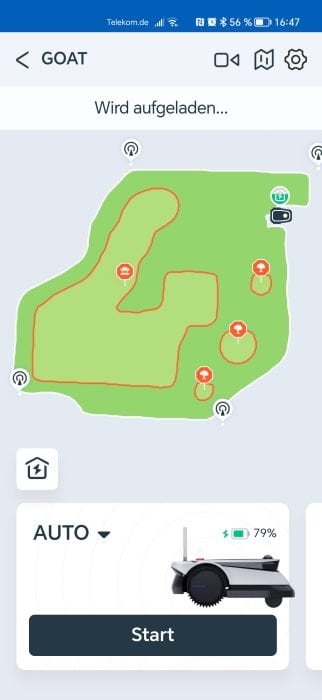
The mowing process is constantly monitored via the app. The home screen provides important information about the position of the robotic lawnmower, which area has already been mowed and the battery status of the device.
The drop-down menu toggles between automatic mowing mode, edge mode and manual mode. All mowing cycles can be viewed in a log.
-
-
The mowing mode is selected via the home screen.
-
-
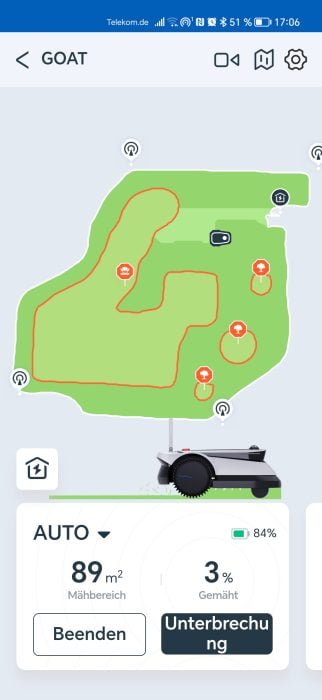
The map shows where the robotic lawnmower is located.
-
-
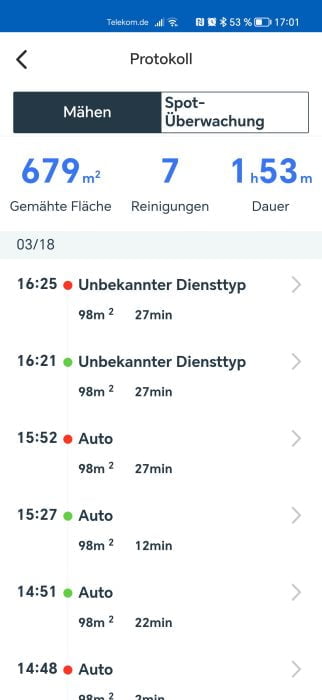
Each mowing pass is logged.
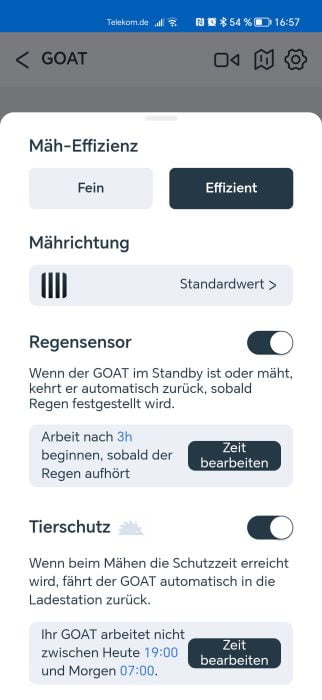
There are additional setting options for mowing behavior available in the app. The “Mowing Efficiency” option ensures that the robotic lawnmower moves faster (Efficient) or slower (Fine) across the lawn.
Tracks in the lawn can be avoided by changing the mowing direction in the settings. There is also a rain sensor that sends the GOAT G1 back to the station as soon as it starts to dribble. A timer is used to determine when the robotic lawnmower continues to work.
-
-
Mowing efficiency, rain sensor, animal welfare.
-
-
Obstacle Avoidance Mode.
-
-
Laboratory functions and voice prompt volume.
A very useful and also important function is animal protection. Because the obstacle detection of the GOAT G1 no longer works reliably as it gets darker, the animal protection function sets a protection time. During this period, the robotic lawnmower does not leave the charging station.
There are also many other functions, such as B. the charging station guard and some laboratory functions that you can try now, but will only be fully implemented in the next updates. In the future it should also be possible to divide the lawn into mowing areas or zones.
-

-
The schedule on the home screen.
-

-
Overview of day and time.
-
-
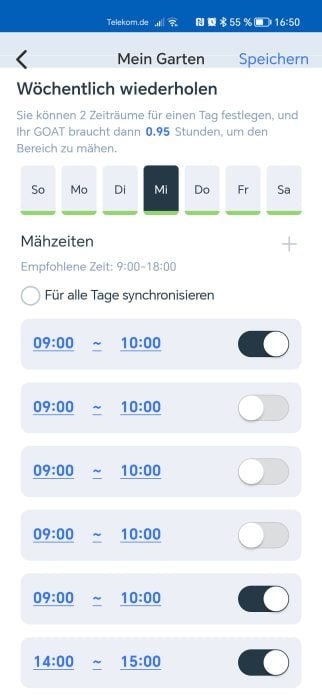
Multiple times in one day.
On which days and at what time the GOAT G1 mows is determined using a schedule in the app. If you set several times on one day, the robotic lawnmower mows in stages. The specified times can also be repeated weekly and synchronized daily.
questions
Can the GOAT G1 mow several separate lawn areas?
Yes, the GOAT G1 can be controlled using interlocking stones or slabs.
How to mow narrow areas under 1,5 meters in AUTO mode?
In flat areas with interlocking stones, you can drive over the edge of the lawn while mapping, or you can steer the GOAT G1 manually through the corridor.
What is the cutting distance to edges?
The robotic lawnmower approaches to within 10-20 centimetres.
How much do the accessories of the GOAT G1 cost?
12 replacement knives for 15 euros (RRP), mobile phone module for 99 euros (RRP), auto-connection module for 249 euros (RRP) and navigation beacon for 99 euros (RRP)
How long does the battery last and how fast does it charge?
The battery lasts about 95 minutes. That is enough to mow an area of 238 square meters. 600 charges are required for daily 3 square meters. The charging time is approx. 140 minutes.
Can multiple maps be created and saved?
Currently the GOAT G1 can only store one map. An update should soon make it possible to save multiple maps.
How often do the knives have to be changed?
A knife lasts approximately 80 hours of use. Depending on the mowing frequency, the blades have to be replaced every 1-3 months.
How high is the data consumption via the mobile network?
The consumption is around 50 MB per month without using the video function. The video function consumes about 100 MB per hour.