Review: Anycubic Photon M3
I started my beginnings in the world of 3D printing with the Anet A6 FDM printer that I have modified over the years and still use today for small prints. This was followed by other FDM models, such as the Creality CR-10 or Artillery Sidewinder X2, with the help of which I constantly expanded my knowledge of FDM prints.

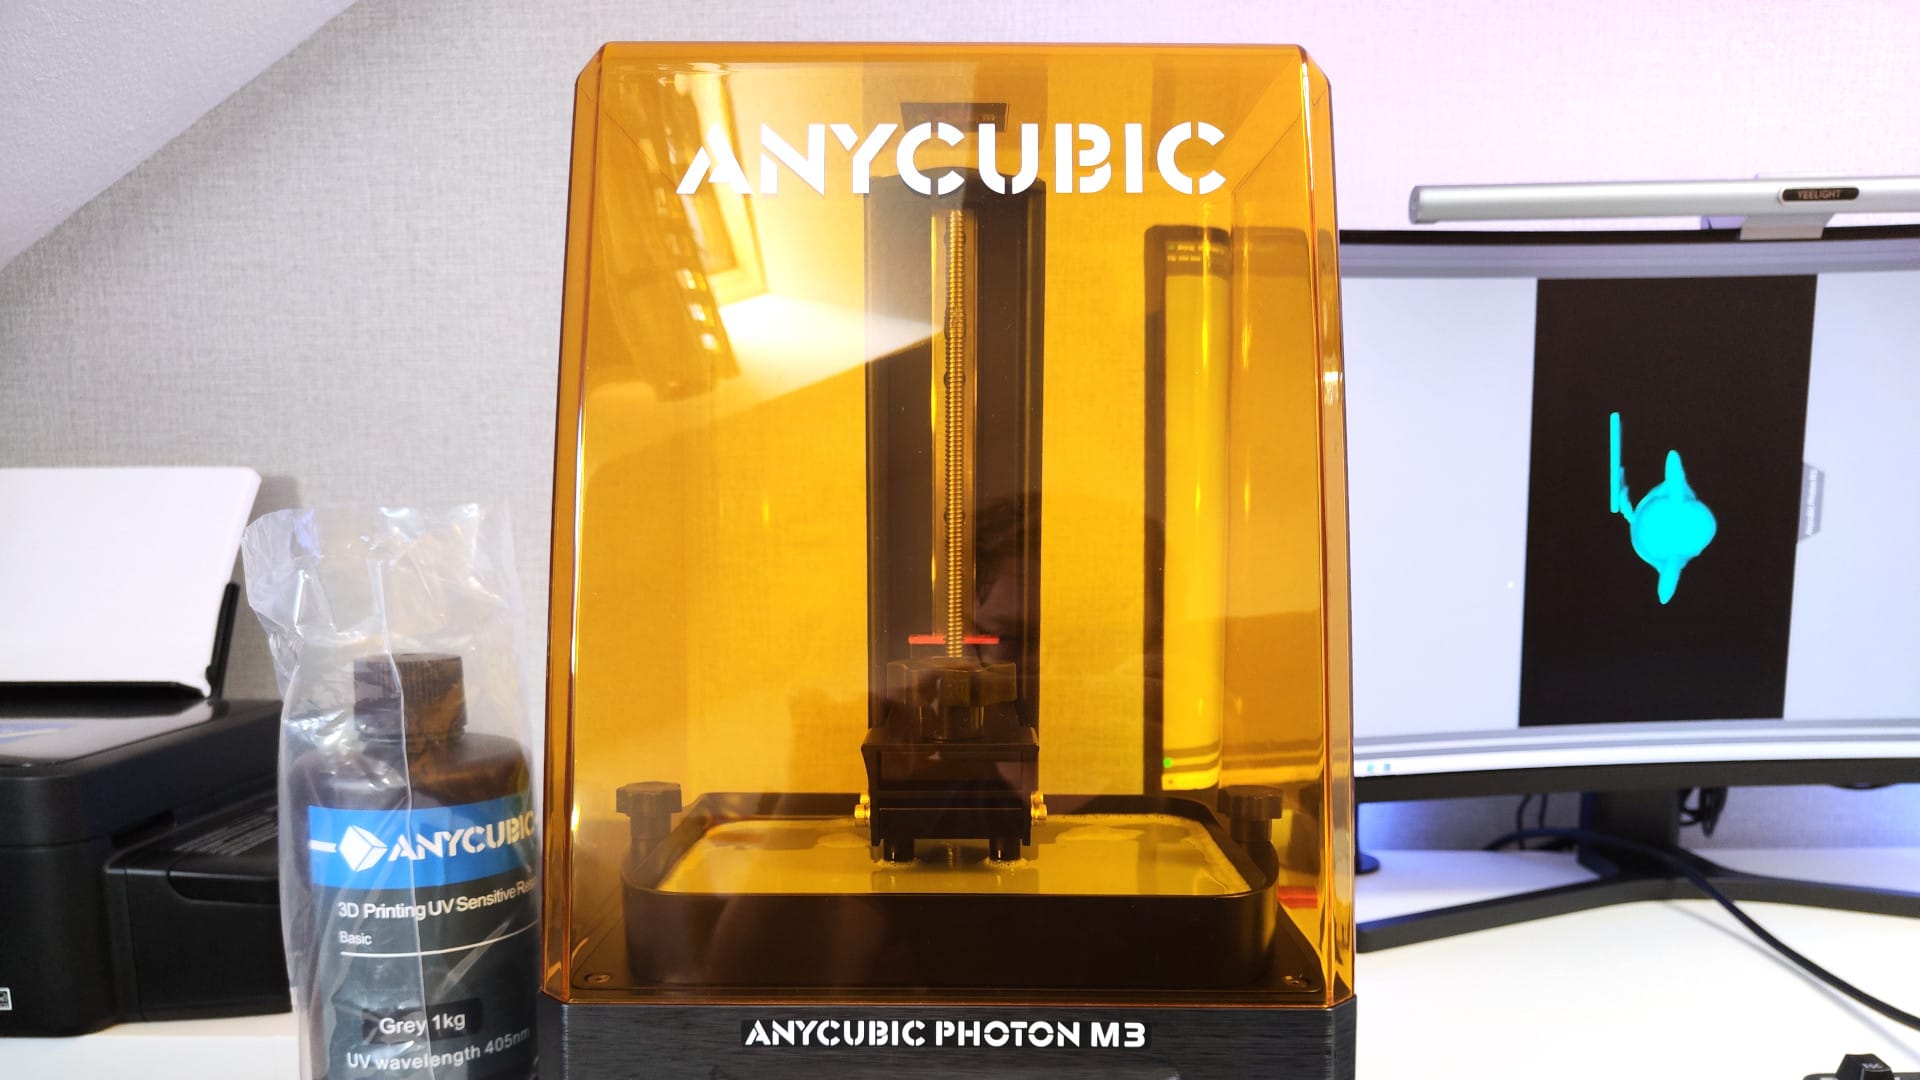
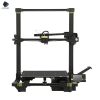
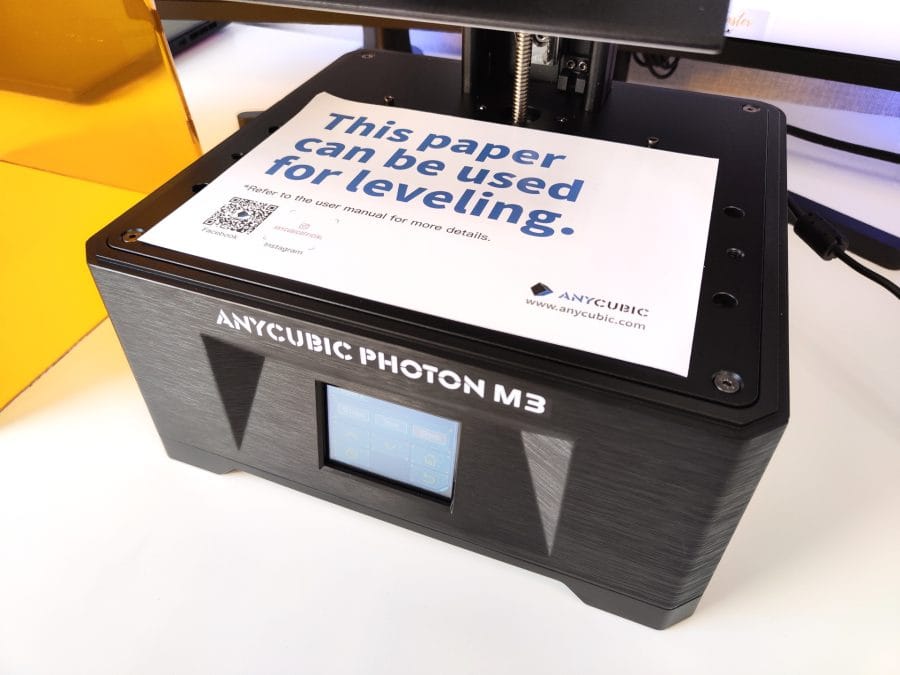
This is what it looks like, the Anycubic Photon M3
I am now entering new resin territory with the Anycubic Photon M3. Accordingly, this test is not an expert test, but a field report that I wrote as a beginner for other beginners. Let's start!
Anycubic Photon M3 vs M3 Max vs M3 Plus
| Model |
Anycubic M3 |
Anycubic M3 Max |
Anycubic M3 Plus |
| Display |
7,6" 4K+ LCD |
9,25" 6K LCD |
13,6" 7K LCD |
| Pressure area |
163 x 102 x 180 mm |
197 x 122 x 245 mm |
425 x 269 x 256 mm |
| print speed |
50 mm / h |
100 mm / h |
60 mm / h |
| light source |
28 LED matrix |
40 LED matrix |
40 LED matrix |
| leveling |
Manual 4-point leveling |
Manual 4-point leveling |
Manual 4-point leveling |
| Guide |
Single Rail |
double rail |
double rail |
| Interface |
USB-A 2.0 |
USB-A 2.0 & 3.0 |
USB-A 2.0 |
| touch display |
2,8 inch |
5 inch |
4,3 inch |
| rated capacity |
55w |
120w |
120w |
| Size: |
42,5 x 26,9 x 25,6 cm |
47,5 x 36 x 29 cm |
59,6 x 40,0 x 40,8 cm |
| Weight |
7 kg |
12 kg |
21 kg |
| Features |
|
- Auto Resin Filler Module
- Anycubic Cloud
|
- Auto Resin Filler Module
- Huge print volume
|
| Price (RRP) |
327€ |
692€ |
1099€ |
Anycubic Photon M3: Package Contents
The Anycubic Photon M3 comes with everything you need for the first print. At least almost everything.
In addition to the 3D printer, it also includes:
- two spatulas, one made of metal and one made of plastic,
- several disposable gloves,
- several paper or paint filters,
- several protective masks (medical),
- several cleaning wipes for the LCD,
- several Allen keys,
- a screen protector, with one already on the display,
- a power cord with a cold appliance plug,
- a power adapter (12V 6A),
- a 4GB USB stick with the Workshop Slicer, the instructions in PDF and print files,
- an instruction manual
- and a piece of paper for calibrating the printing surface.
Only the resin has to be bought separately. Which one you choose is up to you. Who the 3D printer directly in Store by Anycubic ordered, can add 1kg, 3kg or 5kg of resin directly to his order.
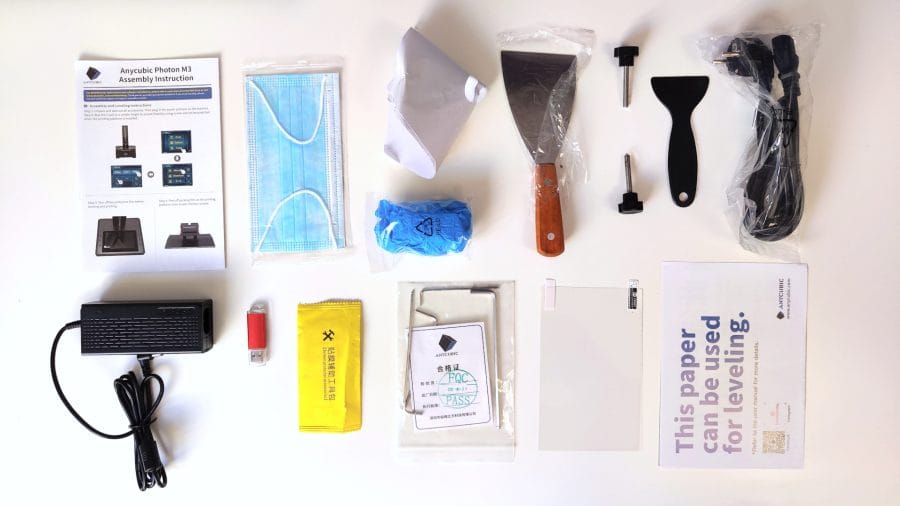
Firstly, the accessories supplied with the Anycubic Photon M3.
Also, it may be worth adding one Anycubic Wash & Cure Station to order. Handling resin is a pretty toxic and sticky business. Every simplification of the process steps comes in handy!
Anycubic Photon M3: Getting Started
Long gone are the days of spending hours building a 3D printer (I mean you, Anet A6!). FDM printers and also resin printers are mostly delivered pre-assembled.
Practical - There is a protective film on the LCD at the factory.
This also applies to the Photon M3, where we only have to insert the printing platform, screw it tight and calibrate it. In the instructions, the individual steps up to the first print are illustrated and precisely explained in text.
Here we assemble the printing platform.
From the base to the attached UV protection cover, the 26,9 x 25,6 x 42,5 cm and 7 kg Photon M3 is well made. I wouldn't count the black plastic base among the prettiest, but it stands up straight, secure and serves its purpose. The attached UV protective hood closes flush with the indentation of the base.
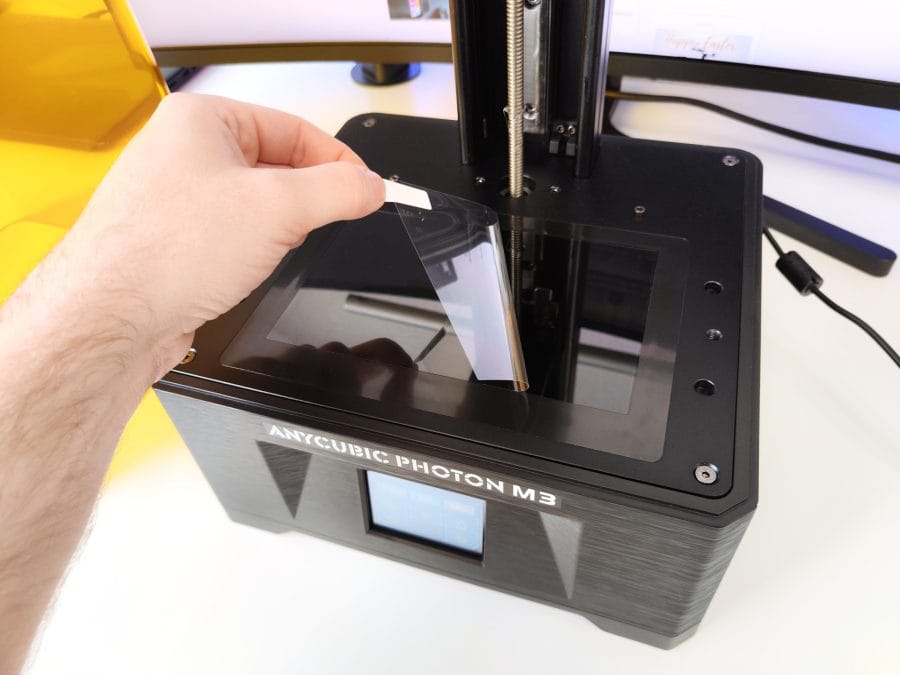
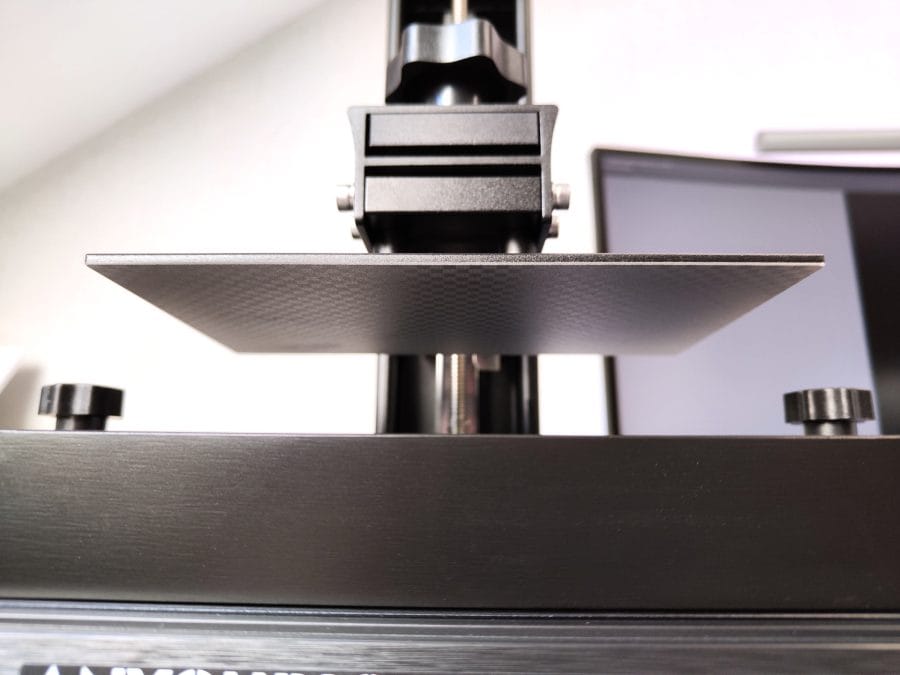
We place the calibration paper on the display.
Inserting and tightening the pressure platform went smoothly in the test. The same can be said for calibration, where you have to loosen the four screws on the pressure platform with the appropriate Allen key. Then you put the calibration paper on the LCD, press the home button so that the printing platform moves to its home position and tighten the screws again.
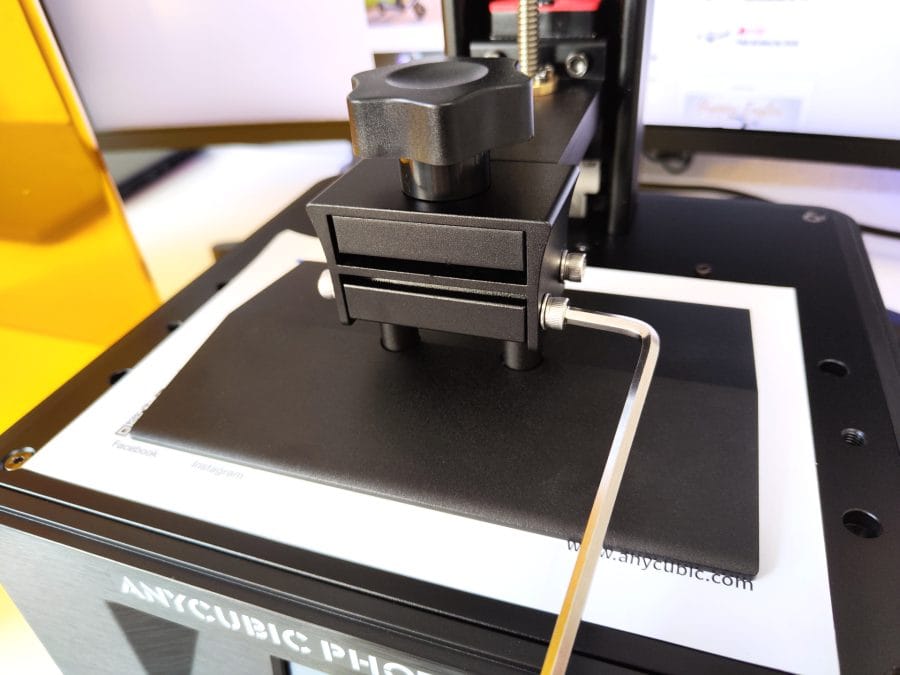
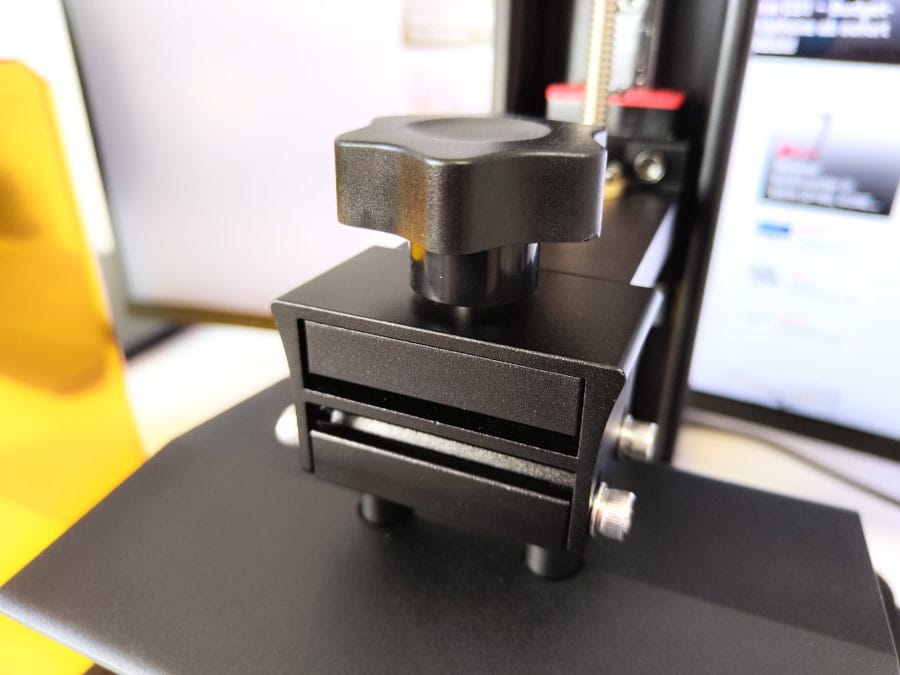
Align the print platform and tighten the screws.
With the setting "z=0" we set the current position as our calibrated starting position. Now insert the resin tank, which is fixed with two set screws, fill the tank with resin and we are ready for the first print.
Anycubic Photon M3: Security
Before we now merrily handle the resin, we should take some safety precautions, because liquid resin is damn poisonous!
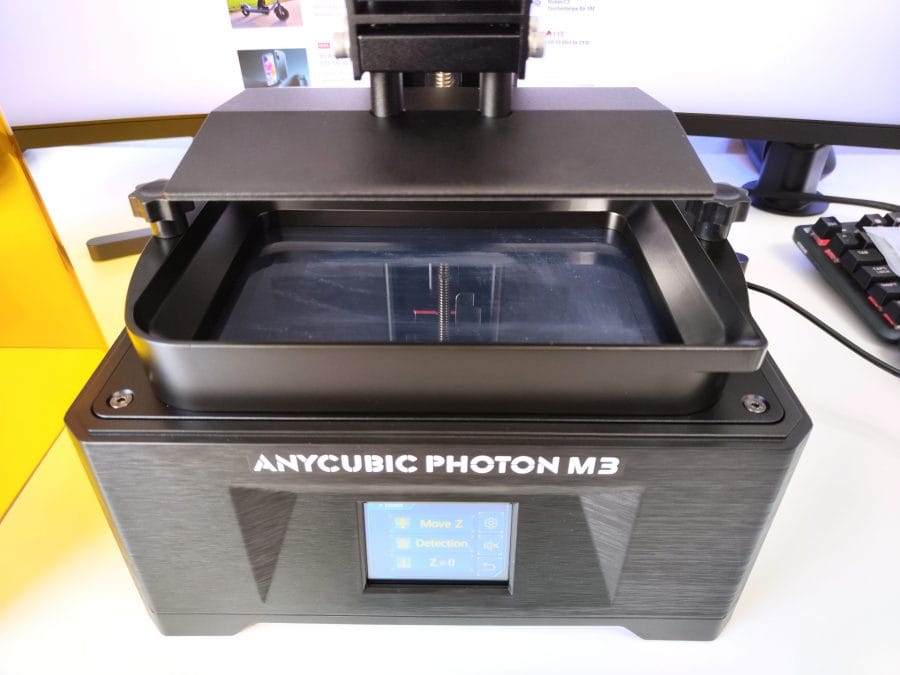
We place the resin tank above the LCD. In between is the FEP film.
Find a well-ventilated room. Setting up the 3D printer in the kitchen, living room or bedroom is definitely not an option. The fumes generated during printing should never be inhaled. Headaches and worse are guaranteed with constant inhaling!
Also have a bottle of isopropanol or denatured alcohol ready. Alcohol not only cleans the print, it is also suitable for binding spilled resin. To prevent this from happening, you should work in a safe environment. Also protect your eyes (goggles!), hands (gloves!) and all other exposed body parts, because the toxic resin should never get on your skin!
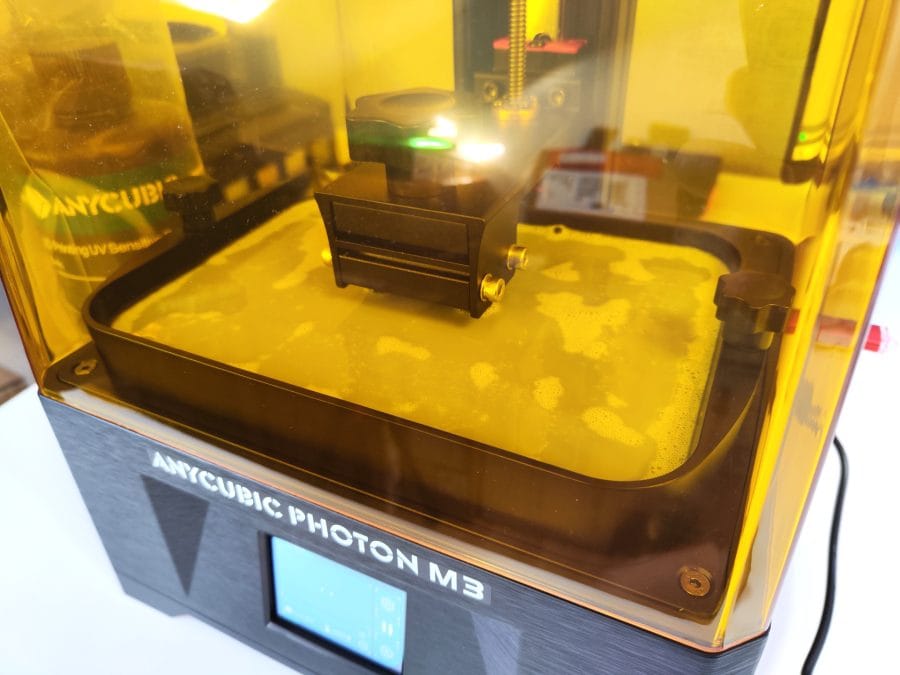
It doesn't look wild, but resin has it all!
By the way, resin is not only dangerous for us humans, but also for the entire environment. You shouldn't even think of disposing of liquid resin residues in the waste water. Let the resin harden in sunlight and then dispose of it with household waste.
Anycubic Photon M3: Slicer
In order to be able to print anything at all with the Anycubic Photon M3, we need a print file. The supplied USB stick contains a ready-made print file that is ideal for the first print. The test file is printed quickly and the result, which comes out here in the form of the Anycubic calibration cube, shows our calibration accuracy very well.
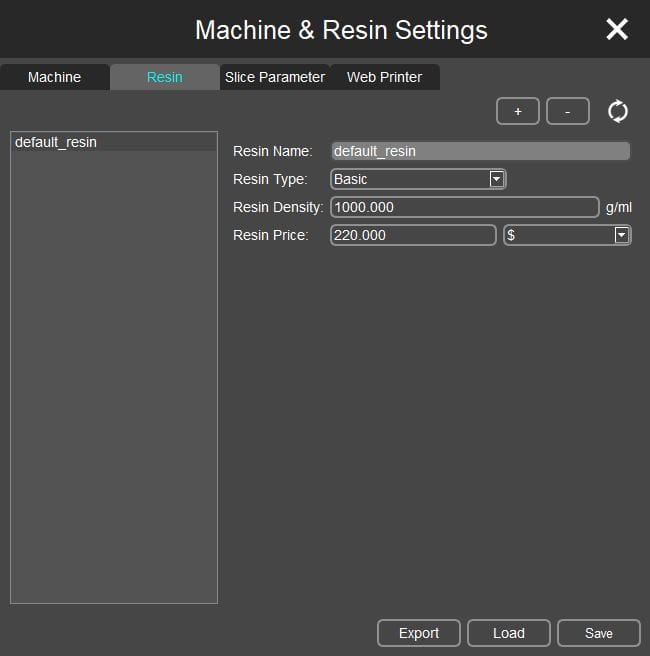
For our own prints we need a slicer that converts our 3D model into a printable file. Anycubic also gives us the right slicer, in our case the Anycubic Photon Workshop. The software is on the one hand on the USB stick, but can also be downloaded in the current version via the Anycubic website be downloaded.
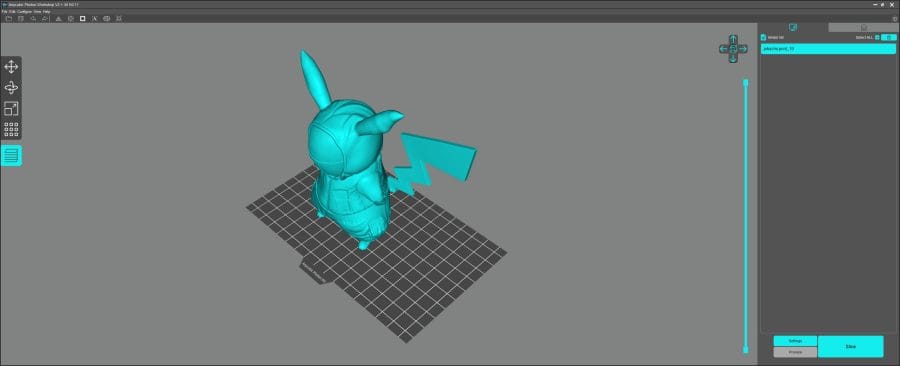
Here we loaded a 3D model into the Anycubic Photon Workshop.
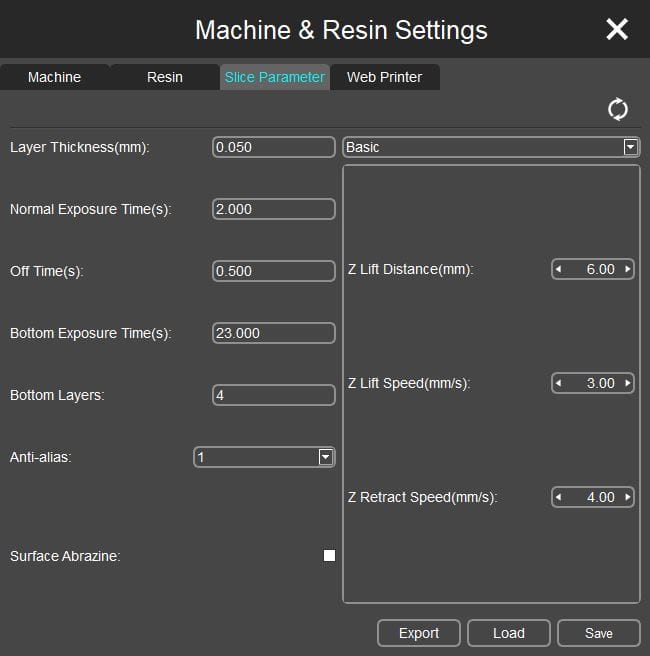
All Anycubic Resin printers are already configured in the Anycubic Photon Workshop. In the software settings we only have to select our suitable model. The individual parameters, including layer thickness, exposure time and speed, can then be set as desired.
The slicer can handle a wide variety of 3D formats. STL and OBJ are among the most common, and most 3D models are provided in this format in model databases and marketplaces. By opening our file we load it into the slicer. Then we determine the size and orientation of the print and the other parameters.
If we need supports, we can even have them automatically attached to the print, although the automatic positioning is not always ideal. Corrections are necessary in most cases.
With "Slice" our model is converted into a printable file and in the preview we can view the print virtually layer by layer. A useful side note is the estimated resin requirement including price and printing time.
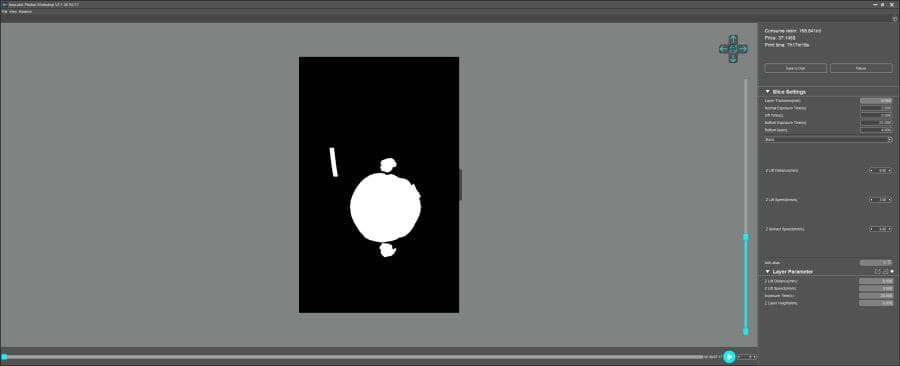
In the preview we get information about the resin consumption and the estimated printing time.
We save our finished print file on our USB stick. In contrast to the other Photon M3 models, our basic model does not support printing via WLAN. SD memory card is also not an option. Printing via USB is the only option here.
Anycubic Photon M3: First Printing
Our Anycubic Photon M3 is calibrated, the resin is filled in the container (observe the maximum filling quantity!) and our USB stick with the print file is in the slot.
touch display
We now start printing using the 2,8" touch display. The menu is clearly structured and all settings can be made quickly and easily. We also track the printing progress via the display. The current shift or layer as well as the remaining time are displayed .
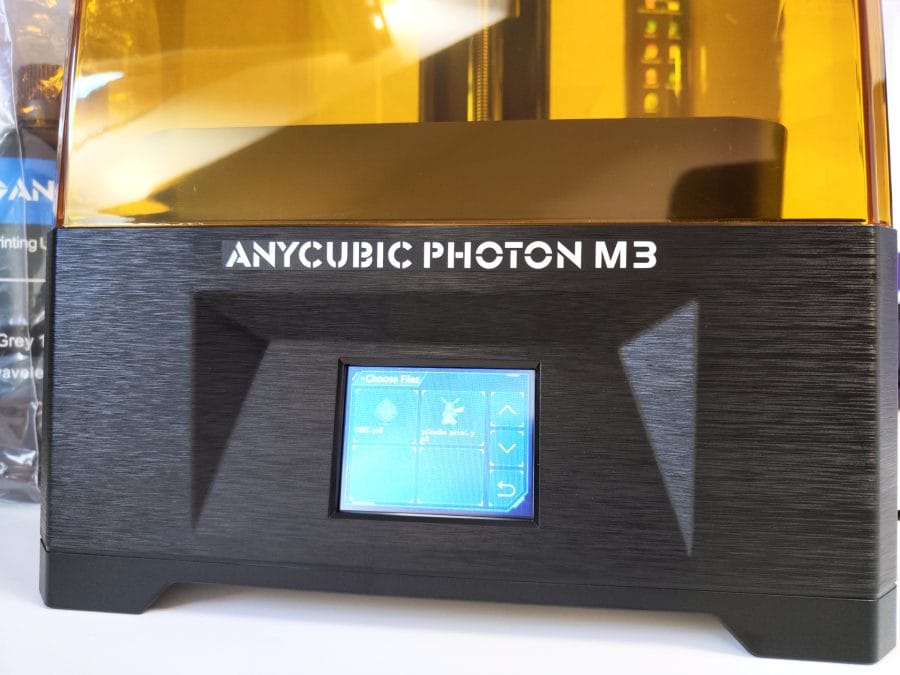
We operate the 3D printer via the touch display.
Display and exposure source
The print volume is 163 x 102 x 180 mm. A 7,6" monochrome display with a resolution of 4096 x 2560 pixels and a 400:1 contrast ratio ensures precise printing results with sharp contours.
The pressure plate is laser engraved, which should ensure better adhesion.
Anycubic specifies the lifespan of the display as 2000 hours. Anycubic is pursuing new approaches with the Anycubic LightTurbo Matrix, an innovative exposure source with a 28 UV LED array that ensures uniform exposure and achieves shorter printing times.
print result
From construction to the first print, the Anycubic Photon M3 is very beginner-friendly. The first prints came out of the printer with the default settings in excellent quality. I only had to adjust the exposure time a bit for a print because the first layers stuck to the FEP film instead of the printing platform.
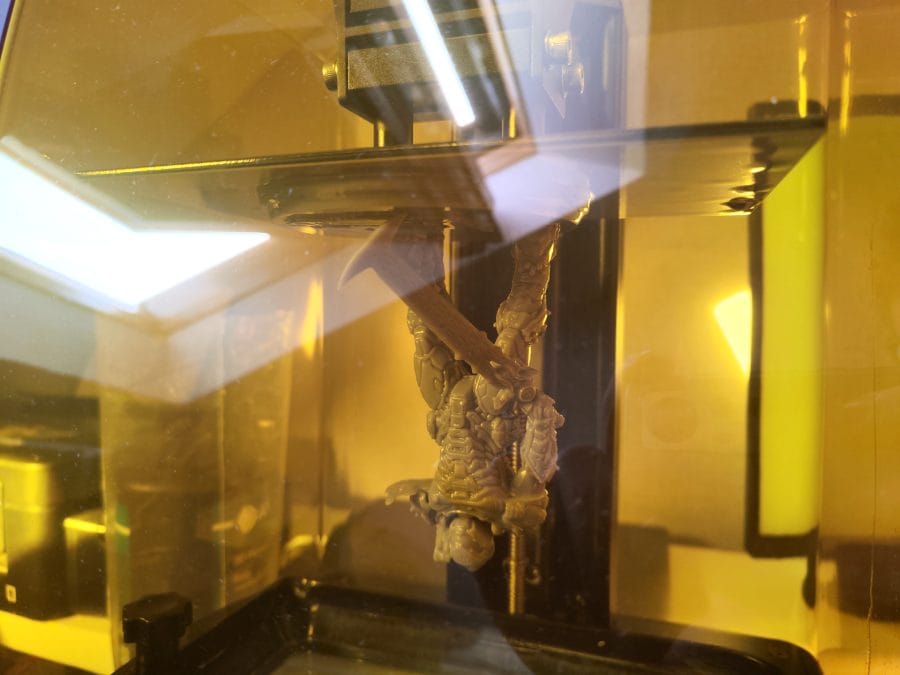
Here our Doom-Slayer is still stuck to the pressure plate.
Subtleties and textures are shown to their best advantage, which can be clearly seen in the result of the printed Doom-Slayer. By the way, he didn't want an arm missing. I simply forgot to print with support here. Gone stupid! Especially those who want to buy the printer for printing D&D miniatures will definitely get their money's worth here.
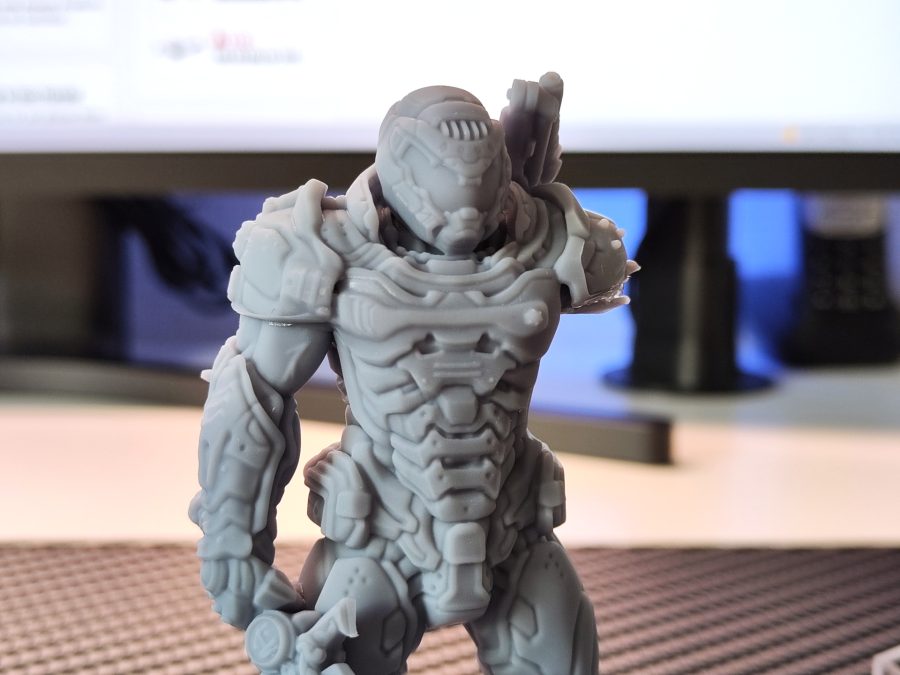
And this is what our finished, cured print result looks like.
As far as the background noise is concerned, the Photon M3 works fairly quietly. Apparently there is no fan. Only the motor and stepper make themselves felt. The pressure platform moves smoothly and precisely on the linear rail.
Cleaning
The finished prints can be cleaned in the Anycubic Was & Cure Station. Strictly speaking, this is a huge magnetic stirrer with UV light to harden the prints. Cleaning the prints by hand in an isopropanol bath and letting them cure in the sun works just as well. With the Anycubic Was & Cure Station it's just more comfortable.
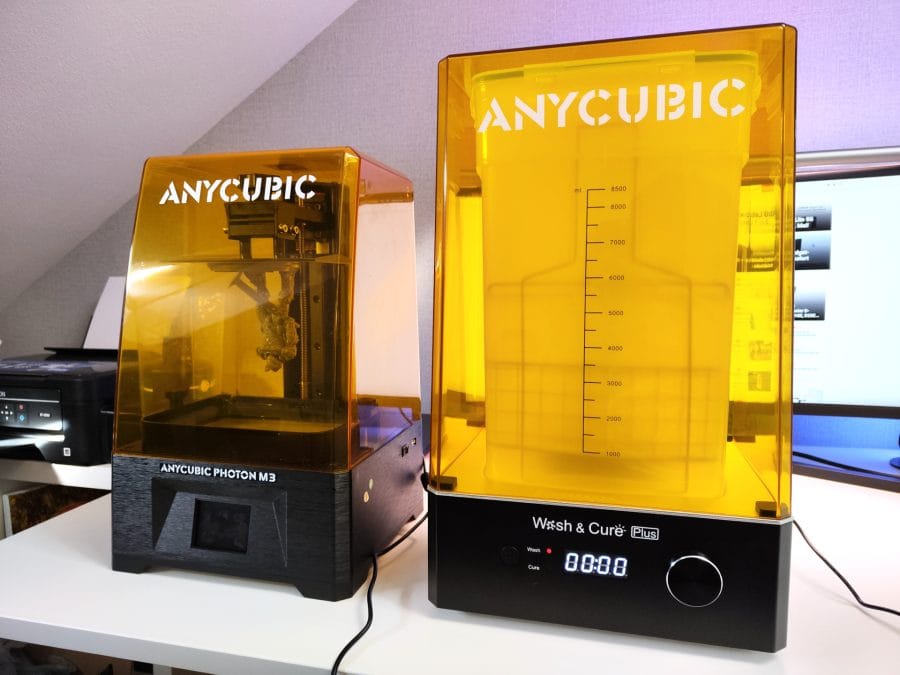
Our Anycubic Photon M3 next to the Anycubic Wash & Cure Station.
We filter the remaining resin in the tank back into the bottle with one of our paint filters. Filtering is particularly important here because there may be hardened resin residue in the tank. Ideally, the tank should have a drain channel on one side for pouring. We clean our tank and FEP film as well as possible with our plastic spatula. We remove the remaining resin from the tank with isopropanol.